[C++] 62 FLTK : xlsx変換アプリ / appファイルの不具合2

[M1 Mac, Big Sur 11.6.5, Python 3.10.4]

sys.pathをPy_SetPathで強制的に書き換えたところ、実行ファイルの方も動かなくなりました。力技が過ぎたようです。

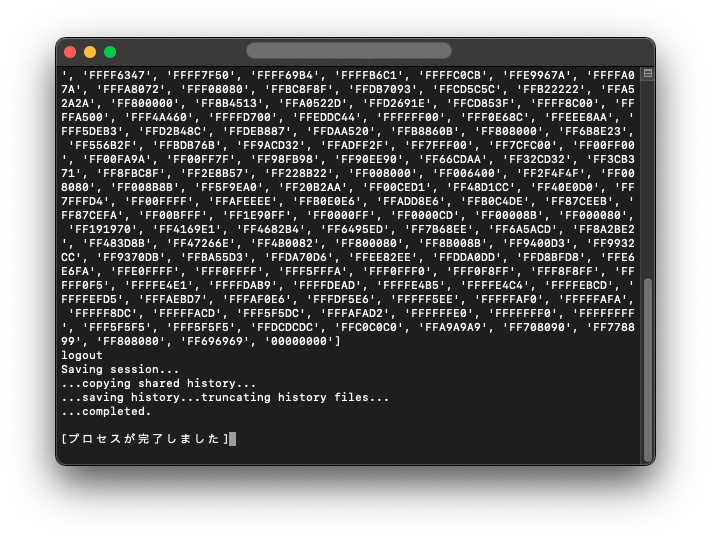
sys.pathの文字列が全く同じでもメモリアドレスが変わったためにEXC_BAD_ACCESSになっているのでしょうか。

appファイルについてはこれで完全にお手上げとなりました。実行ファイルでアプリを完成させる目処は立っていますが、言語を変更してObjective-Cで同じアプリを作るかどうか迷っています。

#define PY_SSIZE_T_CLEAN
#include "process.h"
#include </Library/Frameworks/Python.framework/Versions/3.10/include/python3.10/Python.h>
#include <iostream>
#include <string.h>
#include <stdlib.h>

#define PATH L"/Python/library/python_module:/Library/Frameworks/Python.framework/Versions/3.10/lib/python310.zip:/Library/Frameworks/Python.framework/Versions/3.10/lib/python3.10:/Library/Frameworks/Python.framework/Versions/3.10/lib/python3.10/lib-dynload"

using std::string;

string XlsxToList(const char* path) {
    
    // sys.pathの書き換え
    Py_SetPath(PATH);

    Py_Initialize();

    // sys.pathの確認
    std::wcout << Py_GetPath() << std::endl;

    // pyファイルのモジュール化
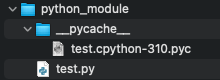
    PyObject* myModule = PyImport_ImportModule((char*)"test");
    
    // pyファイル内の関数を指定 今度は実行ファイルにてここでエラー発生
    const char* function = "xlsx_to_list";
    PyObject* myFunction = PyObject_GetAttrString(myModule,function);
    
    // 関数の引数を設定
    PyObject* args = PyTuple_Pack(1,PyUnicode_FromString(path));
    
    // 関数を実行し戻り値をPyObjectとして取得
    PyObject* myResult = PyObject_CallObject(myFunction,args);
    
    // PyObjectをconst char*に変換
    const char* result = PyUnicode_AsUTF8(myResult);

    std::cout << result << std::endl;

    return result;

    Py_FinalizeEx();
    
}

[C++] 61 FLTK : xlsx変換アプリ / appファイルの不具合

[M1 Mac, Big Sur 11.6.5, Python 3.10.4]

製作中のアプリですが、前回の記事でも書いたように実行ファイルでは正常に動作し、appファイルは起動はするもののボタンを押すと落ちてしまいます。

原因を探ったところ、どうやらPYTHONPATHを認識できないためにPyImport_ImportModuleが働かずモジュールが生成していないようでした。PYTHONPATHの__pycache__ディレクトリにpycファイルが生成していないことで判明しました。

appファイル内の/Contents/Resourcesにpyファイルを置き、info.plistで認識させようとするなどいろいろ試しましたが、うまくいきませんでした。

結局解決には至らず、やむなくこのまま次に進みます。Objective-Cであれば何らかの方法が見つかるかもしれません。

#define PY_SSIZE_T_CLEAN
#include "process.h"
#include </Library/Frameworks/Python.framework/Versions/3.10/include/python3.10/Python.h>
#include <iostream>
#include <string.h>

using std::string;

const char* XlsxToList(const char* path) {

    Py_Initialize();

    // sys.pathを確認 wchar_tなのでwcoutで出力
    std::wcout << Py_GetPath() << std::endl;

    // pyファイルのモジュール化 appファイルではモジュール化できない PYTHONPATHに到達できていない
    PyObject* myModule = PyImport_ImportModule("test");

    // pyファイル内の関数を指定
    PyObject* myFunction = PyObject_GetAttrString(myModule,(char*)"xlsx_to_list");

    // 関数の引数を設定
    PyObject* args = PyTuple_Pack(1,PyUnicode_FromString(path));
    
    // 関数を実行し戻り値をPyObjectとして取得
    PyObject* myResult = PyObject_CallObject(myFunction,args);
    
    // PyObjectをconst char*に変換
    const char* result = PyUnicode_AsUTF8(myResult);

    std::cout << result << std::endl;

    return result;

    Py_FinalizeEx();
    
}

[C++] 60 FLTK : xlsx変換アプリ / Pythonスクリプトのモジュール化

[M1 Mac, Big Sur 11.6.5, Python 3.10.4]

前回まではPythonスクリプトの埋め込みについて調べていましたが、ついにモジュール化に成功しました。

埋め込みでは処理が一方通行だったのが、モジュール化により双方向でデータのやり取りができるようになります。Pythonスクリプトを1行ずつバラして埋め込む必要がなくなるのでだいぶ楽です。

今回のケースでは、Pythonスクリプトで作成したリストをC++コードが文字列として受け取り、Fl_Multiline_Outputに表示させています。

現段階では実行ファイルでしかできませんが、早くappファイルでもできるようにしたいところです。appファイルでは実行ボタンを押すとなぜか落ちてしまいます。

なお.bash_profileにてPYTHONPATHを設定しないとPythonスクリプトを読み込めないので要注意です。

#define PY_SSIZE_T_CLEAN
#include "process.h"
#include </Library/Frameworks/Python.framework/Versions/3.10/include/python3.10/Python.h>
#include <iostream>
#include <string.h>

using std::string;

string XlsxToList(const char* path) {
    Py_Initialize();

    // pyファイルの指定(test.py)
    PyObject* myModuleString = PyUnicode_FromString((char*)"test");

    // pyファイルのモジュール化
    PyObject* myModule = PyImport_Import(myModuleString);

    // pyファイル内の関数を指定
    PyObject* myFunction = PyObject_GetAttrString(myModule,(char*)"xlsx_to_list");

    // 関数の引数を設定
    PyObject* args = PyTuple_Pack(1,PyUnicode_FromString(path));

    // 関数を実行し戻り値をPyObjectとして取得
    PyObject* myResult = PyObject_CallObject(myFunction,args);

    // PyObjectをconst char*に変換
    const char* result = PyUnicode_AsUTF8(myResult);

    return string(result);

    Py_Finalize();
}
import openpyxl

def xlsx_to_list(path):
    wb = openpyxl.load_workbook(path)
    ws = wb.worksheets[0]

    color_name = []
    for cell in ws['A']:
        color_name.append(cell.value)
        
    return str(color_name)
<該当箇所のみ>
void xtol(){
    const char *path = input_line->value();
    string result = XlsxToList(path);
    output_line->insert(result.c_str());
}
# pyファイルのあるディレクトリを指定

export PYTHONPATH="/Python/library/python_module"

Python/C API リファレンスマニュアル

[C++] 58 FLTK : xlsx変換アプリ / Pythonの openpyxlライブラリ導入

[M1 Mac, Big Sur 11.6.5, Python 3.10.4]

Excelファイルを扱うFLTKアプリの作成に着手しました。GUIはよく使うガワの使い回しです。

まずは前々回から取り組んでいるExcelファイルから列データを取り出してリストにする機能を実装しました。A列の値とセル色をリストにします。色データはRGB16進数の頭にFFが付きます。このFFはいらないのでそのうち除去するようにします。

列数や取り出すデータの種類はいずれ選択できるようにしたいです。

#define PY_SSIZE_T_CLEAN
#include "process.h"
#include </Library/Frameworks/Python.framework/Versions/3.10/include/python3.10/Python.h>
#include <iostream>
#include <string.h>

using std::string;

int XlsxToList(const char* path) {

    Py_Initialize();

    PyRun_SimpleString("import openpyxl");

    string path_str = string(path);
    string wb_str = "wb = openpyxl.load_workbook('" + path_str +"')";
    PyRun_SimpleString(wb_str.c_str());
    PyRun_SimpleString("ws = wb.worksheets[0]");

    PyRun_SimpleString("color_name = []");
    PyRun_SimpleString("color_code = []");

    string for_str = "for cell in ws['A']: color_name.append(cell.value), color_code.append(cell.fill.fgColor.rgb)";
    PyRun_SimpleString(for_str.c_str());
        
    PyRun_SimpleString("print(color_name)");
    PyRun_SimpleString("print(color_code)");

    Py_Finalize();
    return 0;
}

[C++] 57 Pythonスクリプトを使ってExcelを操作する / for文

[M1 Mac, Big Sur 11.6.5, Python 3.10.4]

前回の続きです。

for文はワンライナーで書けば、PyRun_SimpleString()に使えます。バックスラッシュを入れてもOKです。

リスト内包表記のワンライナーは多用していましたが、if文やfor文の中身をカンマでつなぐとワンライナーになるというのは知りませんでした。

#include </Library/Frameworks/Python.framework/Versions/3.10/include/python3.10/Python.h>
#include <iostream>
#include <string.h>

using std::string;

int main() {
    Py_Initialize();

    PyRun_SimpleString("import openpyxl");
    PyRun_SimpleString("wb = openpyxl.load_workbook('test.xlsx')");
    PyRun_SimpleString("ws = wb.worksheets[0]");

    PyRun_SimpleString("color_name = []");
    PyRun_SimpleString("color_code = []");

    string str = "for cell in ws['A']: color_name.append(cell.value), color_code.append(cell.fill.fgColor.rgb)";

    // バックスラッシュを使う場合
    // string str = "for cell in ws['A']: \
    //     color_name.append(cell.value), color_code.append(cell.fill.fgColor.rgb)";

    PyRun_SimpleString(str.c_str());
        
    PyRun_SimpleString("print(color_name)");
    PyRun_SimpleString("print(color_code)");

    Py_Finalize();
    return 0;
}

[C++] 56 Pythonスクリプトを使ってExcelを操作する

[M1 Mac, Big Sur 11.6.5, Python 3.10.4]

C++コードからPythonスクリプトを動かしてExcelを操作してみました。Pythonは公式サイトからダウンロード&インストールしたVer. 3.10.4を使っています。

以下のコードはExcelファイルのA列に入力された文字列とセル色をリストにして出力します。

モジュールではないのでデータの双方向なやりとりは直接できませんが、ファイルを介してなら可能でしょう。

C++でExcelを扱うにはLibXLのような3万円もする有償ライブラリが必要になるので、間接的とはいえopenpyxlで操作できるのであればこれで十分です。

FLTKのような軽量なGUIでopenpyxlやpandasが使えないかと思い、試してみた次第です。TkinterやPyQtといったウィジェットツールキットで重量級GUIにはしたくなかったものですから。

#include </Library/Frameworks/Python.framework/Versions/3.10/include/python3.10/Python.h>

int main() {
    Py_Initialize();

    PyRun_SimpleString("import openpyxl");
    PyRun_SimpleString("wb = openpyxl.load_workbook('test.xlsx')");
    PyRun_SimpleString("ws = wb.worksheets[0]");
    PyRun_SimpleString("color_name = [cell.value for cell in ws['A']]");
    PyRun_SimpleString("color_code = [cell.fill.fgColor.rgb for cell in ws['A']]");
    PyRun_SimpleString("print(color_name)");
    PyRun_SimpleString("print(color_code)");

    Py_Finalize();
    return 0;
}
# コンパイラ
COMPILER = clang++
DEBUG = -g

# オプション
CPPFLAGS =

# includeパス(-I)
INCLUDE = -I/Library/Frameworks/Python.framework/Versions/3.10/include/python3.10

# ライブラリパス(-l)
LIBRARY0 = -lpython3.10

# 優先ライブラリパス(-L)
LIBRARY = -L/Library/Frameworks/Python.framework/Versions/3.10/lib

# ソースファイル
SRCDIR = ./src
SRCS = $(SRCDIR)/Openpyxl.cpp

# オブジェクトファイル
OBJDIR = ./obj
OBJS = $(OBJDIR)/Openpyxl.o

# 実行ファイル
TARGETDIR = ./bin
TARGET = Openpyxl

# cppファイルからoファイル作成 $<:依存ファイル
$(OBJDIR)/Openpyxl.o: $(SRCDIR)/Openpyxl.cpp
	$(COMPILER) $(CPPFLAGS) $(INCLUDE) $(DEBUG) -o $@ -c $<

# oファイルから実行ファイル作成
$(TARGET):$(OBJS)
	$(COMPILER) -o $(TARGETDIR)/$@ $(OBJS) $(LIBRARY0) $(LDFLAGS) $(LIBRARY)

# ファイル削除&実行ファイル作成
.PHONY:all
all: clean $(TARGET)

# ファイル削除
.PHONY:clean
clean:
	rm -rf $(OBJS) $(TARGETDIR)/$(TARGET)

[Java]109 自製アプリのリファクタリング案

[M1 Mac, Big Sur 11.6.5, VSCode 1.67.1]

自製カラーアプリのリファクタリング案(改良案)を作成しました。

これまではTextFieldに保持されたカラーコードで選択色を管理していましたが、専用のクラスSelectColorを新設し変数(基本フォーマットは0x+hex)で管理することにしました。

これにより色フォーマットの変更に対応するコードが複雑にならずに済みそうです。

@startuml

package base {
    +class ColorSampleJP {
        +{static} gui : JFrame
        +{static} tabbedpane : JTabbedPaneEx
        +{static} tab1 : JPanel
        +{static} tab2 : JPanel
        +{static} tab3 : JPanel
        +{static} tab4 : JPanel
        +{static} tab5 : JPanel
        +{static} tab6 : JPanel
        +{static} layout : BorderLayout
        +{static} default_font : Font
        +{static} home : String
        -locale_lang : ResourceBundle

        -ColorSampleJP() : void
        +{static} main(String[] args) : void
        +{static} setLAF() : void
        +LAF_OS() : String[][]
        +{static} size(String key) : int
        +{static} makeDir() : void

    }
    
    '関連クラス(mainクラスで使用)
    +class PanelMake {
    }
    +class RegistTab {
    }
    +class SelectColor #00FFFF{
    }
    +class TabMake {
    }
}

package btnAction {
    +class ShowButtonAction #DDA0DD{
    }
    +class AdjustButtonAction {
    }
    +class AlphaButtonAction {
    }
    +class RadioButton1Action #DDA0DD{
    }
    +class RadioButton2Action #DDA0DD{
    }
    +class RadioButton3Action #DDA0DD{
    }
    +class RadioButton4Action #DDA0DD{
    }
    +class RegistButtonAction #DDA0DD{
    }
    +class TrushButtonAction {
    }
    +class FormatConverter {
    }

}

note left of SelectColor
    選択あるいは指定した色を管理する
end note

ColorSampleJP -- PanelMake
ColorSampleJP -left- RegistTab
ColorSampleJP -left- TabMake
TabMake -- SelectColor
SelectColor -- ShowButtonAction
SelectColor -- RadioButton1Action
SelectColor -- RadioButton2Action
SelectColor -- RadioButton3Action
SelectColor -- RadioButton4Action
SelectColor -- RegistButtonAction

left to right direction
PanelMake -- ShowButtonAction
PanelMake -- AdjustButtonAction
PanelMake -- AlphaButtonAction
PanelMake -- RadioButton1Action
PanelMake -- RadioButton2Action
PanelMake -- RadioButton3Action
PanelMake -- RadioButton4Action
RegistTab -- RegistButtonAction
RegistTab -- TrushButtonAction
AdjustButtonAction -- FormatConverter

@enduml

[Java]108 パッケージ別クラス図作成

[M1 Mac, Big Sur 11.6.5, VSCode 1.67.1]

自製カラーアプリについてパッケージ間の関係性をクラス図で表現しました。

mainクラスを含むbaseパッケージとbtnActionパッケージのクラス図を描いてみました。関係性が一目瞭然です。

@startuml

package base {
    +class ColorSampleJP66 {
        +{static} gui : JFrame
        +{static} tabbedpane : JTabbedPaneEx
        +{static} tab1 : JPanel
        +{static} tab2 : JPanel
        +{static} tab3 : JPanel
        +{static} tab4 : JPanel
        +{static} tab5 : JPanel
        +{static} tab6 : JPanel
        +{static} layout : BorderLayout
        +{static} default_font : Font
        +{static} home : String
        -locale_lang : ResourceBundle

        -ColorSampleJP66() : void
        +{static} main(String[] args) : void
        +{static} setLAF() : void
        +LAF_OS() : String[][]
        +{static} size(String key) : int
        +{static} makeDir() : void

    }
    
    '関連クラス(mainクラスで使用)
    +class PanelMake {
    }
    +class RegistTab {
    }
}

package btnAction {
    +class ShowButtonAction {
    }
    +class AdjustButtonAction {
    }
    +class AlphaButtonAction {
    }
    +class RadioButton1Action {
    }
    +class RadioButton2Action {
    }
    +class RadioButton3Action {
    }
    +class RadioButton4Action {
    }
    +class RegistButtonAction {
    }
    +class TrushButtonAction {
    }
    +class FormatConverter {
    }

}

ColorSampleJP66 -- PanelMake
ColorSampleJP66 -left- RegistTab

left to right direction
PanelMake -- ShowButtonAction
PanelMake -- AdjustButtonAction
PanelMake -- AlphaButtonAction
PanelMake -- RadioButton1Action
PanelMake -- RadioButton2Action
PanelMake -- RadioButton3Action
PanelMake -- RadioButton4Action
RegistTab -- RegistButtonAction
RegistTab -- TrushButtonAction
AdjustButtonAction -- FormatConverter

@enduml

[Java]107 メインクラスのクラス図作成 : レイアウト変更

[M1 Mac, Big Sur 11.6.5, VSCode 1.67.1]

クラス図をより見やすくするために子クラスを右側に縦並びさせました。デフォルトの横並びを左へ90度回転させるので左側にあったクラスが下になります。書き順を変えても同じです。

まあ見やすくなったのでよしとします。

@startuml
package base {
    +class ColorSampleJP66 {
        +{static} gui : JFrame
        +{static} tabbedpane : JTabbedPaneEx
        +{static} tab1 : JPanel
        +{static} tab2 : JPanel
        +{static} tab3 : JPanel
        +{static} tab4 : JPanel
        +{static} tab5 : JPanel
        +{static} tab6 : JPanel
        +{static} layout : BorderLayout
        +{static} default_font : Font
        +{static} home : String
        -locale_lang : ResourceBundle

        -ColorSampleJP66() : void
        +{static} main(String[] args) : void
        +{static} setLAF() : void
        +LAF_OS() : String[][]
        +{static} size(String key) : int
        +{static} makeDir() : void

    }
    +class Tab1 {
        -Tab1(String LAF0) : void
    }
    +class Tab2 {
        -Tab2(String LAF0) : void
    }
    +class Tab3 {
        -Tab3(String LAF0) : void
    }
    +class Tab4 {
        -Tab4(String LAF0) : void
    }
    +class Tab5 {
        -Tab5(String LAF0) : void
    }
    +class Tab6 {
        -Tab6(String LAF0) : void
    }
    +class MyWindowsListener {
        +windowClosing(WindowEvent e) : void
    }

    left to right direction
    ColorSampleJP66 +-- Tab1
    ColorSampleJP66 +-- Tab2
    ColorSampleJP66 +-- Tab3
    ColorSampleJP66 +-- Tab4
    ColorSampleJP66 +-- Tab5
    ColorSampleJP66 +-- Tab6
    ColorSampleJP66 +-- MyWindowsListener

    '関連クラス(mainクラスのフィールド)
    +class JTabbedPaneEx {
    }
    
}

ColorSampleJP66 -ri- JTabbedPaneEx

@enduml