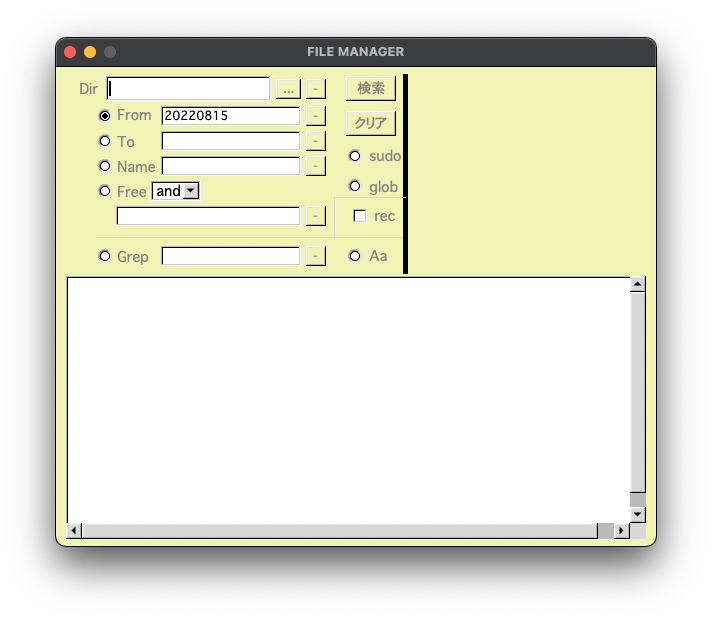
[M1 Mac, Big Sur 11.6.8, clang 13.0.0, FLTK 1.3.8, NO IDE]
前回の続きです。
他のウィジェットと同様に後から色や線種などを変えられるようにしました。
Lineクラス作成を通してFl_Widgetの仕組みが理解できたのは収穫でした。

#pragma once
#include <FLstd.h>
#include <cppstd.h>

class Line: public Fl_Widget
{
	int styletype_, stylewidth_;
	Fl_Color color_;
public:
	enum {
	FL_SOLID = 0 , FL_DASH = 1 , FL_DOT = 2 , FL_DASHDOT = 3 ,
	FL_DASHDOTDOT = 4 , FL_CAP_FLAT = 0x100 , FL_CAP_ROUND = 0x200 , FL_CAP_SQUARE = 0x300 ,
	FL_JOIN_MITER = 0x1000 , FL_JOIN_ROUND = 0x2000 , FL_JOIN_BEVEL = 0x3000
	};

	Line(int x,int y, int w,int h);
	~Line();
	void draw();

	Fl_Color color() const {return color_;}
	void color(Fl_Color bg) {color_ = bg;}

	vector<int> style() const {return {styletype_, stylewidth_};}
	void style(int type, int width) {styletype_= type; stylewidth_= width;}
};
#include <FLstd.h>
#include <cppstd.h>
#include <Line.h>
Line::Line(int x,int y, int w,int h):Fl_Widget(x,y,w,h){
styletype_ = FL_SOLID;
stylewidth_ = 1;
color_ = FL_GRAY;
}
Line::~Line(){}
void Line::draw(){
Fl_Color color1 = color();
fl_color(color1);
vector<int> style1 = style();
fl_line_style(style1[0],style1[1]);
int x1 = x(), y1 = y();
int x2 = x()+ w(), y2 = y()+ h();
fl_line(x1,y1,x2,y2);
}Line *line1 = new Line(40,171,309,0);
Line *line2 = new Line(349,10,0,195);
line2->color(fl_rgb_color(0,0,0));
line2->style(Line::FL_CAP_SQUARE,5);
Line *line3 = new Line(278,131,71,0);
Line *line4 = new Line(278,131,0,41);