[C++] 238 FLTK : アスペクト比固定、小数点以下の扱い

[M1 Mac, Monterey 12.6.3, clang 13.0.0, FLTK 3.8.1, NO IDE]

動画編集アプリの左下に画像をコマ送りで表示させるのですが、アスペクト比を元動画のままにして、経過時間を小数点第3位までとしました。

floatは有効桁数が7桁なので小数点以下で四捨五入しても、1.570000のような表示になります。そこでfloatを文字列に変換し、無限ループを利用して末尾が0である限り削除し続けるようにしました。

ただこの方法では小数点以下の桁数を固定できないのがデメリットです。Pythonであれば簡単に桁数を揃えられそうですが、C++は面倒なので最小限の手立てに留めておきます。

void showCB(Fl_Widget*, void*) {
    paths = getFilePath("/Volumes/DATA_m1/VideoEditor/images", "png");
    // スライダーの数値を取得
    slider -> bounds(0, (double)(paths.size() -1));

    showData(fpsFile);
    fpsChar = fpsInput -> value();
    if (fpsChar == NULL){
        return;
    }

    string fpsStr = string(fpsChar);
    sec = frameNum/stof(fpsStr);
    sec2 = round(sec*1000)/1000;
    sec2_str = to_string(sec2);

    while(1){
        if (sec2_str.back() == '0' or sec2_str == "0."){
            sec2_str.pop_back();
        } else {
            break;
        }
    }
    imageSec -> value(sec2_str.c_str());

    imageNumStr = to_string(frameNum +1) + "/" + to_string(paths.size());
    imageNum -> value(imageNumStr.c_str());

    Fl_PNG_Image *png = new Fl_PNG_Image((paths[0]).c_str());
    anaW = wInput -> value();
    anaH = hInput -> value();

    aspect = stof(string(anaW))/stof(string(anaH));

    if (aspect > 4/3){
        newH = stof(string(anaH)) * 480/stof(string(anaW));
        cout << "newH: " << newH << endl;
        png_copy = png -> copy(480,round(newH));
    } else {
        newW = stof(string(anaW)) * 360/stof(string(anaH));
        cout << "newW: " << newW << endl;
        png_copy = png -> copy(round(newW),360);
    }

    showBox -> image(png_copy);
    showBox -> redraw();
}

[Python] 351 C++ソースコードとJSON要素の照合 その3 スクリプトを統合

[M1 Mac, Monterey 12.6.3, Python 3.10.4]

AdobeXDアイテムデータからJSONファイルを作成するスクリプトとC++ソースコードの内容と比較するスクリプトを統合しました。

これでAdobeXDプラグイン出力のテキストファイルをターミナルにドラッグ&ドロップするだけでC++ソースコードとの比較結果が分かるようになります。

次はVSCodeの拡張機能作成に着手する予定です。

import pandas as pd

print("AdobeXDアイテムデータのパスを入力してください")
items_file = input()

# JSONファイル名作成
items_json_file = "/code/cpp/projects/VideoEditor/plugin/" + (items_file.split("/")[-1]).split(".")[0] + ".json"
print(items_json_file)

# 先頭と末尾のシングルクォートを削除
items_file2 = items_file[1:-1]
print(items_file2)

# データファイルを読み込む
with open(items_file2, "r") as tf:
    items_list = tf.read().replace("\n","").split(';')
    
# print(items_list)
# print(len(items_list))

# listからデータ抽出し、JSON文字列作成
json_str = ""
num = 0
for item in items_list:
    name = item.split("'")[1]
    # print(name + "\n")
    
    xy = (item.split("global X,Y:")[1]).split("parent")[0]
    x = xy.split(",")[0]
    y = xy.split(",")[1]
    # print(x + "\n")
    # print(y + "\n")
    
    wh = (item.split("{")[1]).split("global")[0]
    w = (wh.split("width:")[1]).split(", height")[0]
    h = wh.split("height:")[1]
    # print(w + "\n")
    # print(h + "\n")
    
    if num == 0:
        json_str += "{\"" + name + "\"" + ":[" + x + ", " + y + ", " + w + ", " + h + "],\n"
    elif num < len(items_list) -1:
        json_str += "\"" + name + "\"" + ":[" + x + ", " + y + ", " + w + ", " + h + "],\n"
    else:
        json_str += "\"" + name + "\"" + ":[" + x + ", " + y + ", " + w + ", " + h + "]}"

    # print(json_str + "\n")
    
    num += 1

# JSONファイル作成
with open(items_json_file, mode='w') as f:
    f.write(json_str.replace(" ",""))

# C++ソースファイル    
cpp_file = '/code/cpp/projects/VideoEditor/src/VideoEditor.cpp'
    
# 検索用ファイル文字列(行単位)
with open(cpp_file) as f:
    lines = f.readlines()

# 不一致ファイル名作成
false_json_file = "/code/cpp/projects/VideoEditor/plugin/" + (items_json_file.split("/")[-1]).split("_")[0] + "_false_" +  (items_json_file.split("/")[-1]).split("_")[1]

print(false_json_file)

# JSONファイルをpandasで読込
df = pd.read_json(items_json_file)
print(df)

# 非ウィジェットデータのリスト
notWidget_list = ['convertArea', 'STDOUT', 'IMAGESTOVIDEO', 'VIDEOTOIMAGES']
# 非ウィジェットデータ削除
df2 = df.drop(columns = notWidget_list)

# ウィジェット名リスト化
columns = df2.columns.values
print(columns)
print("columns_len: " + str(len(columns)))

# C++データとAdobeXDデータの照合
false_json = ""
false_count = 0
new_notWidget_list = list()
for col in columns:
    data = df.loc[:, col]
    # print(data.values)
    data2 = str(data.values[0]) + "," + str(data.values[1]) + "," + str(data.values[2]) + "," + str(data.values[3])
    print(data2)
    
    var_str = col + " = new"   
    print(var_str) 
    
    line_str = [line for line in lines if var_str in line]
    
    try:
        line_str2 = line_str[0]
        print(line_str)
        str_exist = data2 in line_str2
        print(str_exist)
        
        if str_exist == False:
            old_xy = (line_str2.split("(")[1]).split(",\"")[0]
            print("col, old_xy: " + col + ", " + str(old_xy))
            
            if false_count == 0:
                false_json += "{\"" + col + "\"" + ":[[" + old_xy + "],[" + data2 + "]],\n"
            else:
                false_json += "\"" + col + "\"" + ":[[" + old_xy + "],[" + data2 + "]],\n"
                
            false_count += 1

    except Exception as e:
        print(e)
        new_notWidget_list.append(col)
        
print("new_notWidget_list: " + str(new_notWidget_list))
print("false_count: " + str(false_count))

false_json2 = false_json[:-2] + "}"

# 不一致WidgetのJSONファイル作成
with open(false_json_file, mode='w') as f:
    f.write(false_json2)

[Python] 350 C++ソースコードとJSON要素の照合 その2 不一致データのJSON化

[M1 Mac, Monterey 12.6.3, Python 3.10.4]

前回の続きです。

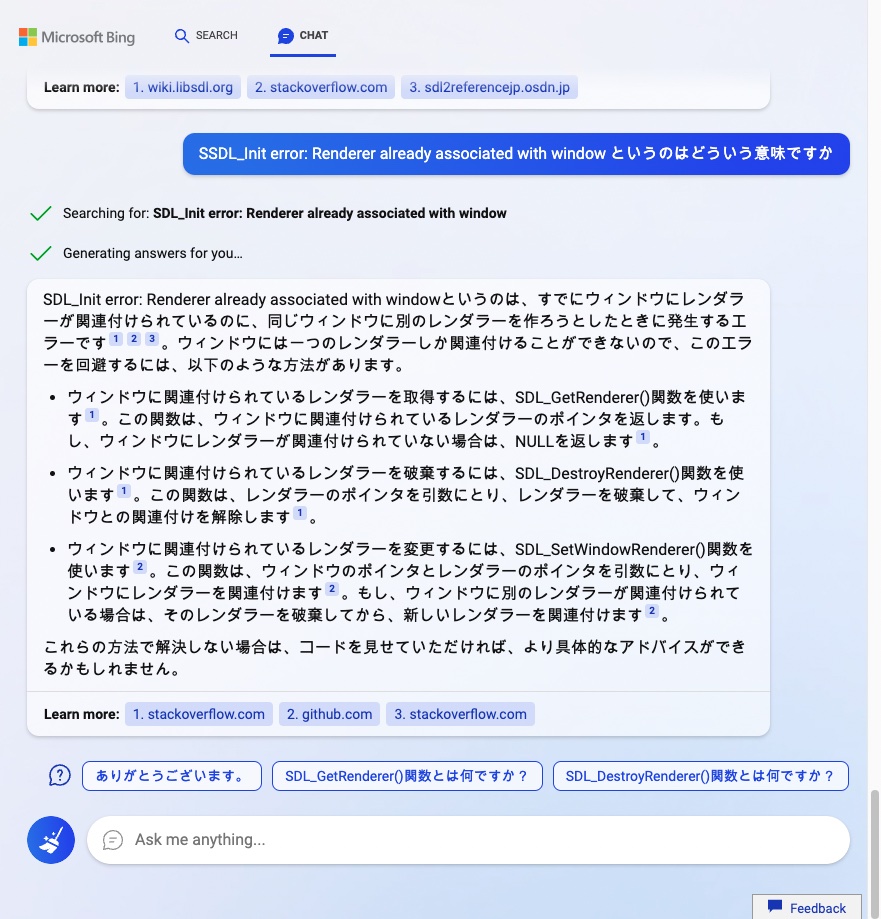
C++ソースコードとAdobeXDのデータを照合し、不一致データをJSONファイルにまとめました。

これを見ながら手動でソースコードの修正ができます。C++ソースコードを自動修正するスクリプト作成までやるかどうかは未定です。

JSONの自由度の高さはなかなかのものです。文字列を連結するだけで作成できるので便利ですね。

import pandas as pd

file = 'VideoEditor.cpp'
    
# 照合用ファイル文字列(行単位)
with open(file) as f:
    lines = f.readlines()

# AdobeXDアイテムデータをpandasで読込
df = pd.read_json('items.json')
print(df)

# 非ウィジェットのリスト
notWidget_list = ['convertArea', 'STDOUT', 'IMAGESTOVIDEO', 'VIDEOTOIMAGES']
# 非ウィジェットデータ削除
df2 = df.drop(columns = notWidget_list)

# ウィジェット名リスト化
columns = df2.columns.values
print(columns)
print("columns_len: " + str(len(columns)))

# C++データとAdobeXDデータの照合
false_json = ""
false_count = 0
new_notWidget_list = list()
for col in columns:
    data = df.loc[:, col]
    # print(data.values)
    data2 = str(data.values[0]) + "," + str(data.values[1]) + "," + str(data.values[2]) + "," + str(data.values[3])
    print(data2)
    
    var_str = col + " = new"   
    print(var_str) 
    
    line_str = [line for line in lines if var_str in line]
    
    try:
        line_str2 = line_str[0]
        print(line_str)
        str_exist = data2 in line_str2
        print(str_exist)
        
        if str_exist == False:
            old_xy = (line_str2.split("(")[1]).split(",\"")[0]
            print("col, old_xy: " + col + ", " + str(old_xy))
            
            if false_count == 0:
                false_json += "{\"" + col + "\"" + ":[[" + old_xy + "],[" + data2 + "]],\n"
            else:
                false_json += "\"" + col + "\"" + ":[[" + old_xy + "],[" + data2 + "]],\n"
                
            false_count += 1

    except Exception as e:
        print(e)
        new_notWidget_list.append(col)
        
print("new_notWidget_list: " + str(new_notWidget_list))
print("false_count: " + str(false_count))

false_json2 = false_json[:-2] + "}"

# 不一致WidgetのJSONファイル作成
with open('false.json', mode='w') as f:
    f.write(false_json2)
{"y1Label":[[697,23,21,14],[698,23,21,14]],
"imageSec":[[475,170,80,20],[485,170,60,20]],
"imageNum":[[65,170,100,20],[65,170,50,20]],
"input":[[25,25,35,16],[25,25,16,16]]}

[Python] 349 C++ソースコードとJSON要素の照合 その1

[M1 Mac, Monterey 12.6.3, Python 3.10.4]

C++ソースコードを読み込み、JSON要素との照合を行い、その結果をBool値で返すスクリプトを書きました。

具体的にはFLTKウィジェットの新しいオブジェクトを作成する行の座標、幅、高さがAdobe XDのデータと一致しているかどうか判定します。

一致していなければAdobe XDのデータに書き換えます。この部分については次回以降記事にする予定です。

久々にpandasの出番でした。相変わらずの高機能です。

import pandas as pd

file = '/VideoEditor/src/VideoEditor.cpp'

with open(file) as f:
    lines = f.readlines()

# 改行コードを削除    
lines_strip = [line.strip() for line in lines]

df = pd.read_json('items.json')
print(df)

columns = df.columns.values
print(columns)

for col in columns:
    data = df.loc[:, col]
    # print(data.values)
    data2 = str(data.values[0]) + "," + str(data.values[1]) + "," + str(data.values[2]) + "," + str(data.values[3])
    print(data2)
    
    var_str = col + " = new"   
    print(var_str) 
    
    line_str = [line for line in lines_strip if var_str in line]
    
    try:
        line_str2 = line_str[0]
        print(line_str)
        str_exist = data2 in line_str2
        print(str_exist)
    except Exception as e:
        print(e)
395,70,90,45
convertArea = new
list index out of range
885,180,60,12
STDOUT = new
list index out of range
635,190,310,440
browser = new
['browser = new Fl_Browser(635,190,310,440,"STDOUT");']
True
895,95,50,30
comBtn = new
['comBtn = new Fl_Button(895,95,50,30,"結合");']
True
895,55,50,30
filBtn = new
['filBtn = new Fl_Button(895,55,50,30,"モザイク\\n作成");']
True
895,20,50,30
culcBtn = new
['culcBtn = new Fl_Button(895,20,50,30,"モザイク\\n追加");']
True

[Python] 348 Adobe XDのアイテムデータからJSONファイルを作成

[M1 Mac, Monterey 12.6.3, Python 3.10.4]

※この記事は”[JavaScript] Adobe XDのアイテムデータを取得するプラグイン作成”のPython編です

Adobe XDの自製プラグインで取得したアイテムデータからJSONファイルを作成しました。

これでアイテムの座標と幅・高さをコピー&ペーストしてC++コードを修正できます。

あとはJSONファイルをキーのアルファベット順でソートする位でしょうか。

時間があればC++コードの自動書き換えを検討します。

import json

with open("items.txt", "r") as tf:
    items_list = tf.read().replace("\n","").split(';')
    
# print(items_list)
# print(len(items_list))

# listからデータ抽出し、JSON文字列作成
json_str = ""
num = 0
for item in items_list:
    name = item.split("'")[1]
    print(name + "\n")
    
    xy = (item.split("global X,Y:")[1]).split("parent")[0]
    x = xy.split(",")[0]
    y = xy.split(",")[1]
    print(x + "\n")
    print(y + "\n")
    
    wh = (item.split("{")[1]).split("global")[0]
    w = (wh.split("width:")[1]).split(", height")[0]
    h = wh.split("height:")[1]
    print(w + "\n")
    print(h + "\n")
    
    if num == 0:
        json_str += "{\"" + name + "\"" + ":[" + x + ", " + y + ", " + w + ", " + h + "],\n"
    elif num < len(items_list) -1:
        json_str += "\"" + name + "\"" + ":[" + x + ", " + y + ", " + w + ", " + h + "],\n"
    else:
        json_str += "\"" + name + "\"" + ":[" + x + ", " + y + ", " + w + ", " + h + "]}"

    print(json_str + "\n")
    
    num += 1

# JSONファイル作成
file = open('items.json', mode='w')
file.write(json_str.replace(" ",""))
file.close()

[JavaScript] 15 Adobe XDのアイテムデータを取得するプラグイン作成 その3 テキスト出力

[M1 Mac, Monterey 12.6.3]

前回の続きです。

Pythonでは区切り文字付きテキストの方がリストのリテラル(機能のないただの文字列)より扱いやすいため、プラグインの内容を修正しました。

これでPythonスクリプトによりアイテムデータをリテラルのリストとして取得できます。あとは各要素から必要な数値を抽出してJSONに変換します。

JavaScriptの方は一応完成になります。

function myCommand(selection) {
    console.log(selection.items.length + " items are selected");

    let items_list = "";
    var num = 1;
    selection.items.forEach(function(value){
        // console.log(value);
        if (num < selection.items.length){
            items_list += value + ";";
        } else {
            items_list += value;
        }
        num += 1;
    });
    console.log(items_list);
}

module.exports = {
    commands: {
        GetItemXY: myCommand
    }
};
with open("items.txt", "r") as tf:
    items_list = tf.read().replace("\n","").split(';')
    
print(items_list)
print(len(items_list))

# ここからlistをJSONに変換する

[JavaScript] 14 Adobe XDのアイテムデータを取得するプラグイン作成 その2 リスト出力

[M1 Mac, Monterey 12.6.3]

Adobe XDのプラグインからアイテムデータをファイル出力するのは私の技量では難しいため早々にあきらめて、Python用のリストとして開発者コンソールに出力するようにしました。

これをPythonスクリプトにコピー&ペーストしてC++コードを書き換えようという算段です。

JavaScriptはローカル環境とのファイルのやり取りが不得手なところがあるので難しいことをやろうとせず、ここだけ手動でさっさとPythonに渡してしまうのが得策だと考えました。

アイテムデータをPython用リストとして出力
function myCommand(selection) {
    console.log(selection.items.length + " items are selected");

    let items_list = "";
    var num = 1;
    selection.items.forEach(function(value){
        // console.log(value);
        if (num == 1){
            items_list += "[\"" + value + "\",\n";
        } else if (num < selection.items.length){
            items_list += "\"" + value + "\",\n";
        } else {
            items_list += "\"" + value + "\"]\n";
        }
        num += 1;
    });
    console.log(items_list);
}

module.exports = {
    commands: {
        GetItemXY: myCommand
    }
};

[JavaScript] 13 Adobe XDのアイテムデータを取得するプラグイン作成 その1

[M1 Mac, Monterey 12.6.3]

ビデオ編集アプリのGUIデザインにはAdobe XDを使っています。

GUI内アイテムの座標と幅・高さをプラグインで取り出して、C++のコードを書き換えるところまで自動化しようとしています。

とりあえずAdobe XDのプラグイン開発環境を構築し、アイテムのデータ所在を確認するところまでは出来ました。スクリプト自体は簡単に書けたので拍子抜けでした。

これらをJSONファイルとして取り出し、PythonでJSON読込・コード書き換えができれば完成になります。

Adobe XD GUIデザイン
GUI内アイテムデータの出力
function myCommand(selection) {
    console.log(selection.items.length + " items are selected");

    selection.items.forEach(function(value){
        console.log(value);
    });
}

module.exports = {
    commands: {
        GetItemXY: myCommand
    }
};

[C++] 237 FLTK : マウスをドラッグして四角形を描く その3 フレーム描画 Fl_Box

[M1 Mac, Monterey 12.6.3, clang 13.0.0, FLTK 3.8.1, NO IDE]

FLTKのfl_frame関数でフレームを描くと残像が重なって使えなかったのですが、最新のフレームだけ表示すると正常になりました。

また前のコードでは拡げたエリアを縮小することはできませんでした。このコードでは伸縮自在です。

ただし複数のフレームを描くと直前のフレームが消えてしまうので、これを残す方法を考える必要があります。あくまで見た目の問題であって、フレームの座標自体は保存できるようになっています。

課題はありますが、かなり前進したと言えるでしょう。

#pragma once
#include <FLstd.h>
#include "cppstd.h"

class BoxXY : public Fl_Box {
    Fl_Input* inputFrame1;
    Fl_Input* inputFrame2;
    Fl_Input* inputFrame3;
    Fl_Input* inputFrame4;

    public:
        BoxXY(int x, int y, int width_input, int height_input, Fl_Input* input1,Fl_Input* input2, Fl_Input* input3,Fl_Input* input4);
        void draw();
    private:
        int handle(int);
};
#include "BoxXY.h"

extern Fl_Box *show_box;
int xx1, yy1, xx2, yy2, xx0, yy0;

BoxXY::BoxXY(int x, int y, int width_input, int height_input, Fl_Input* input1,Fl_Input* input2, Fl_Input* input3,Fl_Input* input4) : Fl_Box(FL_FLAT_BOX, x, y, width_input, height_input, "") 
{
    this->inputFrame1 = input1;
    this->inputFrame2 = input2;
    this->inputFrame3 = input3;
    this->inputFrame4 = input4;
}

void BoxXY::draw(){
    // 線の色(第1引数)はAからXの24段階グレースケール4値(top, left, bottom, rightの順)
    // 灰色線
    fl_frame("LLLL",xx1+65, yy1+190, xx0-xx1, yy0-yy1);
    // 白線
    // fl_frame("XXXX",xx1+65, yy1+190, xx0-xx1, yy0-yy1);
    // 黒線
    // fl_frame("AAAA",xx1+65, yy1+190, xx0-xx1, yy0-yy1);
}

int BoxXY::handle(int event){
    switch (event) {
        case FL_PUSH:{
            xx1 = Fl::event_x() - 65;
            yy1 = Fl::event_y() - 190;

            inputFrame1->value(to_string(xx1).c_str());
            inputFrame1->textsize(12);

            inputFrame2->value(to_string(yy1).c_str());
            inputFrame2->textsize(12);

            return 1;
        }
        case FL_RELEASE:{
            xx2 = Fl::event_x() - 65;
            yy2 = Fl::event_y() - 190;

            inputFrame3->value(to_string(xx2).c_str());
            inputFrame3->textsize(12);

            inputFrame4->value(to_string(yy2).c_str());
            inputFrame4->textsize(12);

            return 1;
        }
        case FL_DRAG:{
            xx0 = Fl::event_x() - 65;
            yy0 = Fl::event_y() - 190;

            inputFrame3->value(to_string(xx0).c_str());
            inputFrame3->textsize(12);

            inputFrame4->value(to_string(yy0).c_str());
            inputFrame4->textsize(12);

            show_box -> redraw(); // この行を追加
            this->redraw();

            return 1;
        }
        default:
            return Fl_Box::handle(event);
    }
}

[C++] 236 FLTK : マウスをドラッグして四角形を描く その2 図形の削除 Fl_Box

[M1 Mac, Monterey 12.6.3, clang 13.0.0, FLTK 3.8.1, NO IDE]

前回の続きです。

fl_draw_box関数で描いた図形はキャンバスに相当するFl_Boxをredrawすると削除できます。

四角形ではなくフレームを描く方法も試しましたが、残像が何個も重なるため実用には至りませんでした。

あとは図形を透過させれば出来上がりです。

clearBtn = new Fl_Button(565,190,50,30,"矩形\nクリア");
clearBtn->color(fl_rgb_color(112,128,144));
clearBtn->labelcolor(fl_rgb_color(208,207,207));
clearBtn->labelsize(12);
clearBtn->callback(clearCB);

--------------------------------------------------
void clearCB(Fl_Widget*, void*) {
    x1_input -> value(0);
    y1_input -> value(0);
    x2_input -> value(0);
    y2_input -> value(0);

    show_box -> redraw();
}