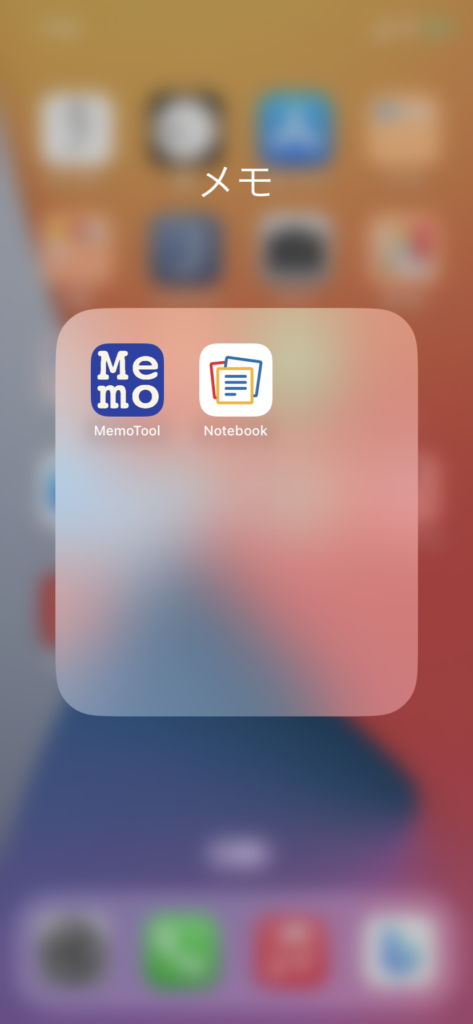
[C++,Python] 315 BBS閲覧アプリの製作 その1 DATファイルの保存

[M1 Mac, MacOS Ventura 13.3.1, clang 14.0.3]

とあるBBSのDATファイルへのアクセスが可能になったようなので、早速遊んでみることにしました。

とりあえずDATファイルをダウンロードしてみます。PythonスクリプトをChatGPTに変換してもらったコードがそのまま使えました。

DATファイルの文字コードがシフトJISですから、Macの場合はUTF-8に変換する必要がありますね。

#include <iostream>
#include <fstream>
#include <curl/curl.h>

size_t WriteCallback(void* contents, size_t size, size_t nmemb, void* userp) {
    std::ofstream* file = static_cast<std::ofstream*>(userp);
    file->write(static_cast<char*>(contents), size * nmemb);
    return size * nmemb;
}

int main() {
    std::string url = "DATファイルのurl";
    std::string filename = "保存先DATファイルのパス";

    CURL* curl = curl_easy_init();
    if (curl) {
        std::ofstream file(filename, std::ios::binary);
        curl_easy_setopt(curl, CURLOPT_URL, url.c_str());
        curl_easy_setopt(curl, CURLOPT_WRITEFUNCTION, WriteCallback);
        curl_easy_setopt(curl, CURLOPT_WRITEDATA, &file);
        CURLcode res = curl_easy_perform(curl);
        if (res != CURLE_OK) {
            std::cerr << "Error: " << curl_easy_strerror(res) << std::endl;
        }
        curl_easy_cleanup(curl);
    } else {
        std::cerr << "Failed to initialize curl" << std::endl;
    }

    return 0;
}
[Swift] 40 ChatGPTアプリ製作 その4 Apple Watchで使用

[M1 Mac, Ventura 13.3.1, Xcode 14.3]

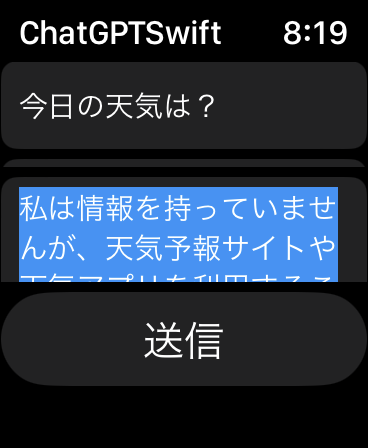
Apple WatchでもChatGPTを使えるようにしました。一問一答形式です。

ただしiCloudにデータを上手く保存できず、それぞれのデバイスのローカルに保存されます。

CoreData: error: CoreData+CloudKit: -[NSCloudKitMirroringDelegate recoverFromError:](2224): <NSCloudKitMirroringDelegate: 0x600003d780e0> - Attempting recovery from error: <CKError 0x600000a14630: 
"Partial Failure" (2/1011); "Failed to modify some record zones"; 
"Server Rejected Request"

[Swift] 39 Apple WatchのComplication改良 複数のComplication作成

[M1 Mac, Ventura 13.3.1, Xcode 14.3]

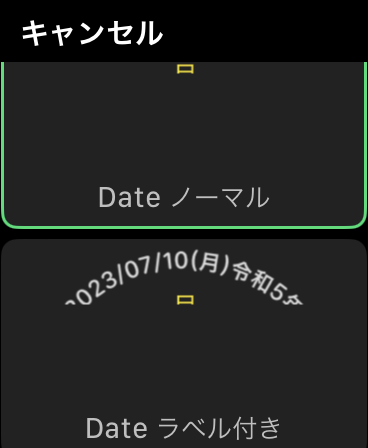
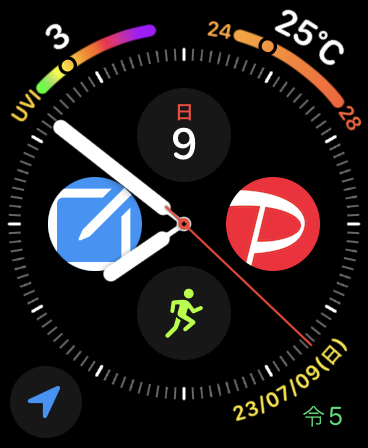
自製カレンダーアプリのComplicationを純正アプリと同様にラベル有りとラベル無しの2種類作成しました。

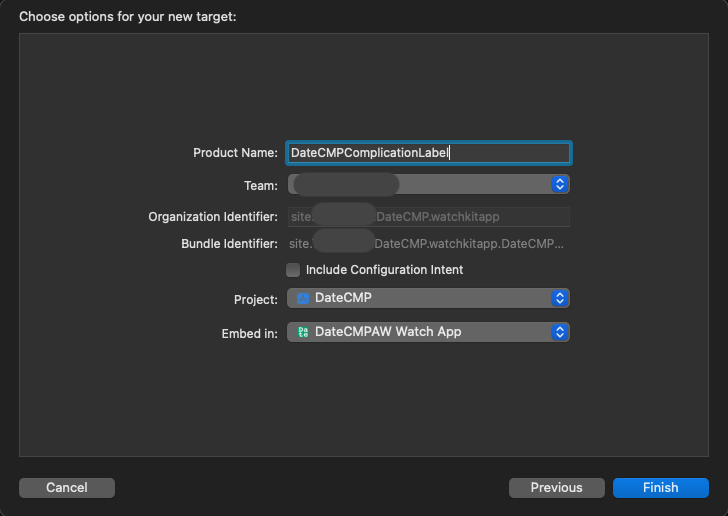
TargetとしてWidget Extensionを増やすだけなので特に問題なくできますが、作成時に”Include Configuration Intent”にチェックを入れないようにします。チェックを入れるとそのままではコマンドの重複が発生しビルドエラーになります。

Complication選択画面
@main
struct DateToolComplicationLabel: Widget {
    let kind: String = "DateToolComplicationLabel"

    var body: some WidgetConfiguration {
        StaticConfiguration(kind: kind, provider: Provider()) { entry in
            DateToolComplicationLabelEntryView(entry: entry)
        }
        .configurationDisplayName("Date ラベル付き")
        .description("")
        .supportedFamilies([.accessoryCircular,.accessoryCorner,.accessoryRectangular,.accessoryInline])
     }

}

[Swift] 38 メモアプリ製作 その11 Apple Watchで新規メモ作成

[M1 Mac, Ventura 13.3.1, Xcode 14.3]

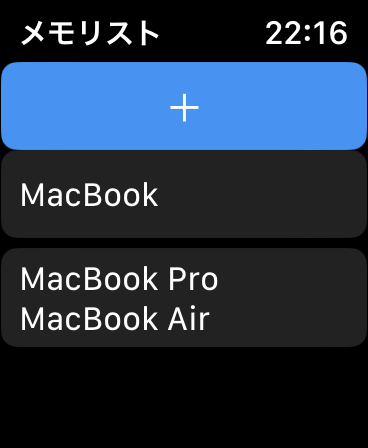
メモアプリのwatchOS版では既存のメモを編集できるだけでした。さらに新規メモを作成できるようにしました。TextFieldなので1行の文字列として入力することになります。

後でiPhoneなどで改行を入れ整形する必要がありますが、とりあえずメモしたい時に便利です。

ToolbarItemのplacementを.automaticにして正常に配置できました。本当はプラスボタンをbottomに置きたいのですが、watchOS 9では不可のようです。watchOS 10で新機能として追加されるという情報を目にしました。本当だとしたらありがたいです。

これで大体完成と言ったところでしょうか。

struct ContentView: View {
    @Environment(\.managedObjectContext)var viewContext

    @FetchRequest(
    entity: Note.entity(),
    sortDescriptors: [NSSortDescriptor(key: "creationDate", ascending: false)])
    private var contents: FetchedResults<Note>

    var body: some View {
        NavigationView{
            List{
                ForEach(contents){content in
                    NavigationLink{
                        if((content.content?.isEmpty) == false){
                            DraftAppleWatch(text:content.content!, note: content)
                        }
                    }label:{
                        if((content.content?.isEmpty) == false){
                            Text(content.content!)
                        }
                    }
                }
                .onDelete(perform:deleteContent)
            }
            .navigationTitle("メモリスト")
            .navigationBarTitleDisplayMode(.inline)
            .toolbar{
                ToolbarItem(placement:.automatic){
                    NavigationLink{
                        DraftAppleWatch()
                    }label:{
                        Text("+")
                        .font(.system(size: 24))
                    }
                }
            }
        }
        .accentColor(.blue)
    }
<以下略>

[Swift] 37 Apple WatchのComplication改良 しばらく経つと消える 原因判明

[M1 Mac, Ventura 13.3.1, Xcode 14.3]

自製カレンダーアプリのComplicationがしばらく経ってアプリごと消えてしまう原因が判明しました。

どうやらXcodeのバグのようです。

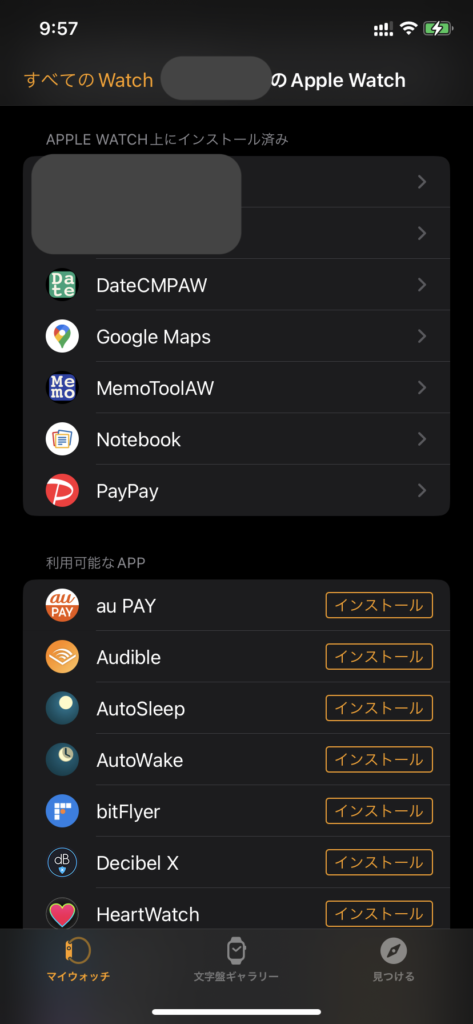
iOSのWatchアプリを開いて”APPLE WATCH上にインストール済み”が表示された瞬間にそこからカレンダーアプリが消えていくのを目撃しました。再現性も確認しています。

この画面になった瞬間にアプリが消えていった

アプリそのものに関する設定に問題があるのではと考え、調べていくとBundle Identiferが不完全な表記になっているのが分かりました。これはwatchOSアプリのプロジェクト作成時に正しく設定しても反映されていないことを意味します。

最初にiOSアプリのプロジェクトを作成し、watchOSアプリ、Widget Extensionと順にターゲットを増やしていくとこのような問題は起こりません。メモアプリはこの手順だったためトラブルにはなりませんでした。

さすがにこれは酷すぎるのでAppleにバグ報告します。

正直こんなことで振り回されたくない。Flutterでこの種の不毛な作業をせずに済むのであれば本気で移行したいです。

アプリのカテゴリーは異なりますが、VSCodeでこのような不具合はあり得ないです。Xcodeへの信頼を著しく損なう事になり残念至極。

プロジェクト作成時はBundle Identiferに特に問題はない
後でBundle Identiferを確認すると.watchkitappに勝手に変わっている
これでは固有IDとして機能しない

[Swift] 36 Apple WatchのComplication改良 しばらく経つと消える

[M1 Mac, Ventura 13.3.1, Xcode 14.3]

カレンダーアプリのComplicationがしばらく経つとアプリごと消えてしまいます。同様にComplication設定しているメモアプリは無事です。

“インフォグラフ”文字盤の中央上部は純正カレンダー以外のアプリを受け付けないのかもしれません。

中央上部は純正カレンダー、右下は自製カレンダーに設定して様子を見ます。

これで消えたら以下の対策を順次試してみます。
1.プロジェクトから作り直し
2.CloudKitを導入しDateなどを適当に保存
3.文字盤を作成
4.正式にアプリ登録する(非公開)

中央上部と右下に設定
しばらくすると消える
(経過時間は不定)
この設定で様子を見る
struct ComplicationCircular : View {
    @Environment(\.showsWidgetLabel) var showsWidgetLabel
    var entry: Provider.Entry
    
    var body: some View {
        VStack (spacing: -6){
            if showsWidgetLabel {
                Text(getWeekday(entry.date))
                .font(.system(size: 18))
                .foregroundColor(.yellow)
                .widgetLabel {
                    Text(getFormattedDate() + getFormattedWeekday() + getFormattedYear())
                    .foregroundColor(.blue) // 中央上部は色設定不可
                }
                
                Text(getMonth(entry.date))
                .font(.system(size: 18))
                .foregroundColor(.green)
                
                Text(getDay(entry.date))
                .font(.system(size: 18))
                .foregroundColor(.white)
                
            } else {
                Text(getWeekday(entry.date))
                .font(.system(size: 18))
                .foregroundColor(.yellow)
                
                Text(getMonth(entry.date))
                .font(.system(size: 18))
                .foregroundColor(.green)
                
                Text(getDay(entry.date))
                .font(.system(size: 18))
                .foregroundColor(.white)
            }
        }
    }
<以下略>

[Swift] 35 Apple WatchのComplication改良 accessoryCorner

[M1 Mac, Ventura 13.3.1, Xcode 14.3]

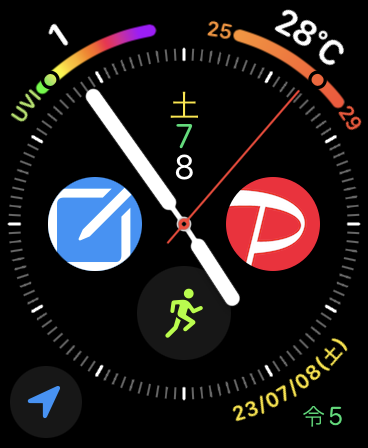
ComplicationのaccessoryCornerにも日付を表示できるようにしました。

ただし現時点では文字盤に沿って円弧状に表示できるのはラベル[23/07/08(土)]だけで本体[令5]は水平のままです。

詳しくは書けませんが、次期watchOSで何らかの進化があるようです。

中央上部と右下に表示
struct ComplicationCorner : View {
    var entry: Provider.Entry
    
    var body: some View {
        Text(getFormattedYear())
        .font(.system(size: 22))
            .foregroundColor(.green)
            .widgetLabel {
                Text(getFormattedDate() + getFormattedWeekday())
                .foregroundColor(.yellow)
            }
     }
    
    func getFormattedDate() -> String {
        let dateFormatter = DateFormatter()
        dateFormatter.dateFormat = "yy/MM/dd"
        return dateFormatter.string(from: entry.date)
    }
    
    func getFormattedWeekday() -> String {
        let dateFormatter = DateFormatter()
        dateFormatter.dateFormat = "E"
        dateFormatter.locale = Locale(identifier: "ja_JP")
        return "(" + dateFormatter.string(from: entry.date) + ")"
    }
    
    func getFormattedYear() -> String {
        let calendar = Calendar(identifier: .japanese)
        let year = calendar.component(.year, from: entry.date)
        return "令" + String(year)
    }
    
}

struct DateToolComplicationEntryView : View {
    @Environment(\.widgetFamily) var widgetFamily
    var entry: Provider.Entry
    
    var body: some View {
        switch widgetFamily {
            case .accessoryCorner:
                ComplicationCorner(entry: entry)
            case .accessoryCircular:
                ComplicationCircular(entry: entry)
            case .accessoryInline:
                ComplicationInline()
            case .accessoryRectangular:
                ComplicationRectangular()
            @unknown default:
                Text("Not an implemented widget yet")
        }
    }
}

[C++] 314 画像加工アプリ チャンネル数取得 RGBA

[M1 Mac, MacOS Ventura 13.3.1, clang 14.0.3]

画像加工アプリにpngのチャンネル数を取得する機能を追加しました。libpngを使います。

RGBAであれば4、アルファチャンネルのないRGBであれば3になります。

unsigned int width;
unsigned int height;
unsigned int res_x;
unsigned int res_y;
unsigned int readSize;
unsigned int channel;

std::array<int,5> getInfoPNG(const char* filename){
	fi = fopen(filename, "rb");
	readSize = fread(signature, 1, SIGNATURE_NUM, fi);

	png = png_create_read_struct(PNG_LIBPNG_VER_STRING, NULL, NULL, NULL);
	info = png_create_info_struct(png);

	png_init_io(png, fi);
	png_set_sig_bytes(png, readSize);
	png_read_png(png, info, PNG_TRANSFORM_PACKING | PNG_TRANSFORM_STRIP_16, NULL);
	
	width = png_get_image_width(png, info);
  	height = png_get_image_height(png, info);
	res_x = png_get_x_pixels_per_inch(png,info);
	res_y = png_get_y_pixels_per_inch(png,info);
	channel = png_get_channels(png, info);

	png_destroy_read_struct(&png, &info, NULL);
  	fclose(fi);

	return {(int)width,(int)height,(int)res_x,(int)res_y, (int)channel};
}

[Python] 358 pngファイルからαチャンネルを削除

[M1 Mac, Ventura 13.3.1, Python 3.10.4]

前の記事でiOSアプリはアイコン登録で優遇されているのではないかと述べましたが、案外そうでもなさそうです。

というのは、iOSアイコンとして登録する画像はpngはpngでもαチャンネル(透過度)を削除したpngでないとアプリ申請が通らないからです。

αチャンネルがないpngというのが存在するというのも驚きですし、それを必須にするAppleもたいがいだと感じました。

αチャンネルはPythonで簡単に削除できます。

from PIL import Image

def remove_alpha_channel(input_file, output_file):
    image = Image.open(input_file)
    image = image.convert("RGB")
    image.save(output_file)

input_file = "RGBA.png"
output_file = "RGB.png"
remove_alpha_channel(input_file, output_file)

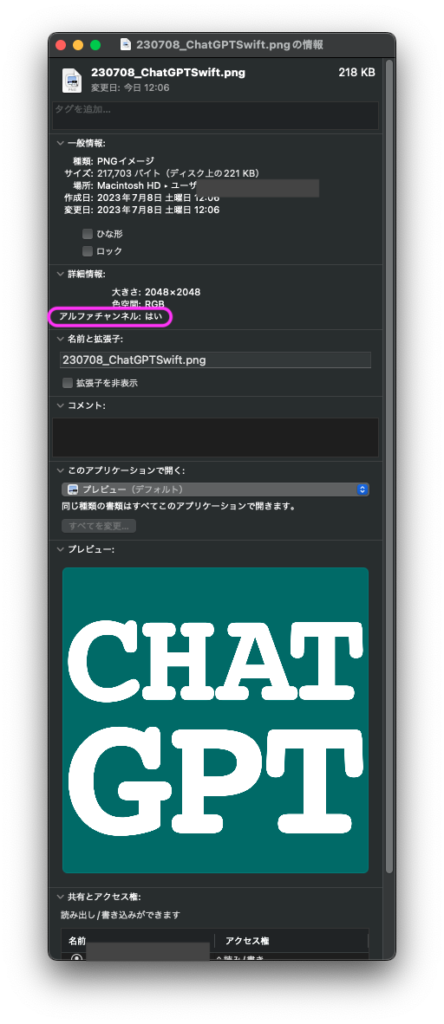
削除できたかどうかは右メニュー”情報を見る”、あるいはピクセル情報をCSVファイルに出力すれば分かります。RGBAデータを取り出そうとするとエラーになるはずです。

“情報を見る”画面
from PIL import Image
import numpy as np
import csv

img_array = np.array(Image.open("RGB.png"))

# 全ピクセルの色情報を取得 jpgあるいはpng(RGB)の場合
list_rgb = img_array[:, :, (0, 1, 2)]
# png(RGBA)の場合
# list_rgba = img_array[:, :, (0, 1, 2, 3)]

with open("RGB.csv", 'w') as f:
    writer = csv.writer(f,lineterminator='\n')
    writer.writerows(list_rgb)

# アルファチャンネル

[Xcode] アイコン登録 iOSとmacOSの違い 黒枠付きになる

[M1 Mac, Ventura 13.3.1, Xcode 14.3]

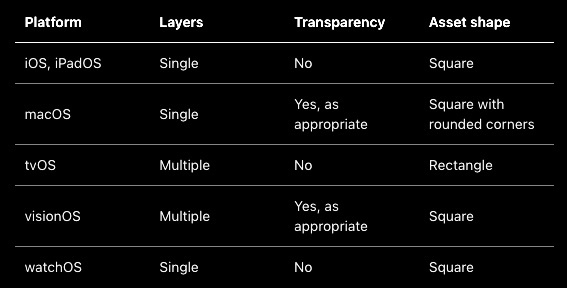
iOSアプリのアイコンとしてmacOSアプリで使ったアイコンと同サイズのものを登録すると下図のように黒枠で囲まれてやや小さいアイコンになりました。

黒枠付きアイコン(左側)

調べると、iOSの方は正方形の画像を登録しXcodeが角丸のアイコンにトリミングしてくれる仕組みであることが分かりました。

引用元:Apple Developer Documentation

iOSアプリ開発者の手間を軽減するようAppleが配慮しているということでしょうか。売上の半分以上を占めるiPhoneならさもありなんといったところです。

かといってmacOSアプリ開発者の方からiOSに合わせろという声は上がらないでしょう。アイコンも製作物の一部ですし角丸にするくらい自分でできる、と思っているのでは。

黒枠がとれたアイコン