Microsoftが開発しているプログラミングに特化したLLM “phi-1″がHugging Faceに公開されるらしいです。
モデルサイズはGPT-3.5の100分の1以下、1.3Bです。能力はGPT-4には及ばないものの、GPT-3.5を少し上回っています(HumanEval比較)。
RTX 4070Tiで動かせるのか分かりませんが、今から待ちどおしいです。
GPT-3.5の100分の1以下のモデルサイズでより高いプログラミング処理能力持つ「phi-1」Microsoftが開発
Microsoftが開発しているプログラミングに特化したLLM “phi-1″がHugging Faceに公開されるらしいです。
モデルサイズはGPT-3.5の100分の1以下、1.3Bです。能力はGPT-4には及ばないものの、GPT-3.5を少し上回っています(HumanEval比較)。
RTX 4070Tiで動かせるのか分かりませんが、今から待ちどおしいです。
GPT-3.5の100分の1以下のモデルサイズでより高いプログラミング処理能力持つ「phi-1」Microsoftが開発
[M1 Mac, Ventura 13.3.1, Xcode 14.3]
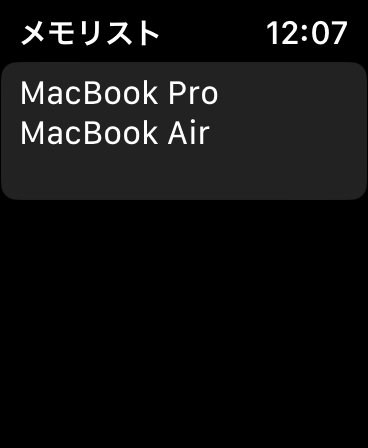
製作中のメモアプリがApple Watchでは読み取りだけだったのを編集できるようにしました。
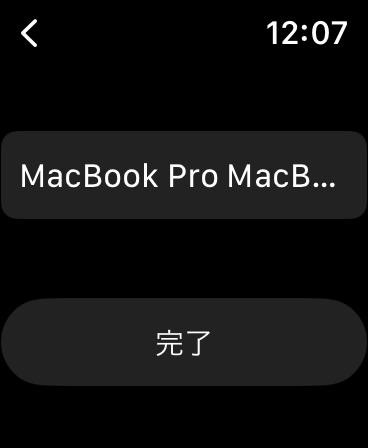
watchOSではTextEditorは使えないため、代わりにTextFieldを使っています。ただTextfieldでは複数行を扱えないので、全ての行がつながってしまいます。
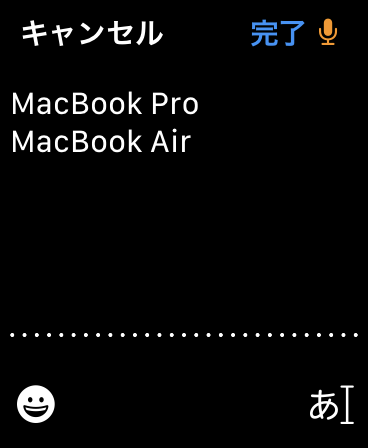
またApple Watch Series 7/8/Ultra以外はキーボード入力ではなく音声入力になります。
発売から8年が経過しているというのに未だにTextEditorが使えないとは。Vision ProだけではなくwatchOSにも力を注いで欲しいです。今のところ、自分で代替の構造体を作るしかないようです。
GoogleのWearOSがどのような内容なのか気になります。そろそろFlutterでGoogle Pixel Watch用アプリも作りたくなってきました。
import SwiftUI

struct DraftAppleWatch: View {
    @State var text = ""
    @FocusState var nameFieldIsForcused: Bool
    @Environment(\.managedObjectContext)var viewContext
    var note: Note?

    var body: some View {
        VStack {
            TextField("", text: $text)
                .focused($nameFieldIsForcused)
                .onAppear{
                    DispatchQueue.main.asyncAfter(deadline:DispatchTime.now()+0.5){
                        nameFieldIsForcused = true
                    }
                }

            Button(action:{
                if note != nil{
                    updateContent(note: self.note!) // メモ編集
                }else{
                    addContent() // 新規メモ追加
                }
            }){
                Text("完了")
            }
        }

    }

    func updateContent(note:Note){
        note.content=text

        do{
            try viewContext.save()
        }catch{
            fatalError("セーブに失敗")
        }

        nameFieldIsForcused = false
    }

    func addContent(){
        let newContent = Note(context:viewContext)
        newContent.content = text

        do{
            try viewContext.save()

        }catch{
            fatalError("セーブに失敗")
        }

        nameFieldIsForcused = false

    }


}


struct DraftAppleWatch_Previews: PreviewProvider {
    static var previews: some View {
        DraftAppleWatch()
    }
}[M1 Mac, Ventura 13.3.1, Xcode 14.3]
iOSとwatchOSをそれぞれ16.5.1、9.5.2にアップデートしたところWatch Appが消えてしまいました。Watch App with iOS Appの方は残っています。
自製Watch Appを全て消して再インストールしようとするとApple Watchを認識できないとか色々難癖を付けてきます。
結局Mac、iPhone、Apple Watchを全て再起動すると直りました。最初からそう言ってほしいものです。
この手のトラブルは以前から発生しているようでApple開発者フォーラムでも非難囂々です。ちなみにMacとiPhoneはUSBハブ経由ではなく直接つなぐ方がいいらしいです。
[M1 Mac, Ventura 13.3.1, Xcode 14.3]
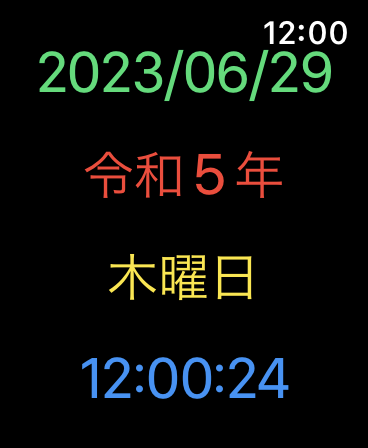
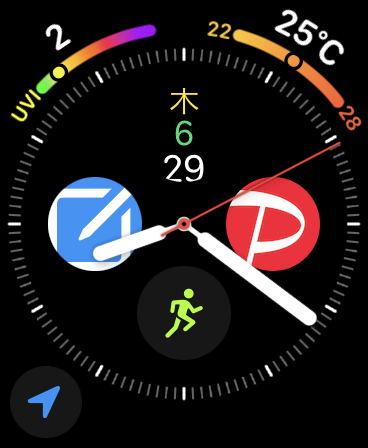
改良カレンダーをタップした時の表示に元号を追加しました。フォントサイズを大きくすると赤色でも問題なく読めます。
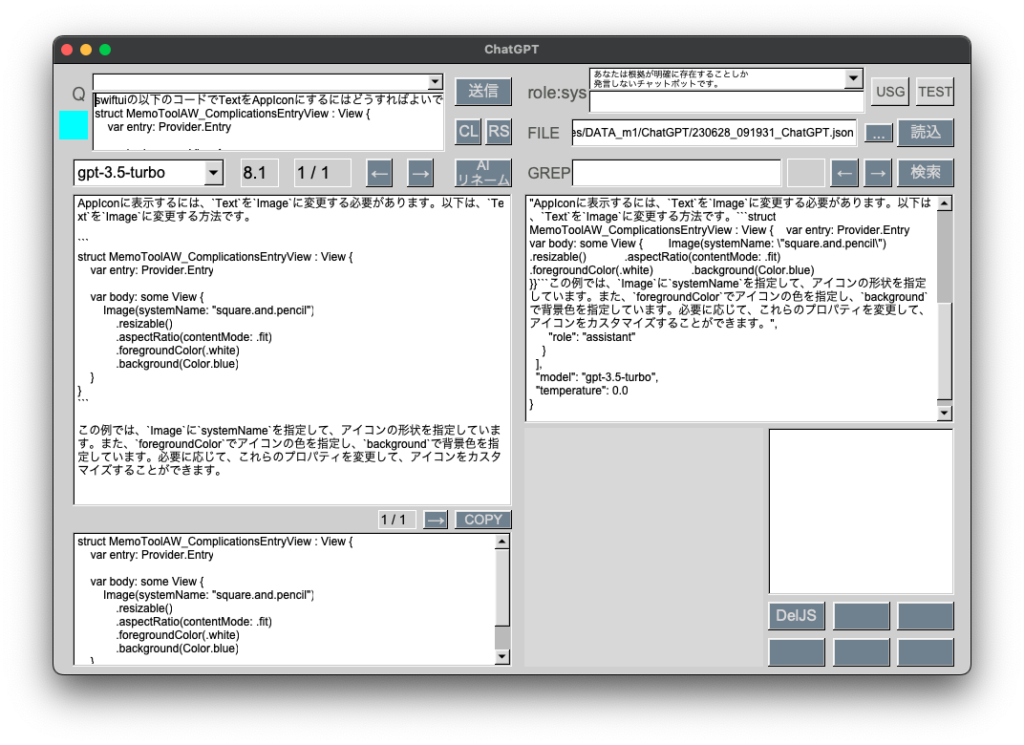
今回は日本固有の内容だったためかChatGPTの回答がかなり怪しく、大幅な修正を加えました。
import SwiftUI

struct ContentView: View {
    let date: Date

    var body: some View {
        VStack (spacing: 15){
            Text(getFormattedDate())
            .font(.system(size: 30))
            .foregroundColor(.green)

            Text(getFormattedYear())
            .font(.system(size: 30))
            .foregroundColor(.red)

            Text(getFormattedWeekday() + "曜日")
            .font(.system(size: 30))
            .foregroundColor(.yellow)

            Text(getFormattedTime())
            .font(.system(size: 30))
            .foregroundColor(.blue)

        }
        .padding()
    }

    func getFormattedDate() -> String {
        let dateFormatter = DateFormatter()
        dateFormatter.dateFormat = "yyyy/MM/dd"
        return dateFormatter.string(from: date)
    }

    func getFormattedYear() -> String {
        let calendar = Calendar(identifier: .japanese)
        let year = calendar.component(.year, from: date)
        return "令和" + String(year) + "年"
    }


    func getFormattedWeekday() -> String {
        let dateFormatter = DateFormatter()
        dateFormatter.dateFormat = "E"
        dateFormatter.locale = Locale(identifier: "ja_JP")
        return dateFormatter.string(from: date)
    }

    func getFormattedTime() -> String {
        let dateFormatter = DateFormatter()
        dateFormatter.dateFormat = "HH:mm:ss"
        return dateFormatter.string(from: date)
    }
}


struct ContentView_Previews: PreviewProvider {
    static var previews: some View {
        ContentView(date: Date())
    }
}[M1 Mac, Ventura 13.3.1, Xcode 14.3]
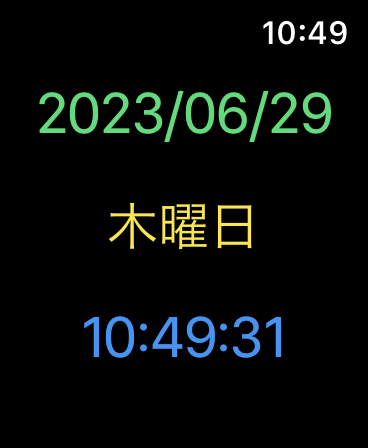
Complicationの改良カレンダーですが、アナログ時計のため時針や分針が重なると読みにくくなります。
そこでタップすると日時を表示するようにしました。デジタル時計は止まったまま動きません。
import SwiftUI

struct ContentView: View {
    let date: Date

    var body: some View {
        VStack (spacing: 20){
            Text(getFormattedDate())
            .font(.system(size: 30))
            .foregroundColor(.green)

            Text(getFormattedWeekday() + "曜日")
            .font(.system(size: 30))
            .foregroundColor(.yellow)

            Text(getFormattedTime())
            .font(.system(size: 30))
            .foregroundColor(.blue)

        }
        .padding()
    }

    func getFormattedDate() -> String {
        let dateFormatter = DateFormatter()
        dateFormatter.dateFormat = "yyyy/MM/dd"
        return dateFormatter.string(from: date)
    }

    func getFormattedWeekday() -> String {
        let dateFormatter = DateFormatter()
        dateFormatter.dateFormat = "E"
        dateFormatter.locale = Locale(identifier: "ja_JP")
        return dateFormatter.string(from: date)
    }

    func getFormattedTime() -> String {
        let dateFormatter = DateFormatter()
        dateFormatter.dateFormat = "HH:mm:ss"
        return dateFormatter.string(from: date)
    }
}


struct ContentView_Previews: PreviewProvider {
    static var previews: some View {
        ContentView(date: Date())
    }
}[M1 Mac, Ventura 13.3.1, Xcode 14.3]
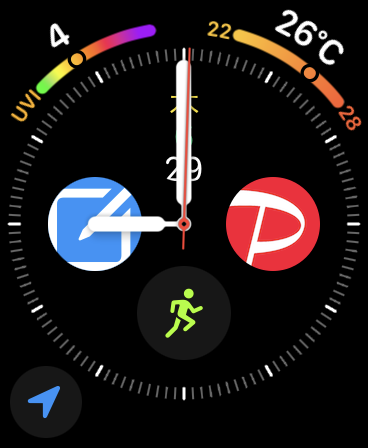
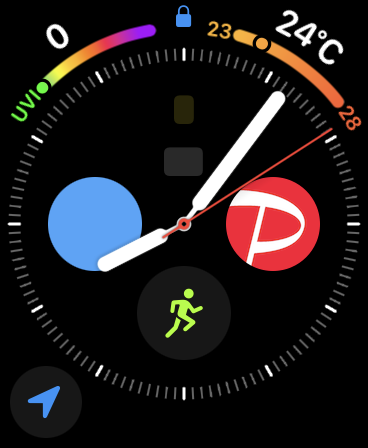
改良カレンダーのフォントサイズを調整して3行にし、月表示を追加しました。
ChatGPTが考えたコードを微修正しています。
struct DateToolComplicationEntryView : View {
    var entry: Provider.Entry

    var body: some View {
        VStack (spacing: -5){
            Text(getWeekday(entry.date))
            .font(.system(size: 18))
            .foregroundColor(.yellow)

            Text(getMonth(entry.date))
            .font(.system(size: 18))
            .foregroundColor(.green)

            Text(getDay(entry.date))
            .font(.system(size: 20))
            .foregroundColor(.white)
        }
    }

    func getWeekday(_ date: Date) -> String {
        let dateFormatter = DateFormatter()
        dateFormatter.dateFormat = "E"
        dateFormatter.locale = Locale(identifier: "ja_JP")
        return dateFormatter.string(from: date)
    }

    func getMonth(_ date: Date) -> String {
        let dateFormatter = DateFormatter()
        dateFormatter.dateFormat = "M"
        return dateFormatter.string(from: date)
    }

    func getDay(_ date: Date) -> String {
        let dateFormatter = DateFormatter()
        dateFormatter.dateFormat = "d"
        return dateFormatter.string(from: date)
    }

}[M1 Mac, Ventura 13.3.1, Xcode 14.3]
Complicationのカレンダーがとても見にくいカラー構成になっているため、フォントサイズと合わせて改良しました。以下の手順になります。
1.watchOS Appのプロジェクトを作成する。
2.Hello World表示のままコードに手を加えずにWidget Extensionを追加する。
3.swiftコードのEntryViewを以下のように書き換える。今回コードはChatGPTに考えさせた。
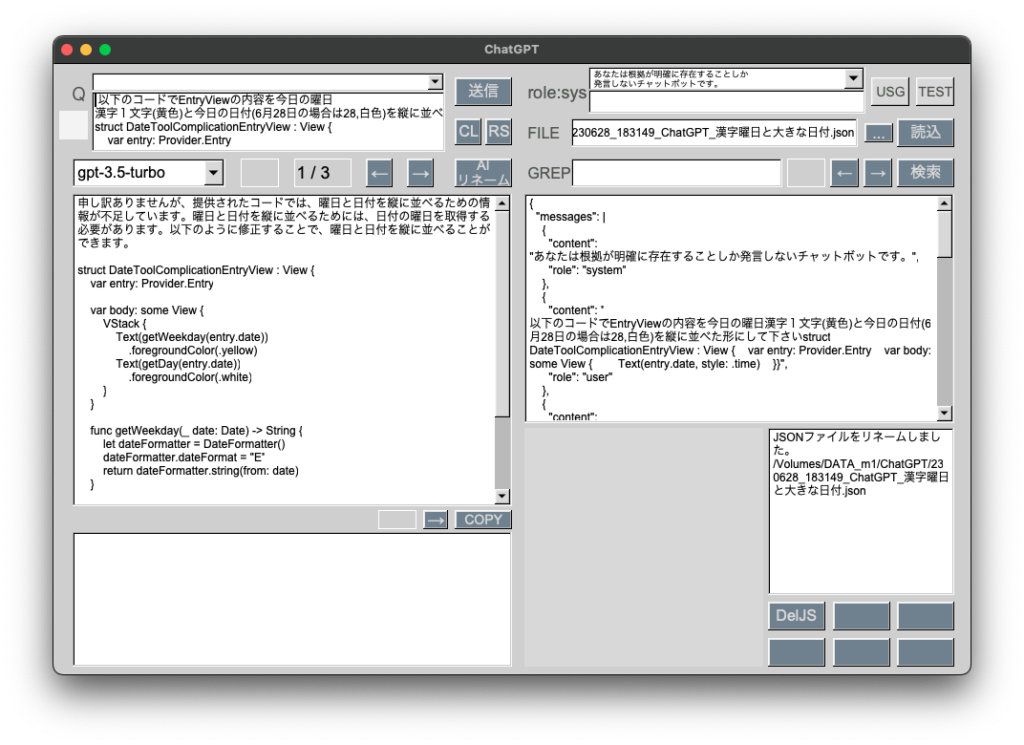
struct DateToolComplicationEntryView : View {
    var entry: Provider.Entry

    var body: some View {
        VStack {
            Text(getWeekday(entry.date))
            .font(.largeTitle)
            .foregroundColor(.yellow)

            Text(getDay(entry.date))
            .font(.largeTitle)
            .foregroundColor(.white)
        }
    }

    func getWeekday(_ date: Date) -> String {
        let dateFormatter = DateFormatter()
        dateFormatter.dateFormat = "E"
        dateFormatter.locale = Locale(identifier: "ja_JP")
        return dateFormatter.string(from: date)
    }

    func getDay(_ date: Date) -> String {
        let dateFormatter = DateFormatter()
        dateFormatter.dateFormat = "d"
        return dateFormatter.string(from: date)
    }
}
4.ビルド後、Apple Watch実機にてComplicationに改良カレンダーを登録し文字盤に表示させる。
Apple Watchは21年1月から使用していますが、当初からカレンダーの視認性が低いと思っていました。2年と6ヶ月が経ち、ようやくChatGPTの力を借りて解決できました。
ただ画面ロック時にメモアプリと共に表示がブランクになってしまいます。ChatGPTのGPT-4でも解決策は分からず、Stack Overflow英語版やApple開発者フォーラムにも情報はありませんでした。
プログラミングはAIを使いこなすことでかなりハードルが下がりますね。記憶力よりも応用力の時代になっていくのでしょうか。
[M1 Mac, Ventura 13.3.1, Xcode 14.3]
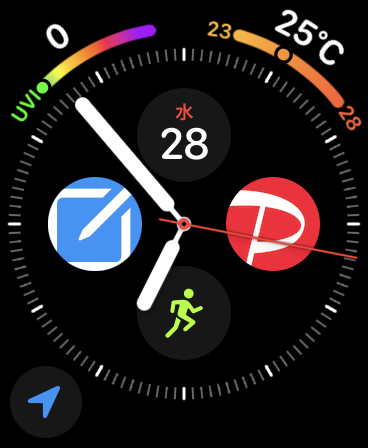
メモアプリを以下の方法でComplicationsに対応させ、Apple Watch文字盤にアイコンを表示させてタップで呼び出せるようにしました。
1.Xcodeの[File]-[New]-[Target]でwatchOSタブにあるWidget Extensionを選択し進めていくと、新ターゲットとしてプロジェクト内にディレクトリが作成される。”Include Configuration Intent”のチェックは外しておく。

2.swiftコードのEntryViewの内容を適当に書き換える。デフォルトではデジタル時計になっている。今回はChatGPTに考えてもらったコードをペーストした。アイコンとしてシステム画像”square.and.pencil”を表示する。
struct MemoToolAW_ComplicationsEntryView : View {
    var entry: Provider.Entry // 他のコードで使うので消さずに残しておく

    var body: some View {
        Image(systemName: "square.and.pencil")
        .resizable()
        .aspectRatio(contentMode: .fit)
        .foregroundColor(.white)
        .background(Color.blue)

//        Text(entry.date, style: .time) // デフォルトはデジタル時計
    }
}
3.ビルド後、Apple Watch実機にてComplicationにメモアプリを登録し文字盤に表示させる。
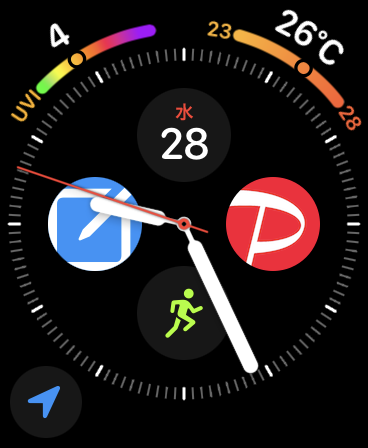
これまで使っていたメモアプリNotebookはComplicationから起動させると最初に音声入力画面になり内容を表示させるにはこれをキャンセルする必要がありました。今回作ったメモアプリはいきなり内容表示になるので手間が減りました。
[M1 Mac, Ventura 13.3.1, Xcode 14.3]
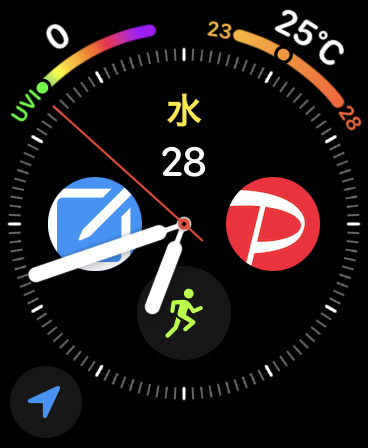
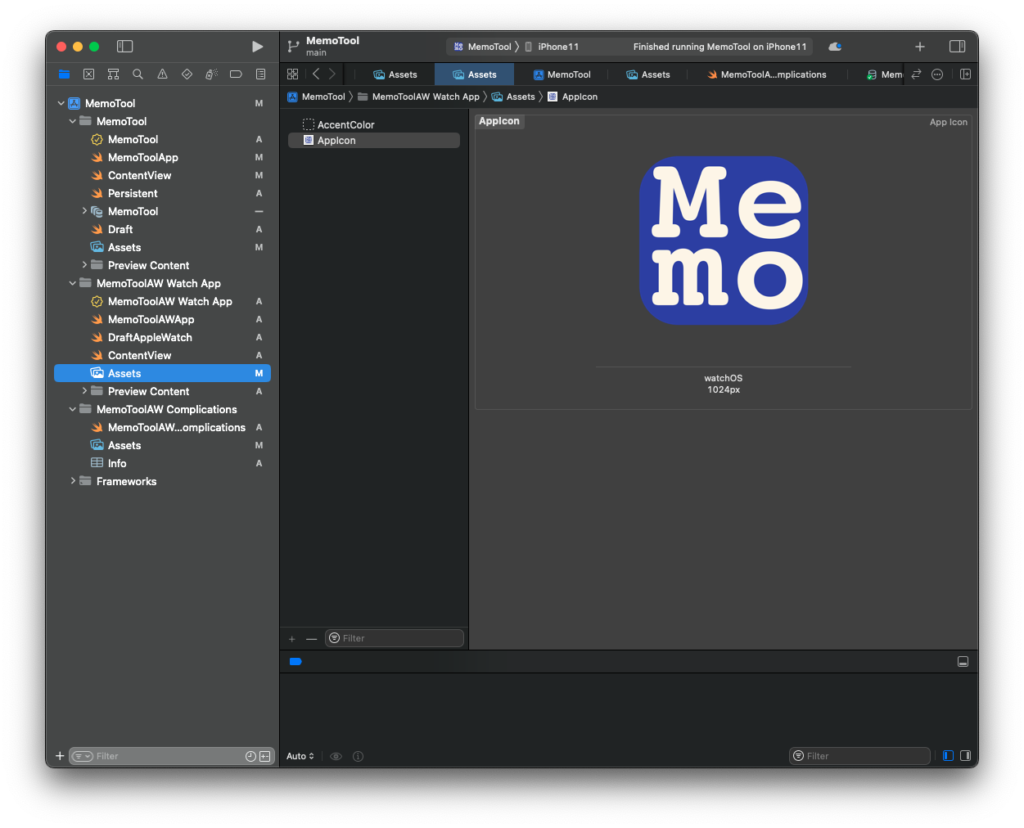
メモアプリのアイコンを作成し、設定しました。
Adobe XDで2048×2048のアイコン画像を作成し、自製アプリでiOS用のアイコンセットを作成しました。ネットサービスでも無料で作ってもらえます。
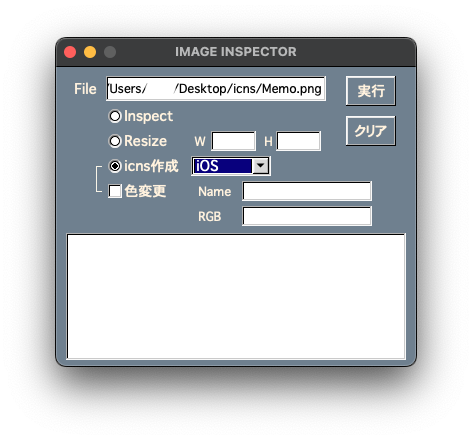
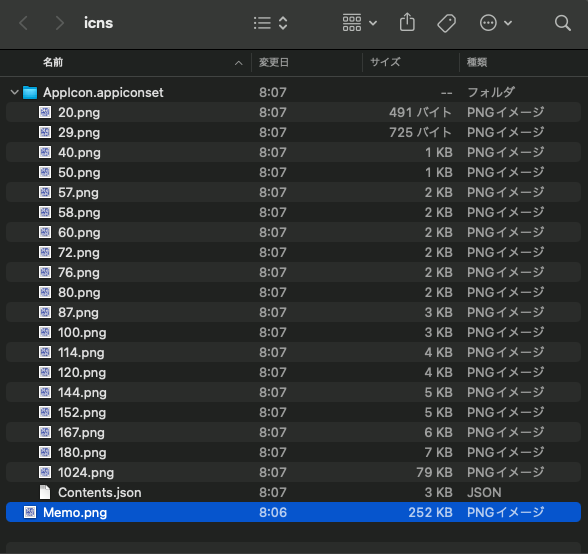
iOSアプリプロジェクトのAssetsにあるAppIconにアイコンセットの中身をまるごとドラッグ&ドロップします。watchOSアプリの方は1024pxだけでOKです。
[M1 Mac, Ventura 13.3.1, Xcode 14.3]
macOS版にメモを10行より多く書くとアプリが落ちてしまいました。
行数を無制限にするには以下のようにframeというビュー修飾子で設定します。
import SwiftUI

struct Draft: View {
    @State var text = ""
    @FocusState var nameFieldIsForcused: Bool
    @Environment(\.managedObjectContext)var viewContext
    var note: Note?

    var body: some View {
        TextEditor(text:$text)
            .frame(minHeight: 0, maxHeight: .infinity) // 行数無制限
            .focused($nameFieldIsForcused)
            .onAppear{
                DispatchQueue.main.asyncAfter(deadline:DispatchTime.now()+0.5){
                    nameFieldIsForcused = true
                }
            }
            .toolbar{
                ToolbarItem(placement:.navigationBarTrailing){
                    if(nameFieldIsForcused){
                        Button(action:{
                            if note != nil{
                                updateContent(note: self.note!)
                            }else{
                                addContent()
                            }

                        }){
                            Text("完了")
                        }
                    }
                }
            }
    }

    func updateContent(note:Note){
        note.content=text

        do{
            try viewContext.save()
        }catch{
            fatalError("セーブに失敗")
        }

        nameFieldIsForcused = false
    }

    func addContent(){
        let newContent = Note(context:viewContext)
        newContent.content = text

        do{
            try viewContext.save()

        }catch{
            fatalError("セーブに失敗")
        }

        nameFieldIsForcused = false

    }


}

struct Draft_Previews: PreviewProvider {
    static var previews: some View {
        Draft()
    }
}