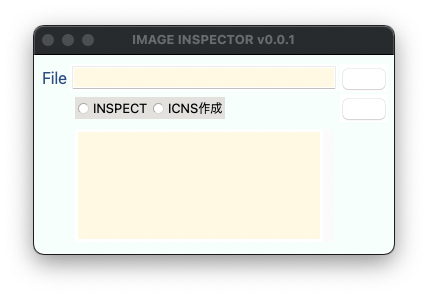
[M1 Mac, Big Sur 11.6.5]
2048*2048, dpi=72のpngファイルからicnsファイルを一発作成できるようにしました。手作業の時に比べたらかなりの省力化になります。
昨日の段階ではプログラムでpngの解像度を上げる方法がわかりませんでしたが、一旦jpgに変換するとdpiを72から144に上げることができました。
せっかくなのでTkinterでGUIアプリにしようとしましたが、相変わらずApple Siliconに対応できておらずButtonが真っ白のままです。PyQt5はHomebrewでインストールできたもののimportエラーになりました。PyQt5ディレクトリの中を確認するとほぼ空でした。Apple Siliconには非対応なのでインストールが中断していたのでしょう。
PyQt6をwhlファイルでインストールするとテストコードが正常に走りました。これでしばらく遊んでみます。なおGPLライセンス版なのでアプリ配布の際はコード開示請求に応える義務があります。
2022/03/25追記
pngからjpgに変換しなくても解像度を上げられましたので後日コードをアップします。
from PIL import Image
import subprocess

filepath0 = 'test0.png' # 2048*2048 dpi=72
filepath0_jpg = 'test.jpg' # 1024*1024 dpi=144
filepath = 'test.png' # 1024*1024 dpi=144
filepath2 = 'test2.png' # 512*512 dpi=72
filedir = '/test/test.iconset/'

img1 = Image.open(filepath0).convert("RGB")
# 512*512 dpi=72
img1_resize = img1.resize((512,512))
img1_resize.save(filepath2)

# dpi=144にするため一旦jpgへ変換
img1_resize2 = img1.resize((1024,1024))
img1_resize2.save(filepath0_jpg,dpi=(144,144))
# jpgをpngへ変換
img3 = Image.open(filepath0_jpg).convert("RGBA")
img3.save(filepath,dpi=(144,144))

pixels = [32, 64, 256, 512, 1024]
pixels2 = [16, 32, 64, 256, 512]
filepaths = ['icon_16x16@2x.png','icon_32x32@2x.png','icon_128x128@2x.png','icon_256x256@2x.png','icon_512x512@2x.png']
filepaths2 = ['icon_16x16.png','icon_32x32.png','icon_128x128.png','icon_256x256.png','icon_512x512.png']

# dpi=144の各種pngファイル作成
for pixel,file in zip(pixels,filepaths):
    img = Image.open(filepath)
    img_resize = img.resize((pixel,pixel))
    img_resize.save(filedir + file)
    img.close()

# dpi=72の各種pngファイル作成
for pixel,file in zip(pixels2,filepaths2):
    img = Image.open(filepath2)
    img_resize = img.resize((pixel,pixel))
    img_resize.save(filedir + file)
    img.close()

# icnsファイル作成
cmd = 'iconutil -c icns test.iconset'
subprocess.run(cmd, cwd=r"/test",shell=True)
