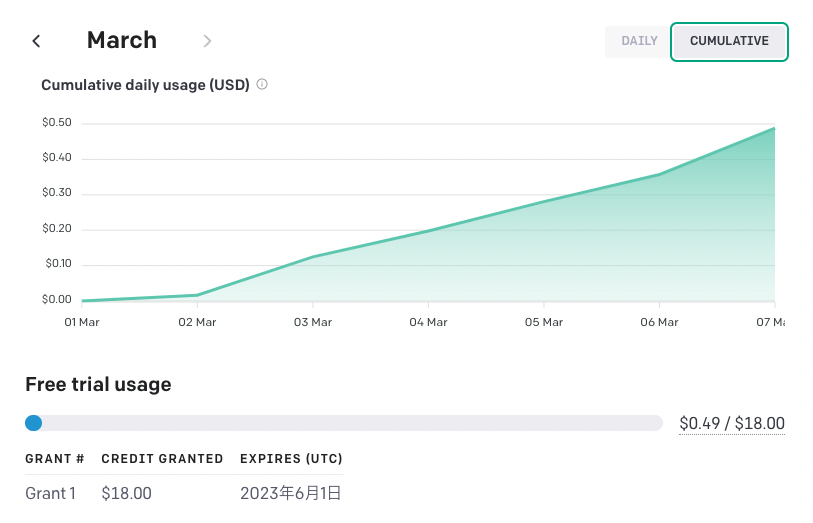
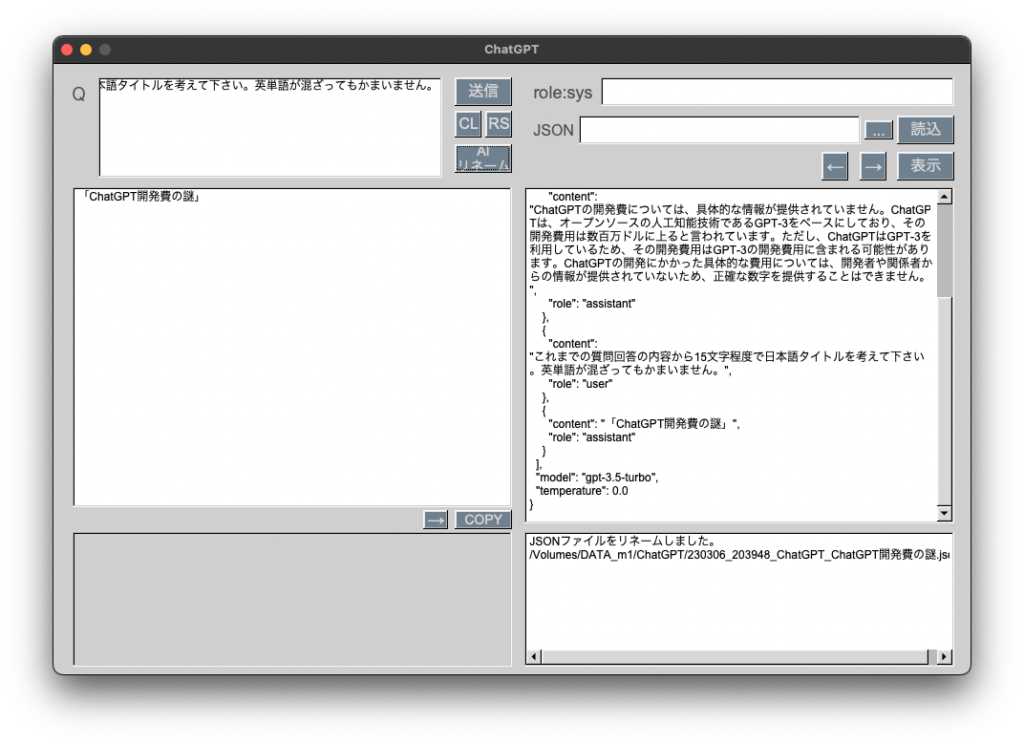
[C++] 273 FLTK : ChatGPTアプリの製作 その2 質問を積み上げていく

[M1 Mac, Monterey 12.6.3, clang 13.0.0, FLTK 1.3.8, ChatGPT Plus, NO IDE]

ChatGPT APIでは質問と回答をJSON形式データに追加していき、stringとして送信します。ソースコードなどを送受信しても問題がないよう質問と回答内のダブルクォートや改行文字をエスケープするようにしています。

roleをsystemにして”あなたは熟練のプログラマです”などとキャラ付けも可能です。

色々とややこしすぎて疲れました。ここまで出来たら後はのんびり進めていきます。

#include <ChatGPT.h>

using json = nlohmann::json;

extern json jsonData;

int count;
string requestData;

// Utility function to write response data to a string
size_t writeCallback(char* buf, size_t size, size_t nmemb, void* up) {
    // Append the response data to the string
    ((string*)up)->append((char*)buf, size * nmemb);
    return size * nmemb;
}

// json chatWithOpenAI(const string& question) {
json chatWithOpenAI(string question) {
    
    // Set up the request parameters
    string url = "https://api.openai.com/v1/chat/completions";

    const char* apiKey;
    apiKey = getenv("CHATGPT_API_KEY");

    if (apiKey == NULL) {
        // appファイルは環境変数を取得できない
        apiKey = "APIキー";
    }

    cout << "apiKey: " << apiKey << endl;
    string authHeader = "Authorization: Bearer " + string(apiKey);
    curl_slist* headers = {};
    headers = curl_slist_append(headers, authHeader.c_str());
    headers = curl_slist_append(headers, "Content-Type: application/json");

    size_t pos = 0;
    while ((pos = question.find('"', pos)) != string::npos) {
        question.replace(pos, 1, "\\\"");
        pos += 2;
    }

    pos = 0;
    while ((pos = question.find('\n', pos)) != string::npos) {
        question.replace(pos, 1, "\\n");
        pos += 2;
    }

    if (count == 0){
        requestData = R"({"model":"gpt-3.5-turbo", "messages":[{"role":"user","content":")" + question + R"("}], "temperature":0.0})";
        cout << "requestData: " << requestData << endl;
        count++;
    } else {
        question = R"({"role":"user","content":")" + question + R"("})";
        json questionJson = json::parse(question);
        jsonData["messages"].push_back(questionJson);
        requestData = jsonData.dump();
        cout << "2回目以降質問追加 jsonData: " << requestData << endl;
    }
    
    string responseData = "";


    // Set up a curl session
    CURL* curl = curl_easy_init();
    if (curl) {
        // Set the request options
        curl_easy_setopt(curl, CURLOPT_URL, url.c_str());
        curl_easy_setopt(curl, CURLOPT_HTTPHEADER, headers);
        curl_easy_setopt(curl, CURLOPT_POSTFIELDS, requestData.c_str());
        curl_easy_setopt(curl, CURLOPT_WRITEFUNCTION, writeCallback);
        curl_easy_setopt(curl, CURLOPT_WRITEDATA, &responseData);

        // Send the request
        CURLcode res = curl_easy_perform(curl);
        if (res != CURLE_OK) {
            cerr << "curl_easy_perform() failed: " << curl_easy_strerror(res) << endl;
        }

        // Clean up
        curl_easy_cleanup(curl);

    } else {
        cerr << "curl_easy_init() failed" << endl;
    }

    // Parse the response data and extract the chat response
    json responseJson = json::parse(responseData);

    return responseJson;
}
回答追加後jsonData: {"messages":[
{"content":"ChatGPTとは","role":"user"},
{"content":"ChatGPTは、人工知能による自然言語処理技術を用いたチャットボットです。
ユーザーがChatGPTに質問や会話をすると、ChatGPTは自然な言葉で返答を行います。
ChatGPTは、様々なトピックに関する知識を持っており、ユーザーが何を求めているかを理解し、
適切な回答を提供することができます。ChatGPTは、オンラインカウンセリングやカスタマーサポート、
教育などの分野で活用されています。","role":"assistant"},
{"content":"どのように模倣するのですか","role":"user"},
{"content":"ChatGPTは、自然言語処理技術を用いて、人間が話す言葉を理解し、
それに適切な返答を生成することができます。ChatGPTは、大量のテキストデータを学習し、
その中からパターンを抽出して、自然な言葉での返答を生成することができます。
ChatGPTは、深層学習アルゴリズムを使用して、自己学習を行い、より正確な返答を生成するように改善されます。
ChatGPTは、人間の言語を模倣するために、自然言語処理技術と機械学習技術を組み合わせて使用しています。","role":"assistant"},
{"content":"どのようなプログラムですか","role":"user"},
{"content":"ChatGPTは、自然言語処理技術を用いたチャットボットのプログラムです。
ChatGPTは、Pythonプログラミング言語を使用して開発されており、深層学習ライブラリであるPyTorchを
使用しています。
ChatGPTは、大量のテキストデータを学習するために、トランスフォーマーと呼ばれる
ニューラルネットワークモデルを使用しています。ChatGPTは、オープンソースであり、
誰でも自由に使用することができます。
ChatGPTは、自然言語処理技術を用いたチャットボットのプログラムとして、オンラインカウンセリングや
カスタマーサポート、教育などの分野で活用されています。","role":"assistant"}],
"model":"gpt-3.5-turbo","temperature":0.0}

[C++] 272 FLTK : ChatGPTアプリの製作 その1 ChatGPT API

[M1 Mac, Monterey 12.6.3, clang 13.0.0, FLTK 1.3.8, ChatGPT Plus, NO IDE]

FLTKでChatGPTアプリを製作します。あくまで私個人用です。

とりあえずたたき台を作成しました。返信されたJSONをそのまま表示しています。

#include <FLstd.h>
#include <cppstd.h>
#include <ChatGPT.h>

Fl_Input* input;
Fl_Text_Display* output;

void sendCB(Fl_Widget*, void*) {
	const char* question0 = input->value();
	string question = string(question0);
	json response = chatWithOpenAI(question);
	string resDump = response.dump();
	cout << resDump << endl;

	Fl_Text_Buffer *buffer = new Fl_Text_Buffer();
	buffer -> text(resDump.c_str());

	output -> buffer(buffer);
	output -> wrap_mode(Fl_Text_Display::WRAP_AT_BOUNDS, 5);
}

int main(int argc, char **argv) {
	Fl_Window* window = new Fl_Window (100, 100, 960, 640, "ChatGPT");
	window->color(fl_rgb_color(208,207,207));
	 
	// Question label
	Fl_Box* inputLabel = new Fl_Box(14,22,26,23,"Q");
	inputLabel->labelsize(18);
	inputLabel->labelcolor(fl_rgb_color(62,66,60));
	inputLabel->align(Fl_Align(FL_ALIGN_INSIDE|FL_ALIGN_LEFT));

	// Question input
	input = new Fl_Input(47,18,360,30,"");
	input->textsize(12);
    	
	// sendBtn
	Fl_Button* sendBtn = new Fl_Button(420,13,60,40,"送信");
	sendBtn->color(fl_rgb_color(112,128,144));
	sendBtn->labelcolor(fl_rgb_color(208,207,207));
	sendBtn->labelsize(16);
	sendBtn->callback(sendCB);

	// Response
	output = new Fl_Text_Display(30,70,448,552,"Response");
	output->labelcolor(fl_rgb_color(62,66,60));
	output->textsize(12);
	output->align(Fl_Align(FL_ALIGN_TOP_RIGHT));
	output->labelsize(10);

	window->end();  
	window->show(argc, argv);

	return Fl::run();
}
[C++] 271 ChatGPT APIをC++で使ってみる

[M1 Mac, Monterey 12.6.3, clang 13.0.0, ChatGPT Plus, NO IDE]

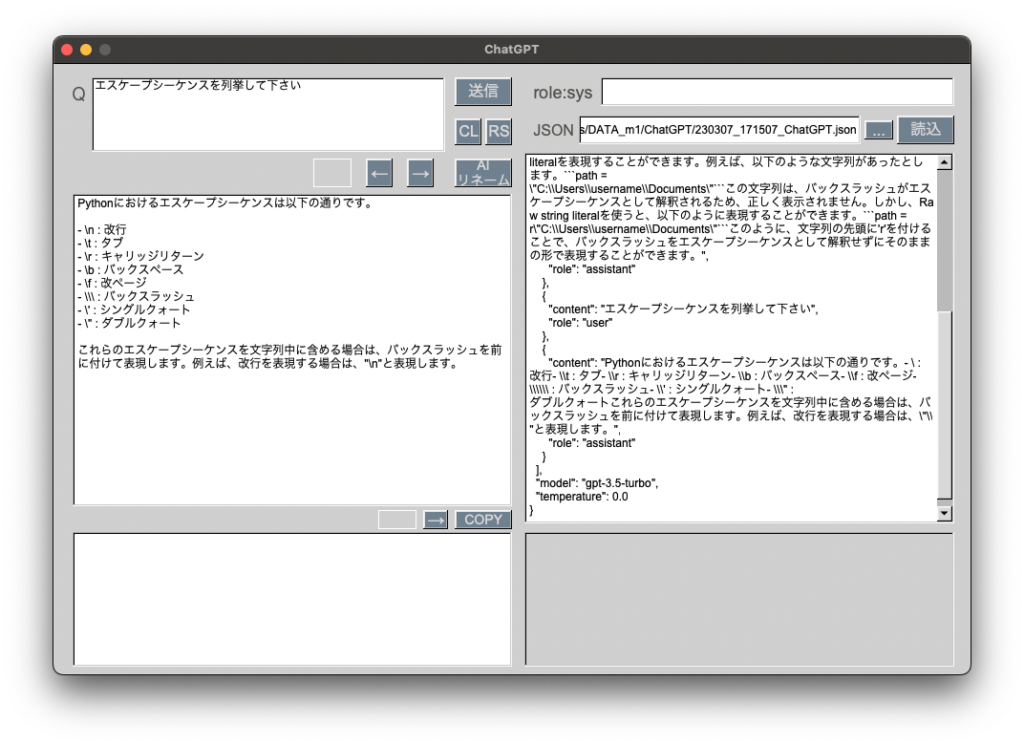
本日2023年3月2日からChatGPT APIが公開されたので早速使ってみました。

C++でChatGPTツールを製作し、ChatGPT Plusは解約して格安で使ってやろうという算段です。

#include <cppstd.h> // 自製ヘッダ
#include <curl/curl.h>
#include <nlohmann/json.hpp>

using json = nlohmann::json;

// Utility function to write response data to a string
size_t writeCallback(char* buf, size_t size, size_t nmemb, void* up) {
    // Append the response data to the string
    ((string*)up)->append((char*)buf, size * nmemb);
    return size * nmemb;
}

json chatWithOpenAI(const string& question) {
    // Set up the request parameters
    string url = "https://api.openai.com/v1/chat/completions";
    string apiKey = getenv("CHATGPT_API_KEY");
    string authHeader = "Authorization: Bearer " + apiKey;

    curl_slist* headers = nullptr;
    headers = curl_slist_append(headers, authHeader.c_str());
    headers = curl_slist_append(headers, "Content-Type: application/json");

    string requestData = R"({"model":"gpt-3.5-turbo", "messages":[{"role":"user","content":")" + question + R"("}], "temperature":0.0})";
    string responseData;

    cout << "requestData: " << requestData << endl;

    // Set up a curl session
    CURL* curl = curl_easy_init();
    if (curl) {
        // Set the request options
        curl_easy_setopt(curl, CURLOPT_URL, url.c_str());
        curl_easy_setopt(curl, CURLOPT_HTTPHEADER, headers);
        curl_easy_setopt(curl, CURLOPT_POSTFIELDS, requestData.c_str());
        curl_easy_setopt(curl, CURLOPT_WRITEFUNCTION, writeCallback);
        curl_easy_setopt(curl, CURLOPT_WRITEDATA, &responseData);

        // Send the request
        CURLcode res = curl_easy_perform(curl);
        if (res != CURLE_OK) {
            cerr << "curl_easy_perform() failed: " << curl_easy_strerror(res) << endl;
        }

        // Clean up
        curl_easy_cleanup(curl);

    } else {
        cerr << "curl_easy_init() failed" << endl;
    }

    // Parse the response data and extract the chat response
    json responseJson = json::parse(responseData);

    return responseJson;
}

int main() {
    string question = "iOSアプリをObjective-CやSwift以外の言語で作れますか";
    json response = chatWithOpenAI(question);
    cout << response.dump() << endl;
    return 0;
}
{"choices":[{"finish_reason":"stop","index":0,"message":
{"content":"\n\niOSアプリを作るためには、Appleが提供するiOS SDKを使用する必要があります。
iOS SDKはObjective-CやSwiftで書かれていますが、他の言語で書かれたアプリを作ることも可能です。\n\n
例えば、React NativeやXamarinなどのクロスプラットフォーム開発ツールを使用することで、
JavaScriptやC#などの言語でiOSアプリを作ることができます。
ただし、これらのツールはiOS SDKをラップしているため、一部の機能に制限がある場合があります。\n\n
また、C++やObjective-C++などの言語を使用してiOSアプリを作ることもできます。
ただし、iOS SDKの一部の機能にアクセスするためには、Objective-CやSwiftの知識が必要になる場合があります。\n\n
総じて、iOSアプリを作るためには、iOS SDKを使用する必要がありますが、他の言語を使用することも可能です。
ただし、iOS SDKの機能にアクセスするためには、Objective-CやSwiftの知識が必要になる場合があるため、
これらの言語を学ぶことをお勧めします。","role":"assistant"}}],"created":***,"id":"***","model":"gpt-3.5-turbo-0301","object":"chat.completion","usage":{"completion_tokens":348,"prompt_tokens":27,"total_tokens":375}}

[C++] 270 SDL : テトリス画面収録 その2 psコマンド プロセスID

[M1 Mac, Monterey 12.6.3, clang 13.0.0, SDL 2.26.2, ChatGPT Plus, NO IDE]

CPUの別コアで並列実行した画面収録をゲームオーバー時に自動で終わらせるようにしました。前回発生したx座標のズレは修正済です。

psコマンドでFFmpeg関連のプロセスIDを取得し、順次killコマンドで停止するという内容です。

ただappファイルについては収録開始時に環境設定のセキュリティで画面収録を都度許可する必要がありプレイに支障があります。おそらくApple公証を通せば許可不要になると思います。実行ファイルは問題ありません。

ChatGPTを使うようになってから、プログラミングに関する調査でGoogleを使う頻度が激減しました。ただ一見考えているようで何も考えていないので、自身のコード検証力が問われるところです。

// 文字列分割(psコマンドにおける出力を処理)
vector<string> splitString(string s, string delimiter) {
    vector<string> tokens;
    size_t delimiterPos = s.find(delimiter);
    while (delimiterPos != string::npos) {
        string token = s.substr(0, delimiterPos);
        tokens.push_back(token);
        s.erase(0, delimiterPos + delimiter.length());
        delimiterPos = s.find(delimiter);
    }
    tokens.push_back(s);
    return tokens;
}

// プロセスID取得
vector<string> getProcessID(){
	FILE* pipe = popen("ps -ef | grep ffmpeg", "r");
    if (!pipe) return {};
	
    char buffer[512];
    string output = "";
    while (!feof(pipe)) {
        if (fgets(buffer, 128, pipe) != NULL)
            output += buffer;
    }
    pclose(pipe);

	cout << "output: " << output << endl;
	string userID = output.substr(2, 3);
	cout << "userID: " << userID << endl;

	vector<string> tokens = splitString(output, userID);
	vector<string> processIDs;
	for (int i = 0; i < tokens.size(); i++){
		cout << "token: " << tokens[i] << endl;
		string id = tokens[i].substr(1, 5);
		processIDs.push_back(id);
		cout << "id: " << id << endl;
	}

    return processIDs;
}

// プロセスID停止
void stopProcess(){
	vector<string> ids = getProcessID();

	for (string id: ids){
		string cmd = "kill " + id;

		if(!system(cmd.c_str())){
			cout << "id不適合" << endl;
		};
	}
}

[C++] 269 SDL : テトリス画面収録 その1 FFmpegを並列実行

[M1 Mac, Monterey 12.6.3, clang 13.0.0, SDL 2.26.2, ChatGPT Plus, NO IDE]

テトリスのプレイ画面収録機能を実装中です。

ffmpegコマンドをCPUの別コアで並列実行します。コマンドの末尾に&を付けると別コアでの実行になります。そうしないと録画が終わるまでゲーム開始が保留状態です。

録画開始はスムーズですが、録画停止についてはプロセスIDを終了させる必要があります。これからコードを書いていきます。

画面のx座標がなぜかズレているため要調整です。

ズレて収録されたプレイ動画
void App::Run()
{
	Uint32 lastTimeMs = SDL_GetTicks();
	auto lastTime = std::chrono::high_resolution_clock::now();

	bool bDone = false;
	while(!bDone )
	{
		GameInput gameInput = {};
		SDL_JoystickUpdate();

		// respond to events
		SDL_Event event;
		while( SDL_PollEvent( &event ) )
		{
			if(event.type == SDL_QUIT)
			{
				bDone = true;
			}

			// 落下速度ボタン選択
			if(event.type == SDL_MOUSEBUTTONDOWN)
			{
				mouseX = event.motion.x;
				mouseY = event.motion.y;
				SDL_Delay(10);
				selectButton(slowButton, normalButton, fastButton, mouseX, mouseY);
			}

			if(event.type == SDL_JOYBUTTONDOWN)
			{
				switch (event.jbutton.button){
					case 2:{	// □ボタン:スタート
						gameInput.bStart = true;
						start = std::chrono::steady_clock::now();
						scores = {};
						dates = {};
						fullDates = {};
						numAllScores = {};
						rank = 0;
						DrawPlayingCount = 0;
						GeneratorCount = 0;
						arr = {};
						modeDetect();

						// 画面収録開始						
						string cmd = "/opt/homebrew/bin/ffmpeg -f avfoundation -framerate 30 -video_size 1280x720 -i \"Capture screen 0\" -vf \"crop=1280:720:400:150\" -vcodec libx264 -pix_fmt yuv420p -r 30 -preset ultrafast -tune zerolatency -crf 28 -x264-params \"nal-hrd=cbr:force-cfr=1\" -maxrate 3M -bufsize 6M /Users/[ユーザID]/TetrisDX/video/test.mp4 &";
						system(cmd.c_str());

						break;
					}
					case 13:{	// 左ボタン
						gameInput.bMoveLeft = true;
						break;
					}
					case 14:{	// 右ボタン
						gameInput.bMoveRight = true;
						break;
					}
					case 1:{	// ○ボタン:反時計回り回転
						gameInput.bRotateClockwise = true;
						break;
					}
					case 0:{	// ×ボタン:時計回り回転
						gameInput.bRotateAnticlockwise = true;
						break;
					}
					case 12:{	// 下ボタン:一気に落下
						gameInput.bHardDrop = true;
						break;
					}
					case 11:{	// 上ボタン:徐々に落下
						gameInput.bSoftDrop = true;
						break;
					}
					case 10:{	// R1ボタン:落下速度ボタン選択
						buttonCount++;
						if (buttonCount % 3 == 1){
							fastButton.selected = true;
							normalButton.selected = false;
							s_initialFramesPerFallStep = 24;

						} else if (buttonCount % 3 == 2){
							slowButton.selected = true;
							fastButton.selected = false;
							s_initialFramesPerFallStep = 48;

						} else {
							normalButton.selected = true;
							slowButton.selected = false;
							s_initialFramesPerFallStep = 32;
						}
						break;
					}
					case 9:{	// L1ボタン:スタート画面
						m_gameState = kGameState_TitleScreen;
						break;
					}
					case 6:{	// optionsボタン:ゲーム終了
						// cout << "ゲーム終了" << endl;
						bDone = true;
						break;
					}
					default:{
						// cout << "default" << endl;
						break;
					}
				}
			}
		}

		Uint32 currentTimeMs = SDL_GetTicks();
		Uint32 deltaTimeMs = currentTimeMs - lastTimeMs;
		lastTimeMs = currentTimeMs;
		HP_UNUSED( deltaTimeMs );
		
		auto currentTime = std::chrono::high_resolution_clock::now();
		auto deltaTime = currentTime - lastTime;
		std::chrono::microseconds deltaTimeMicroseconds = std::chrono::duration_cast<std::chrono::microseconds>(deltaTime);
		float deltaTimeSeconds = 0.000001f * (float)deltaTimeMicroseconds.count();
		lastTime = currentTime;

		mGame->Update(gameInput, deltaTimeSeconds );

		mRenderer->Clear();
		mGame->Draw( *mRenderer );
		mRenderer->Present();
	}
}

[C++] 268 実行ファイルからappファイルを作成 シェルスクリプトをバイナリ化 引数2つ

[M1 Mac, Monterey 12.6.3, clang 13.0.0, SDL 2.26.2, ChatGPT Plus, NO IDE]

Makefileのアプリファイル作成するところを1行減らすためにmakeAppコマンドの引数を2つに増やしました。

実行ファイル作成とappファイル作成がそれぞれ1行にまとまり、すっきりしました。

# 実行ファイル
TARGETDIR = ./bin
TARGET = TetrisDX

# oファイルから実行ファイル・appファイル作成
$(TARGET):$(OBJS)
	$(COMPILER) -o $(TARGETDIR)/$@ $(OBJS) $(LIBRARY0) $(LIBRARY) $(LDFLAGS)
	./sh/makeApp $(TARGETDIR) $(TARGET)
#!/bin/sh

cp $1/$2 $2
mkdir $2.app
mkdir $2.app/Contents
mkdir $2.app/Contents/MacOS
mv $2 $2.app/Contents/MacOS
mkdir $2.app/Contents/Resources
cp ./images/$2.icns $2.app/Contents/Resources
plutil -create xml1 $2.app/Contents/Info.plist
plutil -insert 'CFBundleInfoDictionaryVersion' -string "6.0" $2.app/Contents/Info.plist
plutil -insert 'CFBundleExecutable' -string $2 $2.app/Contents/Info.plist
plutil -insert 'CFBundleIdentifier' -string "" $2.app/Contents/Info.plist
plutil -insert 'CFBundleName' -string $2 $2.app/Contents/Info.plist
plutil -insert 'CFBundlePackageType' -string "APPL" $2.app/Contents/Info.plist
plutil -insert 'CFBundleIconFile' -string $2.icns $2.app/Contents/Info.plist
plutil -insert 'NSHighResolutionCapable' -bool true $2.app/Contents/Info.plist

[C++] 267 実行ファイルからappファイルを作成 シェルスクリプトをバイナリ化

[M1 Mac, Monterey 12.6.3, clang 13.0.0, SDL 2.26.2, ChatGPT Plus, NO IDE]

前回の続きです。

シェルスクリプトの内容を見られたくない場合はshcコマンドでバイナリ化します。

shcコマンドはshファイルをC言語に変換しコンパイルしてくれます。C言語のコードも同時に生成しますので、内容を解析するのも一興です。

chmodコマンドによるアクセス権限付与はいらなくなります。

# shcをインストール
homebrew install shc

# shファイルをバイナリ化(.xが末尾に付く)
shc -f shファイル
# 実行ファイル
TARGETDIR = ./bin
TARGET = TetrisDX

# oファイルから実行ファイル作成(makeApp.sh.xはmakeAppにリネーム)
$(TARGET):$(OBJS)
	$(COMPILER) -o $(TARGETDIR)/$@ $(OBJS) $(LIBRARY0) $(LIBRARY) $(LDFLAGS)
	cp $(TARGETDIR)/$(TARGET) $(TARGET)
	./sh/makeApp $(TARGET)
#!/bin/sh

mkdir $1.app
mkdir $1.app/Contents
mkdir $1.app/Contents/MacOS
mv $1 $1.app/Contents/MacOS
mkdir $1.app/Contents/Resources
cp ./images/$1.icns $1.app/Contents/Resources
plutil -create xml1 $1.app/Contents/Info.plist
plutil -insert 'CFBundleInfoDictionaryVersion' -string "6.0" $1.app/Contents/Info.plist
plutil -insert 'CFBundleExecutable' -string $1 $1.app/Contents/Info.plist
plutil -insert 'CFBundleIdentifier' -string "" $1.app/Contents/Info.plist
plutil -insert 'CFBundleName' -string $1 $1.app/Contents/Info.plist
plutil -insert 'CFBundlePackageType' -string "APPL" $1.app/Contents/Info.plist
plutil -insert 'CFBundleIconFile' -string $1.icns $1.app/Contents/Info.plist
plutil -insert 'NSHighResolutionCapable' -bool true $1.app/Contents/Info.plist

[C++] 266 実行ファイルからappファイルを作成 シェルスクリプト(引数あり)

[M1 Mac, Monterey 12.6.3, clang 13.0.0, SDL 2.26.2, ChatGPT Plus, NO IDE]

前回記事でMakefileで実行ファイルからappファイルを作成できるようにしましたが、そこだけ長ったらしくなるので引数ありシェルスクリプトにしてすっきりさせました。

chmodコマンドでアクセス権限を付与する必要があります。

# シバンは不要

mkdir $1.app
mkdir $1.app/Contents
mkdir $1.app/Contents/MacOS
mv $1 $1.app/Contents/MacOS
mkdir $1.app/Contents/Resources
cp ./images/$1.icns $1.app/Contents/Resources
plutil -create xml1 $1.app/Contents/Info.plist
plutil -insert 'CFBundleInfoDictionaryVersion' -string "6.0" $1.app/Contents/Info.plist
plutil -insert 'CFBundleExecutable' -string $1 $1.app/Contents/Info.plist
plutil -insert 'CFBundleIdentifier' -string "" $1.app/Contents/Info.plist
plutil -insert 'CFBundleName' -string $1 $1.app/Contents/Info.plist
plutil -insert 'CFBundlePackageType' -string "APPL" $1.app/Contents/Info.plist
plutil -insert 'CFBundleIconFile' -string $1.icns $1.app/Contents/Info.plist
plutil -insert 'NSHighResolutionCapable' -bool true $1.app/Contents/Info.plist
# oファイルから実行ファイル作成
$(TARGET):$(OBJS)
	$(COMPILER) -o $(TARGETDIR)/$@ $(OBJS) $(LIBRARY0) $(LIBRARY) $(LDFLAGS)
	cp $(TARGETDIR)/$(TARGET) $(TARGET)
	chmod 777 ./sh/makeApp.sh
	./sh/makeApp.sh $(TARGET)
# oファイルから実行ファイル作成
$(TARGET):$(OBJS)
	$(COMPILER) -o $(TARGETDIR)/$@ $(OBJS) $(LIBRARY0) $(LIBRARY) $(LDFLAGS)
	cp $(TARGETDIR)/$(TARGET) $(TARGET)
	mkdir $(TARGET).app
	mkdir $(TARGET).app/Contents
	mkdir $(TARGET).app/Contents/MacOS
	mv $(TARGET) $(TARGET).app/Contents/MacOS
	mkdir $(TARGET).app/Contents/Resources
	cp ./images/$(TARGET).icns $(TARGET).app/Contents/Resources
	plutil -create xml1 $(TARGET).app/Contents/Info.plist
	plutil -insert 'CFBundleInfoDictionaryVersion' -string "6.0" $(TARGET).app/Contents/Info.plist
	plutil -insert 'CFBundleExecutable' -string $(TARGET) $(TARGET).app/Contents/Info.plist
	plutil -insert 'CFBundleIdentifier' -string "" $(TARGET).app/Contents/Info.plist
	plutil -insert 'CFBundleName' -string $(TARGET) $(TARGET).app/Contents/Info.plist
	plutil -insert 'CFBundlePackageType' -string "APPL" $(TARGET).app/Contents/Info.plist
	plutil -insert 'CFBundleIconFile' -string $(TARGET).icns $(TARGET).app/Contents/Info.plist
	plutil -insert 'NSHighResolutionCapable' -bool true $(TARGET).app/Contents/Info.plist

[C++] 265 実行ファイルからappファイルを作成 plutilコマンド

[M1 Mac, Monterey 12.6.3, clang 13.0.0, SDL 2.26.2, ChatGPT Plus, NO IDE]

appファイルの中に格納するInfo.plistをMakefileで作成できるようになりました。

plutilコマンドはたまに使っていましたが、空のplistファイル作成からkey-valueを入力していくのは初めてでした。なおCFBundleExecutableなどのCFはCore Foundationの略です。NSは言わずと知れたNextstep。

これが最も正統な方法でしょう。少なくともFLTKのfltk-configよりも汎用性が高いです。XcodeでしたらInfo.plistは自動的に作成してくれるはず。

TARGETDIR = ./bin
TARGET = TetrisDX

# oファイルから実行ファイル・appファイル作成
$(TARGET):$(OBJS)
	$(COMPILER) -o $(TARGETDIR)/$@ $(OBJS) $(LIBRARY0) $(LIBRARY) $(LDFLAGS)
	cp $(TARGETDIR)/$(TARGET) $(TARGET)
	mkdir $(TARGET).app
	mkdir $(TARGET).app/Contents
	mkdir $(TARGET).app/Contents/MacOS
	mv $(TARGET) $(TARGET).app/Contents/MacOS
	mkdir $(TARGET).app/Contents/Resources
	cp ./images/$(TARGET).icns $(TARGET).app/Contents/Resources
	plutil -create xml1 $(TARGET).app/Contents/Info.plist
	plutil -insert 'CFBundleInfoDictionaryVersion' -string "6.0" $(TARGET).app/Contents/Info.plist
	plutil -insert 'CFBundleExecutable' -string $(TARGET) $(TARGET).app/Contents/Info.plist
	plutil -insert 'CFBundleIdentifier' -string "" $(TARGET).app/Contents/Info.plist
	plutil -insert 'CFBundleName' -string $(TARGET) $(TARGET).app/Contents/Info.plist
	plutil -insert 'CFBundlePackageType' -string "APPL" $(TARGET).app/Contents/Info.plist
	plutil -insert 'CFBundleIconFile' -string $(TARGET).icns $(TARGET).app/Contents/Info.plist
	plutil -insert 'NSHighResolutionCapable' -bool true $(TARGET).app/Contents/Info.plist
<?xml version="1.0" encoding="UTF-8"?>
<!DOCTYPE plist PUBLIC "-//Apple//DTD PLIST 1.0//EN" "http://www.apple.com/DTDs/PropertyList-1.0.dtd">
<plist version="1.0">
<dict>
	<key>CFBundleExecutable</key>
	<string>TetrisDX</string>
	<key>CFBundleIconFile</key>
	<string>TetrisDX.icns</string>
	<key>CFBundleIdentifier</key>
	<string></string>
	<key>CFBundleInfoDictionaryVersion</key>
	<string>6.0</string>
	<key>CFBundleName</key>
	<string>TetrisDX</string>
	<key>CFBundlePackageType</key>
	<string>APPL</string>
	<key>NSHighResolutionCapable</key>
	<true/>
</dict>
</plist>

[C++] 264 実行ファイルからappファイルを作成 fltk-config不使用

[M1 Mac, Monterey 12.6.3, clang 13.0.0, SDL 2.26.2, ChatGPT Plus, NO IDE]

FLTKソースコードのfltk-config.inの内容を確認しました。特殊なスクリプトを書いているわけではなくbashコマンドの組み合わせでした。

ただMakefileで一からinfo.plistを作ることはできず、あらかじめ作成しておいたinfo.plistをappファイル内にコピーするようにしました。

いまだにMakeは扱いづらいです。ChatGPTもさすがにMakefileには詳しくなく、自力で解決するしかないようです。

if test -n "$post"; then
    running=`uname`
    if test "$running" = "Darwin"; then
        # if FLTK targets MacOS+X11, apps need not be bundled
        if test `echo $LDLIBS | fgrep -c -e " -lX11"` = 1; then
            running=""
        fi
    fi
    case $running in
	Darwin)
	    echo Creating "'$post.app'" bundle for desktop...
	    id=`echo $post | tr ' ' '_'`

	    # Make the bundle directory and move the executable there
	    rm -rf "$post.app/Contents/MacOS"
	    mkdir -p "$post.app/Contents/MacOS"
	    mv "$post" "$post.app/Contents/MacOS"

	    # Make a shell script that runs the bundled executable
	    echo "#!/bin/sh" >"$post"
	    echo 'dir="`dirname \"$0\"`"' >>"$post"
	    echo 'exec "$dir/'"$post.app/Contents/MacOS/$post"'" "$@"' >>"$post"
	    chmod +x "$post"

	    # Make the simplest Info.plist needed for an application
	    cat >"$post.app/Contents/Info.plist" <<EOF
<?xml version="1.0" encoding="UTF-8"?>
<plist version="0.9">
    <dict>
	<key>CFBundleInfoDictionaryVersion</key>
	<string>6.0</string>
	<key>CFBundleExecutable</key>
	<string>$post</string>
	<key>CFBundleIdentifier</key>
	<string>org.fltk.$id</string>
	<key>CFBundleName</key>
	<string>$post</string>
	<key>CFBundlePackageType</key>
	<string>APPL</string>
	<key>NSHighResolutionCapable</key>
	<true/>
    </dict>
</plist>
EOF
	    ;;
    esac
fi
# oファイルから実行ファイル作成
$(TARGET):$(OBJS)
	$(COMPILER) -o $(TARGETDIR)/$@ $(OBJS) $(LIBRARY0) $(LIBRARY) $(LDFLAGS)
	cp $(TARGETDIR)/$(TARGET) $(TARGET)
	mkdir $(TARGET).app
	mkdir $(TARGET).app/Contents
	mkdir $(TARGET).app/Contents/MacOS
	mv $(TARGET) $(TARGET).app/Contents/MacOS
	mkdir $(TARGET).app/Contents/Resources
	cp ./images/$(TARGET).icns $(TARGET).app/Contents/Resources
	cp info.plist $(TARGET).app/Contents