[Obj-C++] 12 自製Makefileの改良 実行ファイルおよびappファイル比較

[M1 Mac, Big Sur 11.6.5, clang 13.0.0, no Xcode]

[Obj-C++] 10で書きましたが、自製Makefileで作成した実行ファイルでアプリ起動した場合View範囲に入ると緑色プラスマークが現れるのに対し、appファイルで起動するとマークが出てきません。

検証のため自製Makefileで実行ファイルとappファイルを作成、CMake経由でappファイルを作成できるように改良しました。

これまでと違うのは自製Makefileからappファイルを作成できるところです。ちなみにそのappファイルではプラスマークが出ませんでした。

まとめると以下のようになります。

自製Makefile作成 exeファイル:OK
自製Makefile作成 appファイル:NG
CMake作成 exeファイル:NG
CMake作成 appファイル:NG

どちらでも構わないのでappファイルでプラスマークを出現させたいところです。

# コンパイラ
COMPILER = clang++
DEBUG = -g

# オプション
CFLAGS = $(shell python3-config --includes) -std=c++11
LDFLAGS = $(shell python3-config --ldflags) -framework Cocoa

# includeパス(-I)
INCLUDE = -I./include -I/Library/Frameworks/Python.framework/Versions/3.10/include/python3.10
# ライブラリパス(-l)
LIBRARY0 = -lpython3.10

# 優先ライブラリパス(-L)
LIBRARY = -L/Library/Frameworks/Python.framework/Versions/3.10/lib

# ソースファイル
SRCDIR = ./src
SRCS = $(shell find $(SRCDIR) -type f)

# オブジェクトファイル
OBJDIR = ./obj
OBJS   = $(addprefix $(OBJDIR), $(patsubst ./src%,%,$(SRCS:.mm=.o)))

# 実行ファイル
TARGETDIR = ./bin
TARGET = XlsxConvertor

# コンパイル
$(OBJDIR)/%.o: $(SRCDIR)/%.mm
	$(COMPILER) $(CFLAGS) $(INCLUDE) $(DEBUG) -o $@ -c $<

# ビルド
$(TARGET):$(OBJS)
	$(COMPILER) -o $(TARGETDIR)/$@ $(OBJS) $(LDFLAGS) $(LIBRARY0) $(LIBRARY)

# ファイル削除
.PHONY : clean
clean:
	rm -rf $(OBJS) $(TARGETDIR)/$(TARGET) $(SRCDIR)/.DS_Store ./app/$(TARGET).app

# CMakeからappファイル作成
.PHONY : all
all:
	rm -rf build/* $(SRCDIR)/.DS_Store
	cd /projects/XlsxConvertor/build && cmake .. && make
	mkdir ./build/$(TARGET).app/Contents/Resources
	cp ./images/XlsxConvertor.icns ./build/$(TARGET).app/Contents/Resources
	plutil -replace 'CFBundleIconFile' -string "XlsxConvertor.icns" ./build/$(TARGET).app/Contents/Info.plist

# 自製Makefileから実行ファイル作成
.PHONY : exe
exe: clean $(TARGET)

# 自製Makefileから実行ファイルおよびappファイル作成
.PHONY : exeapp
exeapp: clean $(TARGET)
	mkdir ./app/$(TARGET)
	mkdir ./app/$(TARGET)/Contents
	mkdir ./app/$(TARGET)/Contents/MacOS
	mkdir ./app/$(TARGET)/Contents/Resources
	cp $(TARGETDIR)/$(TARGET) ./app/$(TARGET)/Contents/MacOS
	cp ./Info.plist ./app/$(TARGET)/Contents
	cp ./images/XlsxConvertor.icns ./app/$(TARGET)/Contents/Resources
	plutil -replace 'CFBundleIconFile' -string "XlsxConvertor.icns" ./app/$(TARGET)/Contents/Info.plist
	mv ./app/$(TARGET)/ ./app/$(TARGET).app/

# CMakeからappファイル、自製Makefileから実行ファイル作成
.PHONY : all2
all2:
	make all
	make exe

[Obj-C++] 10 Drag & Drop 実装完了(非Xib環境)

[M1 Mac, Big Sur 11.6.5, clang 13.0.0, no Xcode]

非Xcode非Xib環境でのDrag & Drop機能の実装が完了しました。

実行ファイルではViewに入るとカーソルの右下に緑色のプラスマークが出現しますが、appファイルでは下の動画でも分かるように表示されないのが不満です。

これでJavaやC++のようにエディタだけで開発する環境が整いました。

[Obj-C++] 08 Drag & Dropの検証 (非Xib環境)

[M1 Mac, Big Sur 11.6.5, clang 13.0.0, no Xcode]

Drag & Dropに関連するメソッドの動作を確認するため検証用コードを作成しました。

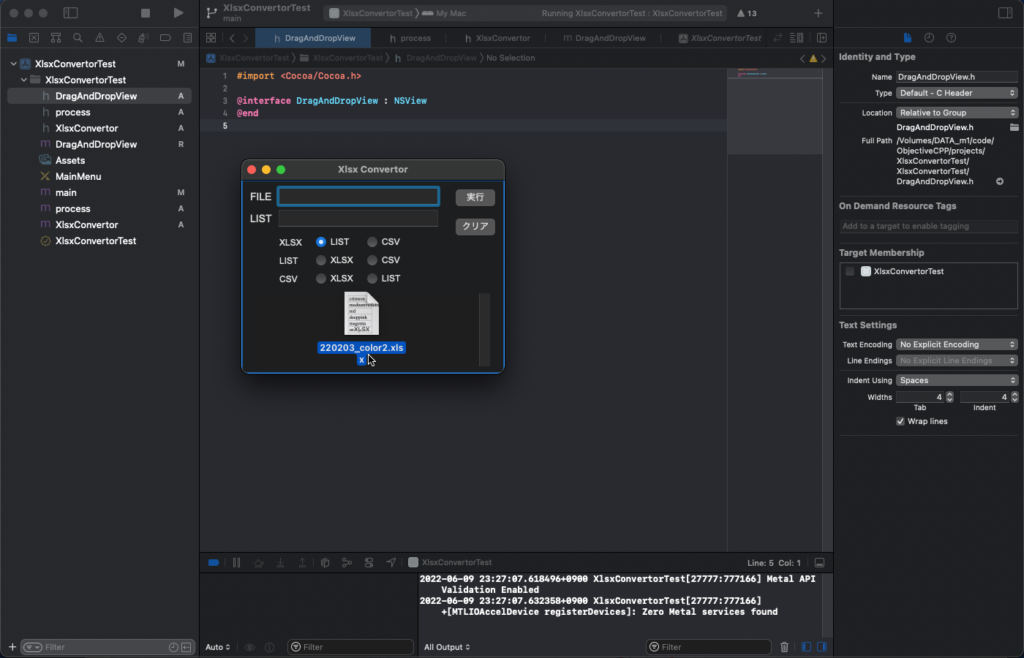
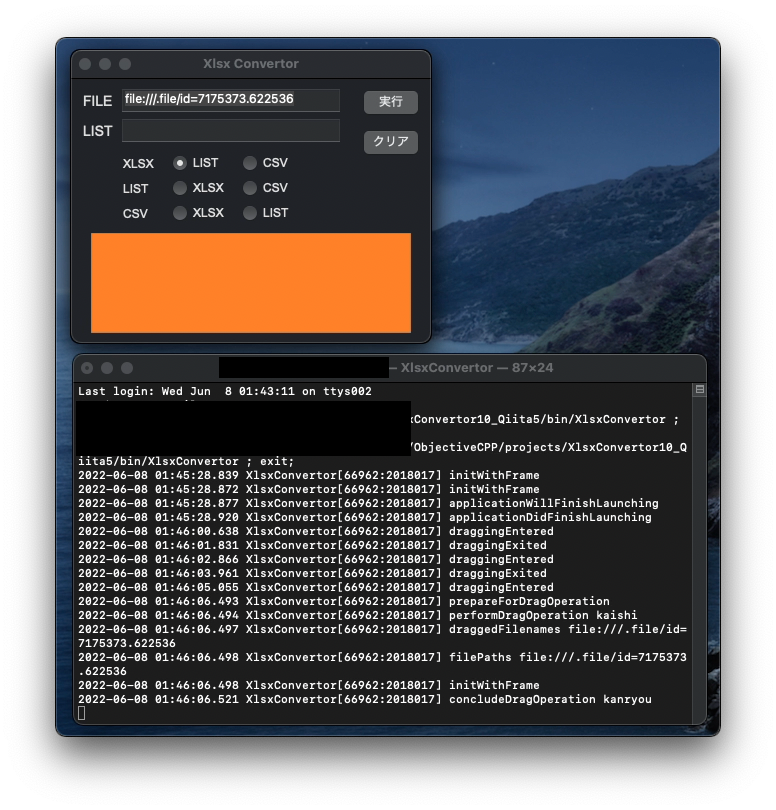
Window全体をドロップ領域のNSViewに設定してもうまくいかないので、オレンジ色の部分をドロップ領域にしました。ファイルのURLをペーストします。

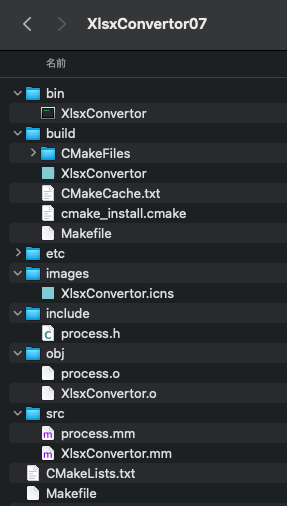
Xcodeを使わずInterfaceBuilderやXibなしでDrag & Dropができるかどうか不安でしたが杞憂でした。

あとはドロップ対象をWindow全体に変更して完了です。

2022/6/8追記:
NSViewの設定がうまくいかなかったのは相対座標ではなく絶対座標でWindowと同じ設定をしていたためでした。

#import "AppDelegate.h"
#import "DragAndDropView.h"
#import "XlsxConvertor.h"

@interface DragAndDropView ()
@property (nonatomic) BOOL highlight; 
@end

@implementation DragAndDropView

// 初期化時の処理
- (id)initWithFrame:(CGRect)frame {
    self = [super initWithFrame:frame];
    if (self) {
        [self setHighlight:NO];
        [self registerForDraggedTypes:[NSArray arrayWithObject:NSPasteboardTypeFileURL]];
    }
    NSLog(@"%s","initWithFrame");
    return self;
}

// Viewの描画処理
- (void)drawRect:(NSRect)rect{
    [super drawRect:rect];
    if (_highlight) {
        [[NSColor systemBlueColor] set];
        [NSBezierPath setDefaultLineWidth: 5];
        [NSBezierPath strokeRect: [self bounds]];
    } else {
        [[NSColor grayColor] set];
        [NSBezierPath setDefaultLineWidth: 1];
        [NSBezierPath strokeRect: [self bounds]];
    }
}

// view内にファイルがドラッグされた時の処理
- (NSDragOperation)draggingEntered:(id <NSDraggingInfo>)sender{
    [self setHighlight:YES];
    [self setNeedsDisplay: YES];
    NSLog(@"%s","draggingEntered");

    return NSDragOperationCopy;
}

// ドラッグ中の処理
- (NSDragOperation)draggingUpdated:(id <NSDraggingInfo>)sender{
    [self setHighlight:YES];
    [self setNeedsDisplay: YES];

    return NSDragOperationGeneric;
}

// view外に出た時の処理
- (void)draggingExited:(id <NSDraggingInfo>)sender{
    [self setHighlight:NO];
    [self setNeedsDisplay: YES];
    NSLog(@"%s","draggingExited");
}


// ドロップ時の処理
- (BOOL)prepareForDragOperation:(id <NSDraggingInfo>)sender {
    [self setHighlight:NO];
    [self setNeedsDisplay: YES];
    NSLog(@"%s","prepareForDragOperation");

    return YES;
}


// ドロップ後の処理
- (BOOL)performDragOperation:(id < NSDraggingInfo >)sender {
    NSLog(@"%s","performDragOperation kaishi");
    NSArray *draggedFilenames = [[sender draggingPasteboard] propertyListForType:NSPasteboardTypeFileURL];
    NSLog(@"draggedFilenames %@",draggedFilenames);

    return YES;
}

// ドロップ完了後の処理
- (void)concludeDragOperation:(id <NSDraggingInfo>)sender{
    NSArray *filePaths = [[sender draggingPasteboard] propertyListForType:NSPasteboardTypeFileURL];
    NSLog(@"filePaths %@",(NSString*)filePaths);

    ConvertorWindow *win= [[ConvertorWindow alloc] init];
    win -> textBox1.stringValue = (NSString*)filePaths;
    NSLog(@"%s","concludeDragOperation kanryou");
}
@end

参考サイト

[Obj-C++] 06 非Xib環境にAppDelegate導入 その2

[M1 Mac, Big Sur 11.6.5, clang 13.0.0, no Xcode]

[Obj-C++] 04で作成したAppDelegate導入環境とこれまで開発してきたコードを合体させました。画面遷移がないのでViewControllerは必要ないみたいです。

当面の目標であるDrag & Drop実装への土台が出来上がりました。

#import "AppDelegate.h"
#import "XlsxConvertor.h"

@interface AppDelegate ()

@end

@implementation AppDelegate

- (void)applicationWillFinishLaunching:(NSNotification*)notification {
    [[[[window alloc] init] autorelease] makeMainWindow];

}

- (void)applicationDidFinishLaunching:(NSNotification *)notification {
    // Insert code here to initialize your application
}


- (void)applicationWillTerminate:(NSNotification *)notification {
    // Insert code here to tear down your application
}


- (BOOL)applicationSupportsSecureRestorableState:(NSApplication *)app {
    return YES;
}

@end
#import "AppDelegate.h"

int main(int argc, const char * argv[]) {
    auto app = [NSApplication sharedApplication];
    app.delegate = [AppDelegate new];
    [app run];
}

[Obj-C++] 05 CMakeLists.txtをワイルドカードで作成

[M1 Mac, Big Sur 11.6.5, clang 13.0.0, no Xcode]

CMakeLists.txtをワイルドカードを使って作成しました。これでファイルが増えても追記不要です。

cmake_minimum_required(VERSION 3.1)

# Project
Project(XlsxConvertor VERSION 1.0.0)
find_library(COREFOUNDATION CoreFoundation)
find_library(COCOA Cocoa)

# C++11指定
set(CMAKE_CXX_STANDARD 11)

# コマンド表示
set(CMAKE_VERBOSE_MAKEFILE ON)

# Info.plist
set(MACOSX_BUNDLE_BUNDLE_VERSION ${PROJECT_VERSION})
set(MACOSX_BUNDLE_COPYRIGHT "Copyright (C) 2022")
set(MACOSX_BUNDLE_INFO_STRING "Convert tool for XLSX")

# ファイル設定(ワイルドカードを使用)
file(GLOB SOURCE ./src/*.mm ./include/*.h)

add_executable(${PROJECT_NAME}
    MACOSX_BUNDLE
    ${SOURCE}
    )

set(INCDIR ./include)
set(INCDIR ${INCDIR} /Library/Frameworks/Python.framework/Versions/3.10/include/python3.10)
include_directories(${INCDIR})

set(LIBS dl)
set(LIBS ${LIBS} /Library/Frameworks/Python.framework/Versions/3.10/lib/libpython3.10.dylib)

set(LIBDIR /Library/Frameworks/Python.framework/Versions/3.10/lib)
link_directories(${LIBDIR})

target_link_libraries(${PROJECT_NAME}
    ${COREFOUNDATION}
    ${COCOA}
    ${LIBS})

[Obj-C++] 04 非Xib環境にAppDelegate導入 その1

[M1 Mac, Big Sur 11.6.5, clang 13.0.0, no Xcode]

これまで非Xcode非Xib環境で開発を進めていますが、Drag & Dropを実装するに際しライフサイクルの概念を取り入れるためAppDelegateを導入しました。IDEを使わずGUIをコードで書く非Xcode非Xib環境は継続になります。

手順は以下の通りです。最初だけXcodeを使います。

1.XcodeでmacOS – Xib – Objective-Cの空プロジェクトを作成する。
2.main.m, AppDelegate.m, AppDelegate.hを用意しておいたプロジェクトにコピーする。
3.拡張子をmからmmに書き換えて、以下の様にコードを追記する。

#import "AppDelegate.h"

@interface AppDelegate ()

@property (strong) NSWindow *window;

@end

@implementation AppDelegate

- (void)applicationWillFinishLaunching:(NSNotification*)notification {
    self.window = [[[NSWindow alloc] initWithContentRect: NSMakeRect(0, 0, 300, 200)
                    styleMask: NSWindowStyleMaskTitled | NSWindowStyleMaskClosable | NSWindowStyleMaskMiniaturizable | NSWindowStyleMaskResizable
                    backing: NSBackingStoreBuffered
                    defer: NO]
                    autorelease];
    auto app_name = [[NSProcessInfo processInfo] processName];
    [self.window setTitle: app_name];
    [self.window makeKeyAndOrderFront: self];
    [self.window orderFront:self];
    [self.window makeMainWindow];
}

- (void)applicationDidFinishLaunching:(NSNotification *)aNotification {
    // Insert code here to initialize your application
}


- (void)applicationWillTerminate:(NSNotification *)aNotification {
    // Insert code here to tear down your application
}


- (BOOL)applicationSupportsSecureRestorableState:(NSApplication *)app {
    return YES;
}

@end
#import <Cocoa/Cocoa.h>

@interface AppDelegate : NSObject <NSApplicationDelegate>

@end
#import "AppDelegate.h"

int main(int argc, const char * argv[]) {
    auto app = [NSApplication sharedApplication];
    app.delegate = [AppDelegate new];
    [app run];
}

参考サイト

[Obj-C++] 03 クラスの拡張

[M1 Mac, Big Sur 11.6.5, clang 13.0.0, no Xcode]

クラスを継承するとクラス名が変わりますが、拡張するとクラス名はそのままです。

NSTextViewクラスにappendStringメソッドを追加してみました。

なかなか便利な機能です。

#include <Cocoa/Cocoa.h>

@interface NSTextView (Controller)

-(void) appendString: (NSString *)str;

@end
#include <Cocoa/Cocoa.h>
#include "NSTextViewEx.h"

@implementation NSTextView (Controller)

-(void)appendString:(NSString *)str {
    <メソッドの内容は作成中>
    NSLog(@"%@",str);
}
@end

[Obj-C++] 02 Makefileの改良 : mmファイル追加への対応

[M1 Mac, Big Sur 11.6.5, clang 13.0.0, no Xcode]

mmファイルが増えてもMakefileに追記しなくてもいいように改良しました。

make allコマンドでappファイルを作成し、make all2では実行ファイルを作成します。LLDBでデバッグする際は実行ファイルを作成しています。

CMakeLists.txtのadd_executableのところもワイルドカードで追記不要にしたいところです。

# コンパイラ
COMPILER = clang++
DEBUG = -g

# オプション
CFLAGS = $(shell python3-config --includes)
LDFLAGS = $(shell python3-config --ldflags) -framework Cocoa

# includeパス(-I)
INCLUDE = -I./include -I/Library/Frameworks/Python.framework/Versions/3.10/include/python3.10

# ライブラリパス(-l)
LIBRARY0 = -lpython3.10

# 優先ライブラリパス(-L)
LIBRARY = -L/Library/Frameworks/Python.framework/Versions/3.10/lib

# ソースファイル
SRCDIR = ./src
SRCS = $(shell find $(SRCDIR) -type f)

# オブジェクトファイル
OBJDIR = ./obj
OBJS   = $(addprefix $(OBJDIR), $(patsubst ./src%,%,$(SRCS:.mm=.o)))

# 実行ファイル
TARGETDIR = ./bin
TARGET = XlsxConvertor

# コンパイル
$(OBJDIR)/%.o: $(SRCDIR)/%.mm
	$(COMPILER) $(CFLAGS) $(INCLUDE) $(DEBUG) -o $@ -c $<

# ビルド
$(TARGET):$(OBJS)
	$(COMPILER) -o $(TARGETDIR)/$@ $(OBJS) $(LDFLAGS) $(LIBRARY0) $(LIBRARY)

# ファイル削除
.PHONY : clean
clean:
	rm -rf $(OBJS) $(TARGETDIR)/$(TARGET)

# CMakeを経てappファイル作成
.PHONY : all
all:
	rm -rf build/*
	cd /projects/XlsxConvertor/build && cmake .. && make
	mkdir ./build/$(TARGET).app/Contents/Resources
	cp ./images/XlsxConvertor.icns ./build/$(TARGET).app/Contents/Resources
	plutil -replace 'CFBundleIconFile' -string "XlsxConvertor.icns" ./build/$(TARGET).app/Contents/Info.plist

# 実行ファイルのみ作成
.PHONY : all2
all2: clean $(TARGET)
cmake_minimum_required(VERSION 3.1)

# Project
Project(XlsxConvertor VERSION 1.0.0)
find_library(COREFOUNDATION CoreFoundation)
find_library(COCOA Cocoa)

# コマンド表示
set(CMAKE_VERBOSE_MAKEFILE ON)

# Info.plist
set(MACOSX_BUNDLE_BUNDLE_VERSION ${PROJECT_VERSION})
set(MACOSX_BUNDLE_COPYRIGHT "Copyright (C) 2022")
set(MACOSX_BUNDLE_INFO_STRING "Convert tool for XLSX")

# XlsxConvertor
add_executable(${PROJECT_NAME}
    MACOSX_BUNDLE
    ./src/XlsxConvertor.mm
    ./src/process.mm
    ./include/process.h
    )

set(INCDIR ./include)
set(INCDIR ${INCDIR} /Library/Frameworks/Python.framework/Versions/3.10/include/python3.10)
include_directories(${INCDIR})

set(LIBS dl)
set(LIBS ${LIBS} /Library/Frameworks/Python.framework/Versions/3.10/lib/libpython3.10.dylib)

set(LIBDIR /Library/Frameworks/Python.framework/Versions/3.10/lib)
link_directories(${LIBDIR})

target_link_libraries(${PROJECT_NAME}
    ${COREFOUNDATION}
    ${COCOA}
    ${LIBS})

[Obj-C++] 01 Objective-C++への移行

[M1 Mac, Big Sur 11.6.5, clang 13.0.0, no Xcode]

C++の機能も使えるようにするため、Objective-CからObjective-C++へ移行します。

mファイルの拡張子をmmに変えるだけでOKです。coutで動作確認しました。

#include <Cocoa/Cocoa.h>
#include <iostream>

using std::cout; using std::endl;

int num = 1;

// Objective-C++
NSLog(@"Objective-C++ num %d",num);

// C++
cout << "C++ num " << num << endl;

--------------------------------------------------
出力
--------------------------------------------------
Objective-C++ num 1
C++ num 1