[C++] 34 FLTK : findコマンド生成アプリ/絶対パス

[M1 Mac, Big Sur 11.6.5, FLTK 1.3.8]

アプリ作成の仕込みとしてfindコマンドへの理解を深めています。

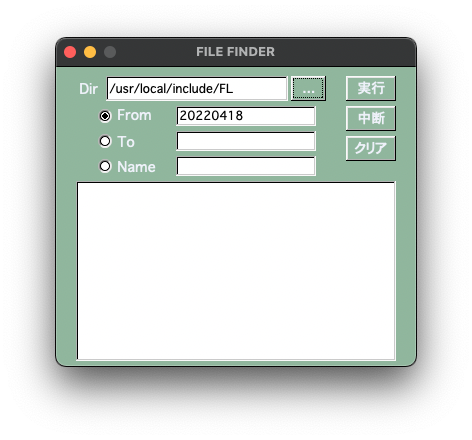
前回の記事で検索結果を絶対パスで出力する場合はディレクトリ指定の所をpwdに置き換えます。

cd /test && \
find `pwd` -type file -newerat '20220414 23:59' ! -newerat '20220415 23:59' ! -name "*DS_Store*" -and -name "*PkgInfo*" && \
find `pwd` -type file -newerat '20220414 23:59' ! -newerat '20220415 23:59' ! -name "*DS_Store*" -and -name "*PkgInfo*" | wc -l
--------------------------------------------------
出力例
--------------------------------------------------
/Python/test/PkgInfo
       1

[C++] 33 FLTK : findコマンド生成アプリ/日付指定

[M1 Mac, Big Sur 11.6.5, FLTK 1.3.8]

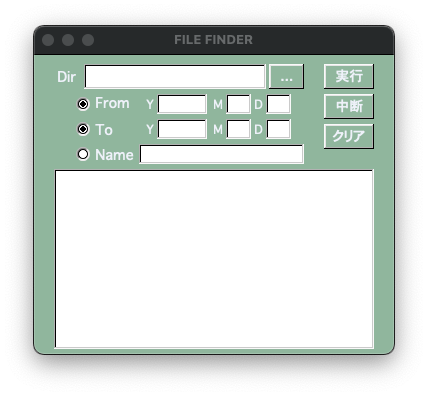
FLTKアプリ第2弾の作成に着手しました。

今一つ信用できないFinderによる検索やSpotlight検索に代わる実用アプリです。

例えば、4/15にtestディレクトリで作成、アクセス、更新したファイルの名前と件数を出力するコマンドは以下の通りです。作成中のアプリはこのコマンドを生成して実行してくれます。

このコマンドでの日時の指定範囲です。
20220414 23:59 < range <= 20220415 23:59

cd /test && \
find . -type file -newerct '20220414 23:59' ! -newerct '20220415 23:59' ! -name "*DS_Store*" && \
find . -type file -newerct '20220414 23:59' ! -newerct '20220415 23:59' ! -name "*DS_Store*" | wc -l && \
find . -type file -newerat '20220414 23:59' ! -newerat '20220415 23:59' ! -name "*DS_Store*" && \
find . -type file -newerat '20220414 23:59' ! -newerat '20220415 23:59' ! -name "*DS_Store*" | wc -l && \
find . -type file -newermt '20220414 23:59' ! -newermt '20220415 23:59' ! -name "*DS_Store*" && \
find . -type file -newermt '20220414 23:59' ! -newermt '20220415 23:59' ! -name "*DS_Store*" | wc -l
--------------------------------------------------
出力例
--------------------------------------------------
       0
./Python/python/test.py
./ShellScript/test.sh
       3
./app/FileFinder/File Finder.png
       1

[C++] 32 FLTK: 親子ウィジェットを消去するコールバック [移植完了]

前回の続きです。

表示させたモーダルダイアログを消すコールバックを作成しました。最初は汎用ポインタvoid*の扱い方がわかりませんでした。

モーダルダイアログとOKボタンの親子関係を構築させ、ボタンを押すと親子ウィジェット共に消去するといった内容です。解決するまではOKボタンを押すとボタンだけが消えるという怪現象に取りつかれていました。

FLTKの仕様にひたすら振り回されました。当たり前の話ですが、つじつまが合うように書いていけばいずれ解決するという感じです。時間的コスパはとてつもなく悪いですね。

FLTKはあらゆる機能をカバーしていますが、実装するのが本当に大変です。これでQtのような遅さだったらとてもやってられないです。

続けてFl_Multiline_Outputにスクロールバーを付けようとしたところ、ドラッグ&ドロップができなくなったので止めました。スクロールバーがなくてもカーソルを動かせば見えなくなった行を確認できます。

リサイズ時の背景黒化は解決し堅牢性もそれなりの水準に達したので、PNG用アプリとしてPyQt6からの移植を一旦完了とします。

#include "modalDialog.h"
#include <string>
#include <FL/Fl.H>
#include <FL/Fl_Window.H>
#include <FL/Fl_Box.H>
#include <FL/Fl_Button.H>
#include <FL/Fl_Widget.H>
 
Fl_Button *button;

modalDialog::modalDialog(int w, int h, const char* title, const char* msg)
    : Fl_Window(w, h, title){

    int ws, hs, xs, ys;
    int margin_x = 70;
    int margin_y = 15;

    ws = 60;
    hs = 25;
    xs = w - ws - margin_x;
    ys = h - hs - margin_y;

    // メッセージ
    Fl_Box *g = new Fl_Box(0, 0, w, h-40, msg);
        
    // OKボタン
    button = new Fl_Button(xs, ys, ws, hs, "OK");
    button->parent(this);
    button->callback(PushButtonOK,this);
    button->down_box(FL_UP_BOX);

    resizable(this);
    end();
}

modalDialog::~modalDialog()
{
}

void modalDialog::PushButtonOK(Fl_Widget* widget,void* x)
{
    Fl_Group* window = widget->parent();
    window->hide();
}

背景色黒化対策

img = cv::imread(path,cv::IMREAD_UNCHANGED);

[C++] 31 FLTK:子ウィジェットの座標

[M1 Mac, Big Sur 11.6.5, FLTK 1.3.8, OpenCV 4.5.5]

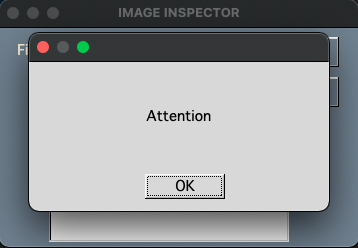
自製したモーダルダイアログの位置設定に苦労しました。

親ウィンドウを指定したものの相対位置を設定する方法が分からず、仕方ないのでルートを把握しこれに加減して座標を定めました。

ただこの方法では親ウィンドウを動かしても子ウィンドウの位置は変わらずです。あくまでも応急措置になります。

とある大学の研究室がモーダルダイアログ作成のコード例を公開しており、最初はこれを参考にしましたが結局大半は自分で書く形になりました。

難解なC++を使ってコンピュータシミュレーションを研究するというのはさぞかし大変なことでしょう。

2022/4/6追記:
デモアプリの動作を確認したところ、子ウィンドウは親ウィンドウの相対位置を取れていませんでした。もしかしたら出来ない仕様なのかもしれません。
2022/7/28追記:
親ウインドウのルートから子ウィンドウの相対位置を設定できました。以下の記事に記しました。

<該当部分のみ>

dlg = new modalDialog(300, 150, "", "Attention");
        dlg->hotspot(window);
        int x = dlg->x_root();
        int y = dlg->y_root();
        cout<<"x_root "<< x <<" y_root "<< y <<endl;
        dlg->resize(x-10,y+110,300,150);
        dlg->set_modal();
        dlg->show();

[C++] 30 segmentation fault発生時のデバッグ macOS

[M1 Mac, Big Sur 11.6.5, FLTK 1.3.8, OpenCV 4.5.5]

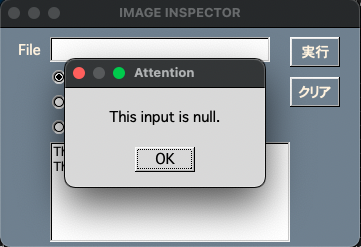
ある条件でFLTKアプリのボタンを押した時にsegmentation faultが発生しました。ターミナルにはトラブルが発生したとの情報しかないので困っていましたが、macOSではlldbというデバッガで調査できることを知りました。Linuxはgdbコマンドです。

内容はARM64のアセンブラです。今回は読解する前に解決できましたが、ざっと見た感じ分岐前のメモリからレジスタへの読み込み時にトラブルが発生したようです。

今更ですがこのトラブルでnullと空文字列が別物と知りました。この程度の知識でも簡単なアプリなら作れます。

lldb -f 実行ファイル名
(lldb) r
(lldb) exit
<実施例>

$ lldb -f ImageInspector 
(lldb) target create ImageInspector"
Current executable set to 'ImageInspector' (arm64).
(lldb) r
Process 84834 launched: 'ImageInspector' (arm64)
Process 84834 stopped
* thread #1, queue = 'com.apple.main-thread', stop reason = EXC_BAD_ACCESS (code=1, address=0xffffffffffffffff)
    frame #0: 0x000000018fdea9d8 libc++.1.dylib`std::__1::basic_string<char, std::__1::char_traits<char>, std::__1::allocator<char> >::basic_string(std::__1::basic_string<char, std::__1::char_traits<char>, std::__1::allocator<char> > const&) + 20
libc++.1.dylib`std::__1::basic_string<char, std::__1::char_traits<char>, std::__1::allocator<char> >::basic_string:
->  0x18fdea9d8 <+20>: ldrsb  w8, [x1, #0x17]
    0x18fdea9dc <+24>: tbnz   w8, #0x1f, 0x18fdea9f4    ; <+48>
    0x18fdea9e0 <+28>: ldr    q0, [x1]
    0x18fdea9e4 <+32>: ldr    x8, [x1, #0x10]
Target 0: (ImageInspector) stopped.

[C++] 29 ヘッダファイル、クラスファイルのテンプレ

FLTK1.3.8にはモーダルダイアログのウィジェットがないのでヘッダファイル他を作成中です。モーダルダイアログとは表示中ダイアログ内の操作以外ができなくなるウィジェットです。

#ifndef MODALDIALOG_H
#define MODALDIALOG_H

#include <FL/Fl.H>
#include <FL/Fl_Window.H>
 
class modalDialog : public Fl_Window{
    public:
        modalDialog(int, int, const char* , const char*);
        ~modalDialog();

    public:
        void OnButtonOK(void) ;
        void OnButtonCancel(void);
};

#endif
#include "modalDialog.h"
#include <string>
#include <FL/Fl.H>
#include <FL/Fl_Window.H>
 
using std::string;

Fl_Window *window;

// コンストラクタ
modalDialog::modalDialog(int w, int h, const char* title, const char* label)
    : Fl_Window(w, h, title){
}

// デストラクタ
modalDialog::~modalDialog()
{
}


void modalDialog::OnButtonOK(void)
{
}


void modalDialog::OnButtonCancel(void)
{
    hide();
}

[C++] 28 FLTK : PyQt6アプリの移植 仮完了

[M1 Mac, Big Sur 11.6.5, FLTK 1.3.8, OpenCV 4.5.5]

PyQt6アプリのFLTKへの移植は主な機能を実装するところまでたどり着きました。色々寄り道しながら9日掛かりました。

対象がpngのみ、リサイズ画像の背景が黒い、例外処理が甘く堅牢性に問題あり、などなど改善すべき点は多いですが徐々に対応していきます。

途中gtk+への変更や最悪C++開発からの撤退も考えましたが、偏屈ながらも筋は通っているFLTKで突き進み、サイズ1.5MBの高速軽量アプリに仕上げました。ちなみにPyQt6版は259.7MBです。

なおlibopencv_coreには動的リンクしています。静的リンクしてアプリに埋め込むと少なくとも4.5MB増しになります。

開発を通して様々なC/C++ライブラリの存在を知ることができましたし、やれることの幅が確実に広がったように思います。

#include "processImage.h"
#include "makeIcns.h"
<中略>
// ver.1.0.0b1

using std::string; using std::to_string;
using std::cout; using std::cin;
using std::endl;
using std::stoi;using std::bitset;

Fl_Window *window;
Fl_Box *file;
Fl_Input *input_line;
Fl_Group *radio_btns;
Fl_Multiline_Output *output_line;
Fl_Radio_Round_Button *inspect_rbtn;
Fl_Radio_Round_Button *resize_rbtn;
Fl_Radio_Round_Button *icns_rbtn;
Fl_Box *width_label;
Fl_Input *width_input;
Fl_Box *height_label;
Fl_Input *height_input;
Fl_Button *exe_btn;
Fl_Button *clear_btn;

int onoff_inspect;
int onoff_resize;
int onoff_icns;

void inspect(){
    const char *path = input_line->value();
    
    if (checkImage(path)==1){
        std::array<int,4> infos = getInfoPNG(path);
        
        cout<<"width "<<infos[0]<<" height "<<infos[1]<<endl;
        cout<<"dpi_x "<<infos[2]<<" dpi_y "<<infos[3]<<endl;

        int *width = &infos[0];
        string width_str = to_string(*width);
        char const* width_char = width_str.c_str();

        int *height = &infos[1];
        string height_str = to_string(*height);
        char const* height_char = height_str.c_str();

        int *dpi_x = &infos[2];
        string dpi_x_str = to_string(*dpi_x);
        char const* dpi_x_char = dpi_x_str.c_str();

        int *dpi_y = &infos[3];
        string dpi_y_str = to_string(*dpi_y);
        char const* dpi_y_char = dpi_y_str.c_str();

        output_line->insert("width ");
        output_line->insert(width_char);
        output_line->insert(" height ");
        output_line->insert(height_char);
        output_line->insert("\n");

        output_line->insert("dpi_x ");
        output_line->insert(dpi_x_char);
        output_line->insert(" dpi_y ");
        output_line->insert(dpi_y_char);
        output_line->insert("\n");

    } else if (checkImage(path)==2){
        output_line->insert("jpg\n");
    } else {
        output_line->insert("This file is invalid.\n");
    }
    
}
void resize(){
    // リサイズ時の背景黒化は要対策
    const char *path = input_line->value();

    const char *width = width_input->value();
    const char *height = height_input->value();
    int down_width = atoi(width);
    int down_height = atoi(height);

    cv::Mat img,img_resize;
    img = cv::imread(path);;
    cv::resize(img,img_resize, cv::Size(down_width,down_height),0,0,cv::INTER_LINEAR);

    // リサイズファイル名作成
    std::string path_str = std::string(path);
    char del = '.';

    std::vector<std::string> list = split(path_str, del);
	std::string extension = list.back();
    list.pop_back();

    const char* del2 = ".";
    std::string pre = join(list,del2);
    std::string path_resize = pre + "_resized." + extension;

    cout<<path_resize<<endl;

    cv::imwrite(path_resize, img_resize);

    output_line->insert("Resize complete!\n");

}
void icns(){
    const char *path = input_line->value();

    std::array<int,4> infos = getInfoPNG(path);

    int *width = &infos[0];
    int *height = &infos[1];
    
    if (*width == 2048 and *height == 2048){
        makeIcns(path);

        output_line->insert("Make icns complete!\n");
    
    }else{
        output_line->insert("This file is invalid.\n");
    }
}

void execute_cb(Fl_Widget*, void*) {
    onoff_inspect = inspect_rbtn->value(); 
    onoff_resize = resize_rbtn->value();
    onoff_icns = icns_rbtn->value();

    if (onoff_inspect == 1){
        inspect();
    } else if (onoff_resize == 1){
        resize();
    } else {
        icns();
    }
}
void clear_cb(Fl_Widget*, void*) {
    input_line->value("");
}

class Box : Fl_Box {
    Fl_Input* input_line2;

    public:
    Box(int, int, int, int, Fl_Input*);
    private:
    auto handle(int) -> int override;
};

Box::Box(int x, int y, int width_input, int height_input, Fl_Input* input) : Fl_Box(FL_NO_BOX, x, y, width_input, height_input, "") {
    this->input_line2 = input;
}

auto Box::handle(int event) -> int {
    switch (event) {
        case FL_DND_DRAG:
        case FL_DND_ENTER:
        case FL_DND_RELEASE:
        return 1;

        case FL_PASTE:
            input_line2->value(Fl::event_text());
            input_line2->textsize(12);
            input_line2->textfont(FL_HELVETICA);

        return 1;

        default:
        return Fl_Box::handle(event);
    }
}

int main(int argc, char **argv) {
    Fl::set_font(FL_HELVETICA, "Osaka");
    window = new Fl_Window(100,100,360,220,"IMAGE INSPECTOR");
    window->color(fl_rgb_color(112,128,144));
    
    // file
    file = new Fl_Box(15,15,35,16,"File");
    file->labelsize(14);
    file->labelcolor(fl_rgb_color(255,239,213));
    file->align(Fl_Align(FL_ALIGN_INSIDE|FL_ALIGN_LEFT));

    input_line = new Fl_Input(50,10,220,25,"");
    input_line->textsize(12);

    radio_btns = new Fl_Group(50,40,90,70,"");{
        radio_btns->labelsize(12);
        // inspect_rbtn
        inspect_rbtn = new Fl_Radio_Round_Button(50,40,90,20,"Inspect");
        inspect_rbtn->labelcolor(fl_rgb_color(255,239,213));
        inspect_rbtn->setonly();
        
        // resize_rbtn
        resize_rbtn = new Fl_Radio_Round_Button(50,65,90,20,"Resize");
        resize_rbtn->labelcolor(fl_rgb_color(255,239,213));
        
        // icns_rbtn
        icns_rbtn = new Fl_Radio_Round_Button(50,90,90,20,"icns作成");
        icns_rbtn->labelcolor(fl_rgb_color(255,239,213));
        
    }
    radio_btns->end();

    width_label = new Fl_Box(135,70,15,10,"W");
    width_label->labelsize(12);
    width_label->labelcolor(fl_rgb_color(255,239,213));
    width_label->align(Fl_Align(FL_ALIGN_INSIDE|FL_ALIGN_LEFT));
    
    width_input = new Fl_Input(155,65,45,20,"");
    width_input->textsize(12);

    height_label = new Fl_Box(205,70,15,10,"H");
    height_label->labelcolor(fl_rgb_color(255,239,213));
    height_label->labelsize(12);
    height_label->align(Fl_Align(FL_ALIGN_INSIDE|FL_ALIGN_LEFT));
    
    height_input = new Fl_Input(220,65,45,20,"");
    height_input->textsize(12);

    exe_btn = new Fl_Button(290,10,50,30,"実行");
    exe_btn->color(fl_rgb_color(112,128,144));
    exe_btn->labelcolor(fl_rgb_color(255,239,213));
    exe_btn->labelsize(14);
    exe_btn->callback(execute_cb);
    exe_btn->when(FL_WHEN_RELEASE); // 省略可

    clear_btn = new Fl_Button(290,50,50,30,"クリア");
    clear_btn->color(fl_rgb_color(112,128,144));
    clear_btn->labelcolor(fl_rgb_color(255,239,213));
    clear_btn->labelsize(14);
    clear_btn->callback(clear_cb);

    output_line = new Fl_Multiline_Output(50,115,240,100,"");
    output_line->textsize(12);

    Box *box = new Box(0, 0, 360,220, input_line);

    window->end();
    window->show(argc, argv);
    return Fl::run();
}

[C++] 27 FLTKとOpenCV併用時のトラブル対応 M1 Mac

[M1 Mac, Big Sur 11.6.5, FLTK 1.3.8, OpenCV 4.5.5]

FLTKアプリにOpenCVの画像リサイズ機能を導入する際、トラブルが発生しました。何とか解決できたので、記録として残しておきます。OpenCVはHomebrewからインストールしています。

タイムリーなことに英語版Stack Overflowに本日付で解決例が投稿されていました。この内容と他の記事との合わせ技で解決できました。

Apple Silicon MacでOpenCVをフルに使えなくて困っていた方々には朗報でしょう。

トラブル1:
コンパイル時にFLTKのmath.hが存在しない/usr/include/math.hを読み込もうとしてfile not foundエラー発生。

原因:以下の流れです。
1.OpenCVがmath.hにアクセスしようとしている。
2.-Iオプションで指定されているFLディレクトリのmath.hに優先アクセスする。
3.FL/math.hは/usr/include/math.hをインクルードしようとする。
4.ファイルがないのでエラー発生。

解決策:
以前のXCodeは/usr/includeディレクトリにヘッダファイルを置いていました。FL/math.hのインクルード先を標準のmath.hに書き換えても、FL/math.hの内容が古いためエラーになります。私自身はFLTKのmath.hを使っていないので荒技ですが適当なディレクトリに隔離しました。仮にFL/math.hが使用可能だとしてもどう改変されているか分からないので使いたくないですね。この問題、エラーにならなかったら気付かないうちにFL/math.hを使わされていることになります。

トラブル2:
リサイズ機能を記述したソースのビルド時に以下のエラーが発生した。

Undefined symbols for architecture arm64:
  "cv::Mat::Mat()", referenced from:
      resize() in ImageInspector.o
  "cv::Mat::~Mat()", referenced from:
      resize() in ImageInspector.o
  "cv::Mat::operator=(cv::Mat&&)", referenced from:
      resize() in ImageInspector.o
  "cv::imread(std::__1::basic_string<char, std::__1::char_traits<char>, std::__1::allocator<char> > const&, int)", referenced from:
      resize() in ImageInspector.o
  "cv::resize(cv::_InputArray const&, cv::_OutputArray const&, cv::Size_<int>, double, double, int)", referenced from:
      resize() in ImageInspector.o
  "cv::imwrite(std::__1::basic_string<char, std::__1::char_traits<char>, std::__1::allocator<char> > const&, cv::_InputArray const&, std::__1::vector<int, std::__1::allocator<int> > const&)", referenced from:
      resize() in ImageInspector.o
ld: symbol(s) not found for architecture arm64

原因:
ライブラリの参照先が不十分。今回は当てはまりませんが、makefileのオブジェクトファイル作成部分が抜けていても同種のエラーが出ます。

解決策:
コンパイルおよびビルド時に以下のオプションを追加しました。”pkg-config –cflags –libs opencv4″コマンドでも出てこないオプションです。

<コンパイル>
-lopencv_core -lopencv_imgcodecs -lopencv_highgui -lopencv_imgproc

<ビルド>
-L/opt/homebrew/Cellar/opencv/4.5.5/lib

参考サイト1
参考サイト2

[C++] 26 libpngによるpng情報の取得

libpngを使ってpngファイルの縦横サイズと解像度のデータを取得しました。

width, height, dpi_x, dpi_yの値を配列std::array<int,4>にして戻り値としています。main関数は省略します。

#include "png.h"
#include <array>

std::array<int,4> getInfoPNG(const char*);

#define SIGNATURE_NUM 8
#include "process_image.h"
#include <string>

FILE *fi;
unsigned int width;
unsigned int height;
unsigned int res_x;
unsigned int res_y;
unsigned int readSize;
png_structp png;
png_infop info;
png_byte signature[8];

std::array<int,4> getInfoPNG(const char* filename){
	fi = fopen(filename, "rb");
	readSize = fread(signature, 1, SIGNATURE_NUM, fi);

	png = png_create_read_struct(PNG_LIBPNG_VER_STRING, NULL, NULL, NULL);
	info = png_create_info_struct(png);

	png_init_io(png, fi);
	png_set_sig_bytes(png, readSize);
	png_read_png(png, info, PNG_TRANSFORM_PACKING | PNG_TRANSFORM_STRIP_16, NULL);
	
	width = png_get_image_width(png, info);
  	height = png_get_image_height(png, info);
	res_x = png_get_x_pixels_per_inch(png,info);
	res_y = png_get_y_pixels_per_inch(png,info);

	png_destroy_read_struct(&png, &info, NULL);
  	fclose(fi);

	return {(int)width,(int)height,(int)res_x,(int)res_y};
}

参考サイト

[C++] 24 文字列のバイト列への変換 文字化け調査

文字化けの原因調査等に必要なので記録しておきます。

#include <string>
#include <iostream>
#include <stdio.h>
#include <vector>
#include <bitset>

using std::cout; using std::string;
using std::endl; using std::bitset;

void binary_convert(string str){
	for (int i = 0; i < str.length(); ++i) {
		bitset<8> bs4(str[i]);
		cout << str << " " << i+1 << "番目 " << bs4 << endl;
	}
	cout << "end"<< endl;
}

int main(int argc, char **argv){
	string str1 = "123";
	string str2 = "バイト列";

	binary_convert(str1);
	binary_convert(str2);
}
--------------------------------------------------

出力
--------------------------------------------------
123 1番目 00110001
123 2番目 00110010
123 3番目 00110011
end
バイト列 1番目 11100011
バイト列 2番目 10000011
バイト列 3番目 10010000
バイト列 4番目 11100011
バイト列 5番目 10000010
バイト列 6番目 10100100
バイト列 7番目 11100011
バイト列 8番目 10000011
バイト列 9番目 10001000
バイト列 10番目 11100101
バイト列 11番目 10001000
バイト列 12番目 10010111
end