[Python] 309 日本語フォント名の抽出

[macOS Catalina 10.15.7]

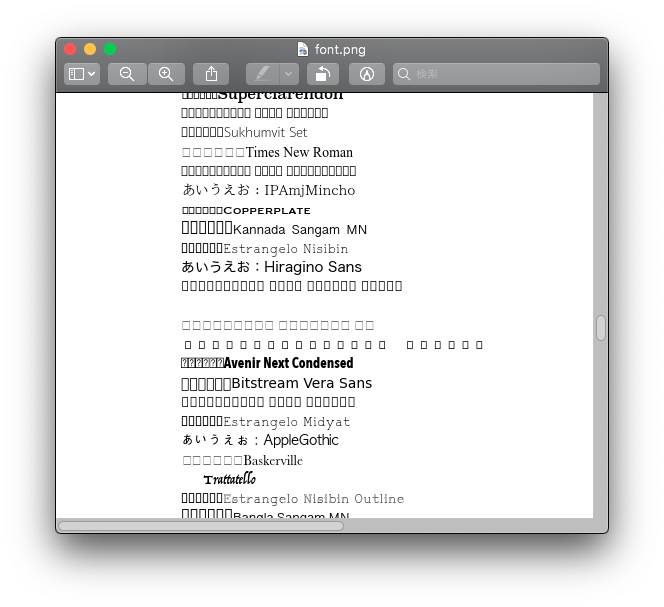
Macに入っている日本語フォント名を抽出するコードを書きました。平仮名の”あ”に該当するグリフ(字体)の有無で判定しています。私の環境には24種類以上あることが分かりました。

ttcファイルおよびotfファイルについては中に入っている最初のフォントを判定しています。

Last Resort Fontというフォールバック用フォントの存在を初めて知りました。

from fontTools import ttLib
from pathlib import Path
import glob
import pprint

HOME = Path.home()
print(str(HOME))

OSXFontDirectories = [
    "/Library/Fonts/",
    "/Network/Library/Fonts/",
    "/System/Library/Fonts/",
    "/opt/local/share/fonts/",
    str(HOME / "Library/Fonts/"),
]

font_paths = list()
for dir in OSXFontDirectories:
    paths_ttf = glob.glob(dir + "*.ttf")
    paths_ttc = glob.glob(dir + "*.ttc")
    paths_otf = glob.glob(dir + "*.otf")
    paths = paths_ttf + paths_ttc + paths_otf
    for path in paths:
        font_paths.append(path)

list_jfont = {}
for path in font_paths:
    font = ttLib.TTFont(path, fontNumber=0)
    cmap = font["cmap"]
    fontfile = path.split('/')[-1]
    for uni, id in cmap.getBestCmap().items():
        if uni == 12354:
            list_jfont.update({fontfile:id})

pprint.pprint(list_jfont)
print(len(list_jfont))
--------------------------------------------------

出力
--------------------------------------------------
{'AppleSDGothicNeo.ttc': 'cid00852',
 'AquaKana.ttc': '.notdef#16152',
 'Arial Unicode.ttf': 'uni3042',
 'BIZ-UDGothicB.ttc': 'uni3042',
 'BIZ-UDGothicR.ttc': 'uni3042',
 'BIZ-UDMinchoM.ttc': 'uni3042',
 'Hiragino Sans GB.ttc': 'cid00357',
 'LastResort.otf': 'lastresorttemplate',
 'PingFang.ttc': 'cid00856',
 'STHeiti Light.ttc': 'uni3042',
 'STHeiti Medium.ttc': 'uni3042',
 'ipamjm.ttf': 'aj843',
 'ヒラギノ丸ゴ ProN W4.ttc': 'cid00843',
 'ヒラギノ明朝 ProN.ttc': 'cid00843',
 'ヒラギノ角ゴシック W0.ttc': 'cid00843',
 'ヒラギノ角ゴシック W1.ttc': 'cid00843',
 'ヒラギノ角ゴシック W2.ttc': 'cid00843',
 'ヒラギノ角ゴシック W3.ttc': 'cid00843',
 'ヒラギノ角ゴシック W4.ttc': 'cid00843',
 'ヒラギノ角ゴシック W5.ttc': 'cid00843',
 'ヒラギノ角ゴシック W6.ttc': 'cid00843',
 'ヒラギノ角ゴシック W7.ttc': 'cid00843',
 'ヒラギノ角ゴシック W8.ttc': 'cid00843',
 'ヒラギノ角ゴシック W9.ttc': 'cid00843'}
24

[Python] 308 matplotlib 日本語フォント

[macOS Catalina 10.15.7]

matplotlibで使える日本語フォントを探すため、使用可能な全フォントについて”あいうえお”をグラフとして表示させてみました。私の環境では全体で301種類のフォントが使用可能です。

元々macOSのFont Bookアプリで日本語フォントを確認できますが、今回はアプリを使わずに検索しています。

下図から”あいうえお”と表示されているフォントをmatplotlibでグラフ作成する際に指定すればOKなのですが、いちいちフォント名を目視で拾い出す作業が不毛なので効率的な方法を模索しています。

例えば、”あ”のユニコードは10進数で12354(16進数では3042)ですから、フォントデータ内をユニコードで検索し該当するグリフ(字体)があれば日本語フォントであると判定できます。

フォントファイルのパスをリスト化するなどしたいのですが、ttfファイルはともかくttcファイル内にあるフォントの確認方法が分からず停滞しています。

import matplotlib.pyplot as plt
import matplotlib

image_font ='font.png'

fonts = set([f.name for f in matplotlib.font_manager.fontManager.ttflist])
print(fonts)
print(f'フォント数 {len(fonts)}')

# 図のサイズ設定
fig = plt.figure(figsize=(10,len(fonts)/4))

# グラフへのフォント表示
for i, font in enumerate(fonts):
    plt.text(0, i, f"あいうえお:{font}", fontname=font)

# グラフ設定
plt.ylim(0, len(fonts))
plt.axis("off")

plt.show()
fig.savefig(image_font)

[Python] 307 pyocr 文字認識によるブラウザの文字読み取り 余白増しによる精度向上

前回の続きです。

Google Chromeのurl欄で読み取れない文字列に出くわしたので、精度向上の検討を行いました。

url欄はスラッシュと文字がかなり近いため、スラッシュを避けて切り取った画像の端と文字が接近してしまいます。そこで背景と同色で一回り大きい画像に貼り付けてみました。

結果は成功でした。これで完成としたいところです。

あとは文字のフォントをサンセリフ体(日本語フォントのゴシック体に相当)ではなくセリフ体(明朝体と同種)にしたら読み取り精度がさらに向上するのでしょうが、url欄のフォントを変える方法が分かりません。

import pyautogui as gui
import pyocr
import pyocr.builders
from PIL import Image
from PIL import ImageEnhance

tools = pyocr.get_available_tools()
tool = tools[0]
print(f"tool {tool.get_name()}")

ret = gui.locateCenterOnScreen("url.png", confidence=.8)
gui.moveTo(ret) # urlへのカーソル移動を確認

# スクリーンショットの左上座標を算出
x1 = ret.x + 34
y1 = ret.y - 10
print(f"x1:{x1} y1:{y1}")

# スクリーンショットのサイズを設定
width = 200
height = 20

img = 'url_temp.png'
img2 = 'url_temp2.png'

sc = gui.screenshot(region=(x1, y1, width, height))
sc.save(img)

# 得られた画像のコントラストを1.5倍にして、縦5倍横5.5倍に拡大する
img_open = Image.open(img)
img_con = ImageEnhance.Contrast(img_open)
img_con_enh = img_con.enhance(1.5)
img_con_enh2 = img_con_enh.resize((1100,100))

# 1200*150の同色背景画像に貼り付ける
img_back = Image.open("back.png")
img_back2 = img_back.copy()
img_back2.paste(img_con_enh2,(50,25))
img_back2.save(img2)

# 画像から設定6で文字認識し文字データへ変換
txt = tool.image_to_string(
        Image.open(img2),
        lang="eng",
        builder=pyocr.builders.TextBuilder(tesseract_layout=6))

print(txt)

[Python] 306 pyocr 文字認識によるブラウザの文字読み取り

[macOS Catalina 10.15.7]

pyocrを使ってブラウザの文字を読み取りました。

今回はurl欄のurlを取得しました。この方法で動画サイトのチャンネル名などをスクリーンショットから文字データにできます。

Google Chromeのurlはドメイン名から右部分がグレイアウトしているため、コントラストを上げて文字を少し横長にしさらにtesseract_layoutの設定を調整しました。なかなか正確な文字起こしができず、時間が掛かりました。

設定が合わないと実際からは程遠い文字列になりますが、フィットする設定になると突然正しく認識します。最適解に近づいているのかどうか分かりにくいのが難点です。

様々なチャンネル名で検証した結果、コントラストは1.5倍、画像は縦横それぞれ5倍、5.5倍に拡大、tesseract_layoutは設定6にして何とか読み取れるようになりました(ディスプレイはフルHD)。あくまでも仮設定です。4Kディスプレイであれば拡大しなくて済むかもしれません。

pip install pyocr
brew install tesseract
import pyautogui as gui
import pyocr
import pyocr.builders
from PIL import Image
from PIL import ImageEnhance

tools = pyocr.get_available_tools()
tool = tools[0]
print(f"tool {tool.get_name()}")

# ドメイン名の座標を取得
ret = gui.locateCenterOnScreen("url.png", confidence=.8)
gui.moveTo(ret) # urlへのカーソル移動を確認

# スクリーンショットの左上座標を算出
x1 = ret.x + 34
y1 = ret.y - 10
print(f"x1:{x1} y1:{y1}")

# スクリーンショットのサイズを設定
width = 200
height = 20

img = 'img.png'
img_con_enh = 'img2.png'

# スクリーンショットを撮る
sc = gui.screenshot(region=(x1, y1, width, height))
sc.save(img)

# 得られた画像のコントラストを1.5倍、サイズを縦5倍横5.5倍に拡大する
img_open = Image.open(img)
img_con = ImageEnhance.Contrast(img_open)
img_con_enh_open = img_con.enhance(1.5)
img_con_enh_open2 = img_con_enh_open.resize((1100,100))
img_con_enh_open2.save(img_con_enh)

# 画像から設定6で文字認識し文字データへ変換
txt = tool.image_to_string(
        Image.open(img_con_enh),
        lang="eng",
        builder=pyocr.builders.TextBuilder(tesseract_layout=6))

print(txt)

[Python] 305 pyautogui 画面内の画像を一定時間おきにクリック 改良版

while文でより完成度を高めました。目的のアイコンが出現するまでwhile文内でループします。1分毎にチェックするので、クリック後の待機時間も設定不要です。

ネット通販の在庫チェックはselenium等を使ったクローリングよりもpyautoguiの画像認識の方が断然楽ですが、見つけ次第注文するとなると微妙です。

私自身は在庫チェックにはクローリングを利用し、注文は人力です。自動発注はやろうと思えばできるはずですが、そこは一線を引いています。

import pyautogui as gui
import time

time.sleep(2)

c = 0
while gui.locateCenterOnScreen("user_icon.png"):
    i = 0
    while not gui.locateCenterOnScreen("point_icon.png",confidence=.8):
        print(f"アイコンなし {i}分経過 {c}回クリック済み")
        time.sleep(60)
        i = i + 1
    else:
        ret = gui.locateCenterOnScreen("point_icon.png",confidence=.8)
        gui.moveTo(ret)
        gui.click()

        print(f"クリック完了 {c+1}回目")
        c = c + 1

[Python] 304 pyautogui 画面内の画像をクリックする際の精度調整

[macOS Catalina 10.15.7]

pyautoguiを使って画面内画像をクリックする際、精度を下げないと全く認識してくれないことがあります。

そのような場合はopenCV(Open Source Computer Vision Library, intelが開発)をpipでインストールし、画像認識精度(confidence)や色(白黒にする場合はgrayscale=True)を調整します。

macOSのメールアプリを起動し、各ボックスの未開封メールを開けて最後にアプリを閉じるコードを書いてみました。

このメールアプリの場合は、一度ウィンドウの空白部分をクリックしてアクティブにしないとメールボックスをクリックできませんでした。

またメールを受信するアイコンを正確に認識できず少しずれたところをクリックするため、ここだけ精度を0.9に上げています。

全体的に精度を下げており画面の状態によっては誤動作の恐れがあるので、慎重に扱うべきですね。

pyautoguiでデジタル書籍をpdf化するのも容易でしょう。すでにその種のコードは広まっているかと思いますが、kindle書籍のバックアップを取るコードを自分で書いてみたいです。

import pyautogui as gui
import time

# メールアプリを起動する
ret = gui.locateCenterOnScreen("mail.png", grayscale=True, confidence=.6)
gui.click(ret)

time.sleep(4)

# メールを受信する
ret_recieve = gui.locateCenterOnScreen("recieve.png", grayscale=True, confidence=.9)
gui.click(ret_recieve)

time.sleep(3)

box_list = ["gmail","gmail2"]

for box in box_list:
    # メールボックスを開ける
    ret2 = gui.locateCenterOnScreen(f"{box}.png", grayscale=True, confidence=.6)
    gui.moveTo(ret2)
    gui.click()

    time.sleep(1)
    
    # 画面上端にカーソルを移動し隠れているメニューバーを表示させる
    gui.moveTo(100,0)

    time.sleep(1)

    # メニューバーのメールボックスをクリックしてプルダウンさせる
    ret3 = gui.locateCenterOnScreen("メールボックス.png", grayscale=True, confidence=.6)
    gui.moveTo(ret3)
    gui.click()

    time.sleep(1)

    # 未開封メールを全て開ける
    ret4 = gui.locateCenterOnScreen("open.png", grayscale=True, confidence=.6)
    gui.click(ret4)

    time.sleep(1)

    # アプリの空白部分をクリックしてウィンドウをアクティブにする
    gui.moveTo(250,50)
    gui.click()

    time.sleep(1)

# メールアプリのアイコンを右クリックする
ret5 = gui.locateCenterOnScreen("mail.png", grayscale=True, confidence=.6)
gui.rightClick(ret5)

time.sleep(1)

# 終了をクリックする
ret6 = gui.locateCenterOnScreen("終了.png", grayscale=True, confidence=.6)
gui.click(ret6)

[Python] 303 pyautogui 画面内の画像を一定時間おきにクリック

[macOS Catalina 10.15.7]

9日ぶりの記事になります。

とあるサイトで10分おきにアイコンが出現しクリックするとポイントがもらえるので、定期的に自動クリックするコードを書きました。

事前にアイコンの画像(スクショ切り取り)を用意し、pyautoguiとPillowをpipでインストールしておく必要があります。

import pyautogui as gui
import time

for i in range(10000):
    for j in range(5): # 画像サーチを5回繰り返す
        try:
            ret = gui.locateCenterOnScreen("image.png")
            if ret == None:
                pass
            else:
                gui.click(ret) # 今回のケースではカーソル移動のみでした
                break
        except Exception as e:
            print(e)

        time.sleep(1)

    gui.click() # 画像をクリックする

    for k in range(10):
        time.sleep(60)
        print(f"{k+1}分経過")

[Python] 302 自製ライブラリpandas_exの機能追加 to_html デフォルト設定

前の記事の続きです。

自製ライブラリpandas_exのto_html関数は引数が6つもあるため、第4引数以降はデフォルト値を設定して省略可能にしました。

import pandas as pd

def to_html(df,html_name,encoding,header=False,index=False,border=1):
# header,index:True or False
# border:1(重線),2(重線)
# 第4引数(header)以降は省略可

    html_string = '''
    <html>
        <head>
            <meta charset={encoding}>
            <title></title>
        </head>
        <body>
            {table}
        </body>
    </html>
    '''

    with open(html_name,'w') as f:
        f.write(html_string.format(table=df.to_html(header=header,index=index),encoding=encoding))

    with open(html_name,'r') as f:
        html = f.read()

    if border == 1:
        html_new = html.replace('border="1"','border="1" style="border-collapse: collapse; border-color: #add8e6"')
    elif border == 2:
        html_new = html.replace('border="1"','border="1" style="border-collapse: separate; border-color: #add8e6"')

    with open(html_name,'w',encoding=encoding) as f:
        f.write(html_new)
import pandas as pd
from my_library import pandas_ex as pd_ex

df = pd.read_csv("test.csv",encoding='shift_JIS')

# 第5,6引数は省略
pd_ex.to_html(df,"test.html","UTF-8",True)

[Python] 301 自製ライブラリpandas_exの機能追加 to_html

pandasのto_htmlではtableの境界線が黒の2重線になるため、任意の色で1重線にすることもできる関数を自製ライブラリpandas_exに追加しました。

引数を増やしすぎてもかえって不便ですから、border-colorはライブラリ内で設定するようにしています。

pandasでhtmlを作成する機能は見た目に関しては最低限の内容なので、自分で機能を増やす他ないです。

import pandas as pd

def to_html(df,html_name,encoding,header,index,border):
# header,index:True or False
# border:1(重線) or 2(重線)
    html_string = '''
    <html>
        <head>
            <meta charset={encoding}>
            <title></title>
        </head>
        <body>
            {table}
        </body>
    </html>
    '''

    with open(html_name,'w') as f:
        f.write(html_string.format(table=df.to_html(header=header,index=index),encoding=encoding))

    with open(html_name,'r') as f:
        html = f.read()

    if border == 1:
        html_new = html.replace('border="1"','border="1" style="border-collapse: collapse; border-color: #add8e6"')
    elif border == 2:
        html_new = html.replace('border="1"','border="1" style="border-collapse: separate; border-color: #add8e6"')

    with open(html_name,'w',encoding=encoding) as f:
        f.write(html_new)
import pandas as pd
from my_library import pandas_ex as pd_ex

df = pd.read_csv("test.csv",encoding='shift_JIS')

# encodingはUTF-8,headerあり,2重線でhtmlファイルを作成
pd_ex.to_html(df,"test.html","UTF-8",True,False,2)

[Python] 300 自製ライブラリpandas_exの機能追加 to_csv

データフレームをワンライナーでcsvファイルに変換できるようにしました。

with文が今一つ好きになれないので作ってみました。

Pythonの記事が300回に到達しました。これからもマイペースで書いていきます。

import pandas as pd

def to_csv(df,csv_name,encoding,header,index): # header,index:True or False
    with open(csv_name,'w',encoding=encoding) as f:
        df.to_csv(f,header=header,index=index)
import pandas as pd
from my_library import pandas_ex as pd_ex

df = pd.read_csv("test.csv",encoding='shift_JIS')

<dfに何らかの処理を施す>

# encodingはUTF-8,headerありでcsvファイルを作成
pd_ex.to_csv(df,"test2.csv","UTF-8",True,False)