[macOS Catalina 10.15.7, Python 3.9.7]
TensorFlow1で使っていた学習モデル作成コードをTensorFlow2にうまく移植できず困っていたのですが、ほんの些細なところを修正するだけで解決しました。
TensorFlow2ではConv2DとMaxPooling2Dが求めるinput_shapeの次元が異なるため、あえてinput_shapeの指定を外してライブラリ任せにするとうまくいきました。
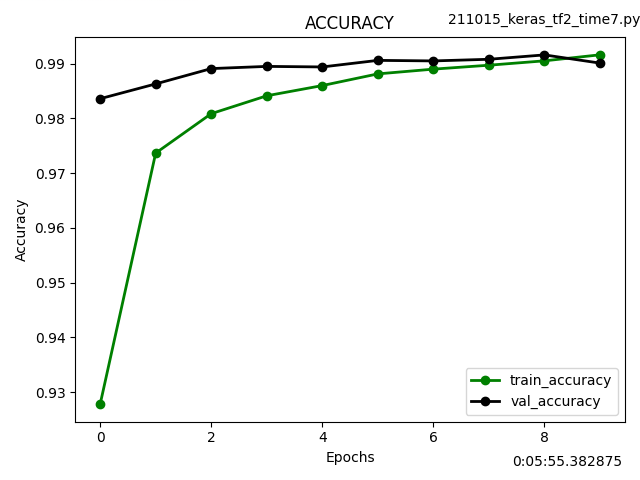
学習時間は約1分30秒の短縮です。
import tensorflow as tf
from tensorflow.keras import models
from keras.layers import Dense, Dropout, Flatten
from keras.layers import Conv2D, MaxPooling2D
import matplotlib.pyplot as plt
import time,datetime,os
from stegano import lsb
import numpy as np
import json
def plot_loss_accuracy_graph(history):
<略>
return dt_now_str # 戻り値はグラフ作成日時
def create_model():
model = models.Sequential()
model.add(Conv2D(32, kernel_size=(3, 3),activation='relu')) # input_shape = (28,28,1)を削除
model.add(Conv2D(64, (3, 3), activation='relu'))
model.add(MaxPooling2D(pool_size=(2, 2)))
model.add(Dropout(0.25))
model.add(Flatten())
model.add(Dense(128, activation='relu'))
model.add(Dropout(0.5))
model.add(Dense(10, activation='softmax'))
return model
def main():
# 前処理
(x_train, y_train), (x_test, y_test) = tf.keras.datasets.mnist.load_data()
x_train = x_train.astype(np.float32).reshape(60000,28,28,1) / 255.0
x_test = x_test.astype(np.float32).reshape(10000,28,28,1) / 255.0
# 学習モデル作成
model = create_model()
loss = tf.keras.losses.SparseCategoricalCrossentropy()
acc = tf.keras.metrics.SparseCategoricalAccuracy()
optim = tf.keras.optimizers.Adam()
model.compile(optimizer=optim, loss=loss, metrics=[acc])
# 学習
epochs = 10
history = model.fit(x_train, y_train, validation_data=(x_test, y_test), epochs=epochs, batch_size=128)
print(f'history.history {history.history}')
# 学習データ・グラフ化
ret = plot_loss_accuracy_graph(history)
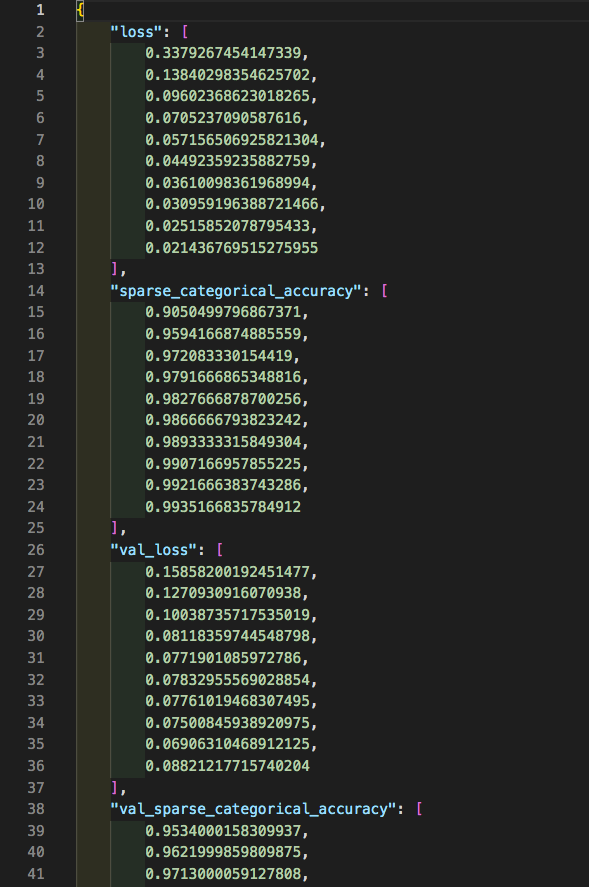
json_file = '{}_history_data.json'.format(ret)
with open(json_file ,'w' ) as f:
json.dump(history.history ,f ,ensure_ascii=False ,indent=4)
# 検証結果
test_loss = history.history['val_loss'][-1]
test_accuracy = history.history['val_sparse_categorical_accuracy'][-1]
print('Test loss:', test_loss)
print('Test accuracy:', test_accuracy)
model.save('keras-mnist-model.h5')
if __name__ == "__main__":
main()